• Home
  • For the Newcomers
  • Iyengar Yoga Classes
  • Contact

posted on July 23, 2012 by Rebecca Simmons

On the go, busy box craft gift for a three-year-old

There are times when I do homemade birthday gifts and times when I have to get something on the go. Saturday was one of those days when I bought a gift on the way to the party. I had no idea what that gift would be until I began walking the isles at Target.

Toys didn’t seem right. The three-year-old birthday girl is leaving in 12 days to live in Norway with her family for one year.  So the toys, most likely, would get left behind and she wouldn’t see them again until she is four.

So I started thinking about what she might bring on the plane, and on the go, across the world. She’ll be living in a 1200 square foot apartment with her family of five, being entertained by her a work-from-home dad. I immediately thought of things to keep her busy, and possibly help them all out.

In the busy box is a drawing pad, glue stick, kid scissors, foam stickers, pipe cleaners and pompoms, Kid Made Modern crayons and Kid Made Modern tape. The contents of the box added up to about $25.

My kids didn’t help pick out the gift, but it did meet their approval. Meaning my oldest daughter told me “it was a really good gift.” As I predicted, it was parent approved too!

Before we carried the gift into the party I decided to share it with you, and do a little mini photo shoot with my iPhone. That’s why the photo looks like it was taken in the front seat of my car – because it was! Truly an on the go gift, on two different levels.
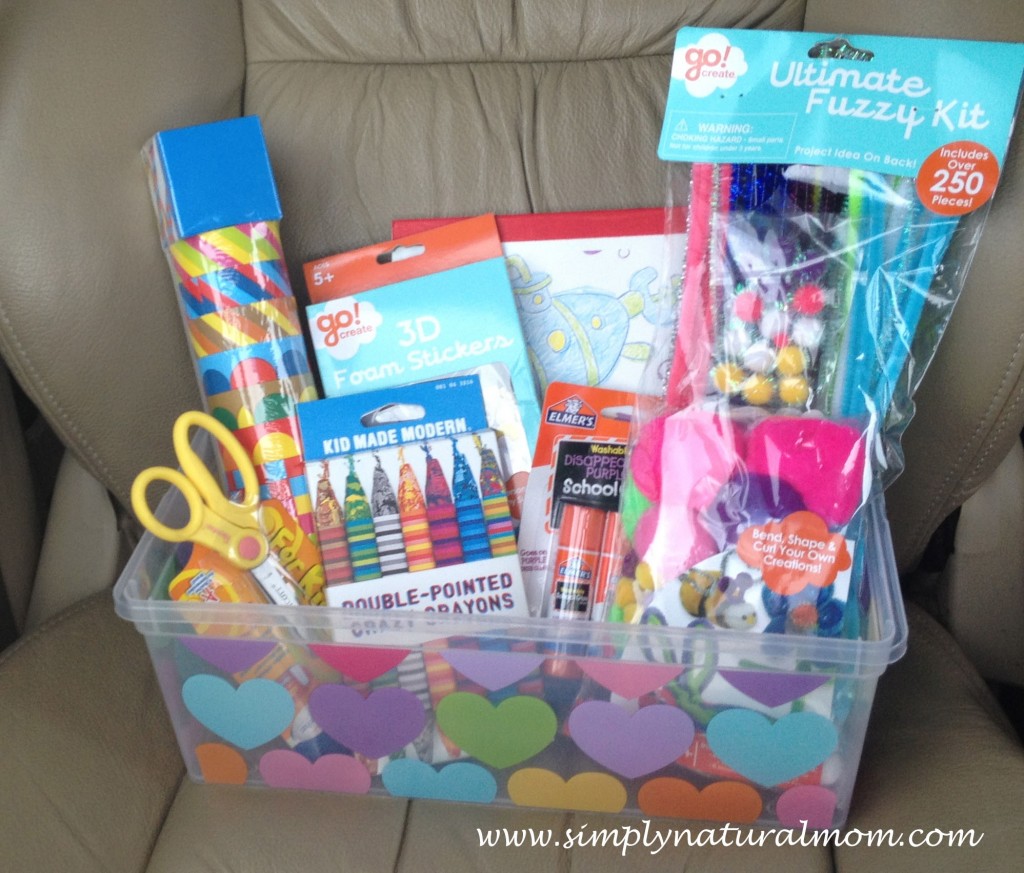
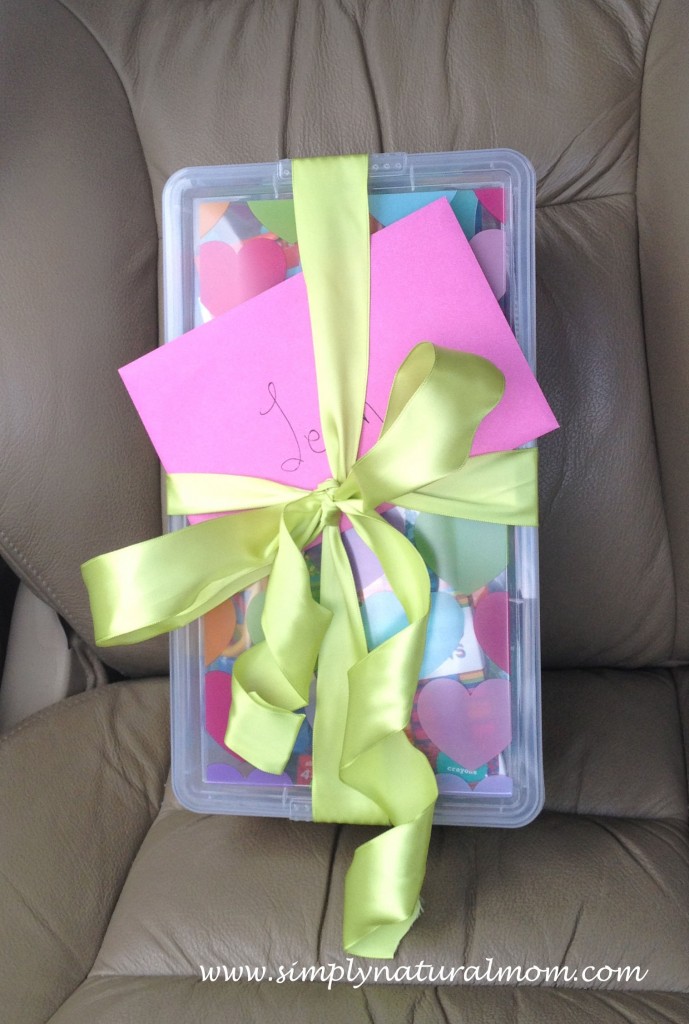
All the kids liked it so much when the gift was opened, it gave me the idea to gather up some supplies we have at home and make up some busy box craft kits for my own kids.

I bet you could easily do the same. Feel free to share some of the ideas of what you put in your versions. I’m thinking buttons, googley eyes, beads, popsicle sticks….the options are plentiful.

It reminds me of this sewing kit I made for my niece, using all extra stuff I had on hand.

Filed Under: Handmade, Tips Tagged With: busy box craft box, homemade busy box craft box, homemade busy box for toddlers

posted on July 23, 2012 by Rebecca Simmons

I made myself “unavailable,” and learned a lesson

Last week I had a parenting kunundrum on my hands that left me befuddled, and looking for solutions in dealing with squabbling sisters. Usually my girls get along well. Yes they disagree and argue like all siblings do sometimes. But in the big picture they have a good time together. They do well playing independently, without me having to interact or play referee with them.

However, for three straight days last week I was in constant conflict resolution and mediation mode, trying to keep the peace here. Peacefully, with kind words and patience. By Wednesday my patience was shot.

The doll area that was set up in the basement for the summer, while the upstairs undergoes renovations, was where it all began. My oldest daughter came home from a special grandparent trip with a new doll on Sunday.

My middle girl usually doesn’t care much about these dolls and has mostly given up all the rights to her dolls to her sister. Except when a new doll enters the house and the big sister wants time in the space all to herself, which is technically a shared doll space that she has taken ownership of – even though half of it really belongs to her middle sister.

The middle sister had her special grandparent trip first, and came home delighted to see her sisters and share her new loot. Much to my shock, round two didn’t go as well.

Someone was stuck in only-child mode and wanted to play alone, uninterrupted, for hours. That is great if you are the only child. But that is simply not the case here where spaces must be shared.

So for four days, no one played in the space, until a peaceful solution could be made. I rattled my brain for a fair way to handle it all.

I came up with this proposition for my oldest daughter: Either you choose to share the doll space and everything in it, or we separate up the space and set your things up in a place that is your own and you give back all the items that actually belong to your sister. It was a very tough decision for her because she wanted all the doll stuff organized together, in the set up space that is very fun with a couch, dressers, fabric hanging from the wall….and so on.

I think the options I presented were fair. That happened on Monday morning.

By Wednesday that area, and the new doll, remained untouched – with the space in a state that resembled the aftermath of a category 4 hurricane. By Wednesday afternoon the mess was bothering me and I really wanted it all cleaned up, physically and figurativly.

I asked one of my mom friend’s for advice. One who grew up as the youngest of three girls. I grew up with one older brother, and I never dealt with sister sharing issues. Her advice was brilliant.

“Give her a deadline. Kids work well with deadlines.” Ah ha! Why didn’t I think of that?

By the end of the day my daughter had to decide if she would choose to keep the space the same and share it with her sister, or divide it up and give back the things that officially belong to my middle girl. A deadline was good because I didn’t think it was right for my middle girl to not have access to her stuff (even though it doesn’t mean that much to her) until the decision was made.

Meanwhile all this not sharing business and fussiness over extreme organizational pickiness (ah, em type A) was about to do me (not a type A) in. AND, there was a whole lot of boredom happening because the area, determined by my oldest daughter, was off limits until the problem was resolved.

And then came the breakthrough moment!

We had been doing art in the basement, spending an afternoon using up kits and crafts that were gifts dating back to Christmas. They came in handy just when I needed them. Pulling “new” things out of cabinets was fun for all of us. But then one thing led to another, one girl was shaking the table, one girl’s painting wasn’t working out, one girl wanted to do a craft she was too young to do successfully, one girl had a hard time accepting there was no way her craft was going to look like the picture on the box.

At that moment I started counting down the days until they ALL go back to school – on August 13.

It was 4:00 and I had a squash and zucchini dinner I wanted to get started on. So I decided to excuse myself from the situation, hoping things could work themselves out. I went to the kitchen and opened a bottle of wine, to offset the increased amount of whining I had been dealing with all weeklong.

My oldest daughter wanted to do a kit making pom pom pillows for her dolls. I was headed upstairs and I kindly told her to read the directions and figure it out.

“I know you can do it,” I told her. “We have made those before and you are capable of figuring it out. Just read the directions in the box.”

Next she hollered up to me, “Mom the directions say to ask a grown up for help.”

Oh she got me! Sigh.

“There is no grown up available right now,” I kindly hollered back down the stairs.

And then…..about 10 minutes later she pops up the stairs as proud as proud could be, with one doll pillow she made all by herself.

I knew she could do it! She was so proud of her work. And her independent success.

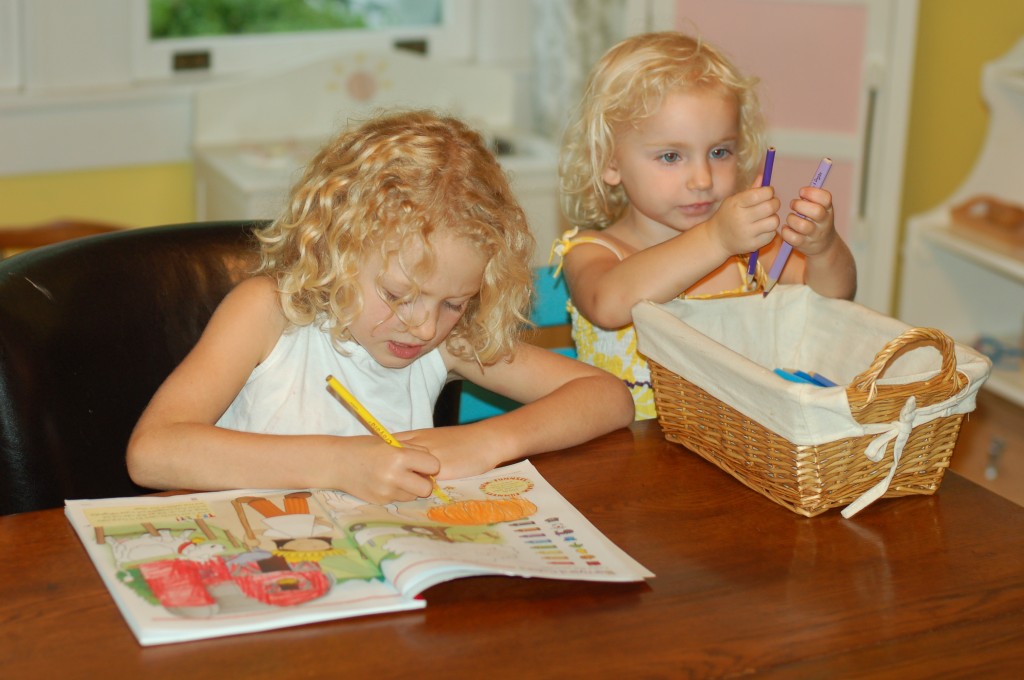
Meanwhile in the dinning room my middle girl was working on some workbook she found in our basement stash, and my toddler was handing her the colored pencils.

At that moment I realized, I had been so in he middle of the girls this week, trying to peacefully mediate their arguments, negotiate solutions with them and find things for them to do – that things were better when I just got out of the way.

It reminded me of the post I wrote back during my first few weeks of writing this blog, titled Confession: I don’t play with my kids and why that’s not such a bad thing.

And the next morning….my oldest daughter came to me with all smiles and said, “Mom. I’ve decide to share the doll space and keep it the same.”

I hugged and kissed here. Her sister hugged and kissed her. We all hugged in a big sandwich hug gleefully jumping up and down in the kitchen.

I knew she would come to a peaceful decision. I just had to give her time. And let her decide on her own.

Eventually, the next day, she cleaned up the doll space all on her own – “organizing it” just perfectly – the way she sees as appropriate. And I didn’t say a word.

To read a similar essay about mothering and letting kids take the lead, you might enjoy A lesson in saying yes when I wanted to say no.

Filed Under: Mothering

posted on July 20, 2012 by Rebecca Simmons

A Simple Moment

A Simple Moment is a post that appears here every Friday.
A photo I want to remember of a simple moment, with a few simple words.

If you are inspired to do the same, leave a link in the comment section for all to see and read.

A big kid on a new big bike, with hand brakes and gears! Quite spiffy compared the banana seat bikes of my day. Still, a childhood rite of passage.

Officially documenting what is known as “The Simmons Train,” I’m attaching a photo of my husband pulling the other two girls. “The Simmons Train” began with the big kid on the tag-along and two little girls riding in the trailer! This moment was a nice stroll down the street to a neighborhood get-together, with just two girls on “The Simmons Train.” A sweet change and a lighter load.

A Simple Moment was inspired by SouleMama. Visit her site to see many more moments.

Filed Under: Simple Moments

posted on July 18, 2012 by Rebecca Simmons

Renovations Update, watching the building action

I appoligize for my absence here the last few days. We’ve been doing a whole lot of nothing the last few days, dodging the hectic renovation schedules of summer, with a daily dose of hustle and bustle that starts at 7:30 a.m. The same time I am waking up and drinking coffee in my PJs.

I have no shame with greeting the contractors in my yoga pants and all sleepy eyed. As long as I don’t have to answer any serious questions before 10 a.m. Such as my final thoughts on glass doors being built into the cabinets? Really, am I capable of keeping my dishes tidy enough for them to be on display? Probably not. But I’m doing it anyway.

Hammers have been swung, pipes have been cut and moved, insulation was blown in and now plans are being finalized for the building of our kitchen cabinets. It’s amazing to see all that happens here, during a renovation, on a daily basis.

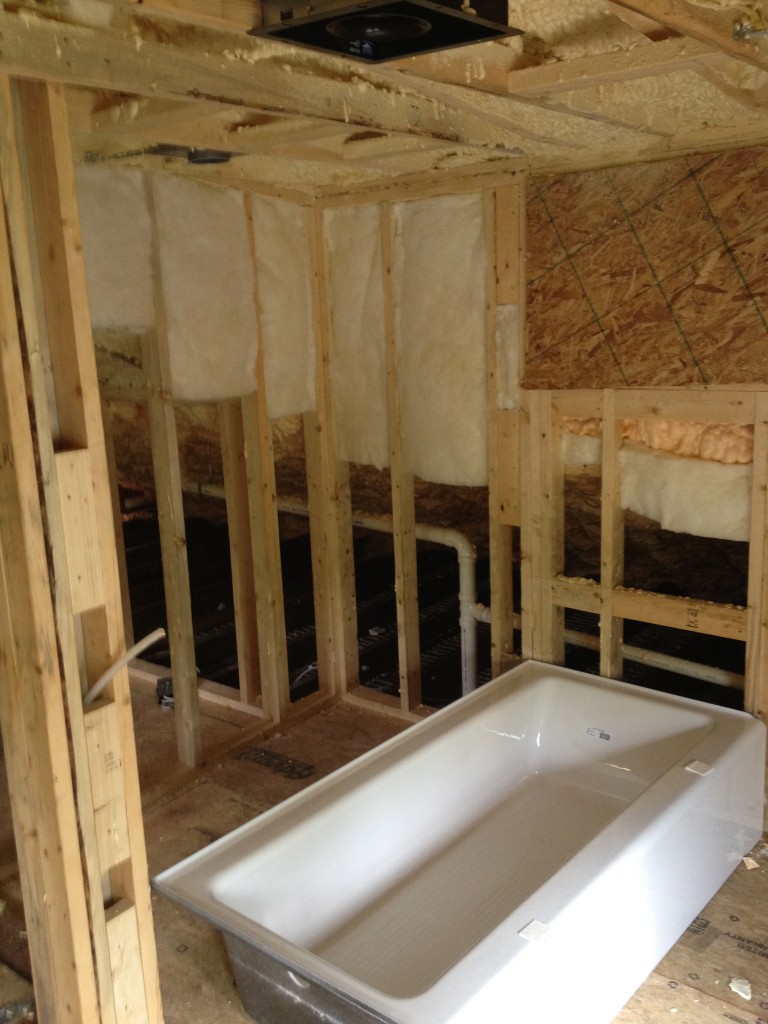
It’s good for the girls to see the making of their new bedrooms and bathroom. It’s fascinating to me, to see our 1919 house being taken apart and put back together – keeping it’s original integrity yet making it better. We see the carpenters carrying supplies upstairs, big sliver pipes that circulate the air to heat and cool the space, wires being run through the exposed walls to make the lights work, and the pipes that take the dirty business out of the house. Yesterday, we were all entertained watching these talented carpenters figure out how to get a 30″x60″ cast iron bathtub up a very narrow flight of stairs with a right angle turn at the top.

It’s a good thing we have had this entertainment the last two days. Because the doldrums of summer are kicking in here. Where know one wants to go anywhere and no one is motived to do much of anything at home either. I officially named Monday as being the Boringest (even though it’s not really a word, go with me here) Day of Summer. And, I dreadfully realized we had exactly four more weeks until school starts!

Watching the landing and deck steps being built off our future mudroom was the most exciting source of entertainment my daughters had on Monday. And we were thankful for that.

A new mudroom is being built using the previous screened in back porch, which is off our kitchen and will include french doors opening into our fenced in backyard. I could sing hallelujah I’m so excited about this – to easily send the kids out to play, have a proper dumping zone for all the things that come in the door that WILL ALWAYS get dumped somewhere, to get all the kids’ shoes out of my kitchen, and have a set up where I can be cooking and SEE them playing in the backyard at the same time. It could be considered my Mother’s Day, Birthday, Christmas and Anniversary gifts combined for the next 10 years.

But the kitchen is still to come. This post is about what is happening now…..photos of the progress, since I posted when the demo work started.

The first photo I’m share is of the super nifty, state of the art, spray foam insulation in the upstairs renovations. The foam insulation holds the highest R-value for retaining energy efficiency. You can read more about it at the Green Building Advisor. We did a combination of open-cell foam and closed-cell foam depending on the available ceiling space. The narrower, tighter spaces got the closed-cell foam and the spaces in the more open attic areas got the open-cell foam where there was room for more layers to be applied. Doing this combo deal saved us about $4000. Because let me tell ya – insulation is NOT cheep.

his is a newly added space added to the hallway, where we knocked out a wall where there used to be a closet. Our girls had already been using that closet as a play space. So I decided to take out the wall here and make it like a mini playroom opened to the hallway near the top of the stairs. It’s also a good shot of the insulation, and the handy work done along the hall ceiling to get those HVAC ducts in there. Over the last nearly, seven years we have contemplated at least 10 different scenarios to get central heating and air in the upstairs space. Finally a solution, with lots of expensive insulation, that works!

I must admit, I find it ironic that this state-of-the-art “green” building supply required us to be gone for two days while the odor aired out. All traces of it are gone now, thankfully.

Since it’s an attic space that was built into a living space by adding dormers and pop up roofs (that were originally done around the 30s-40 is my guess), I wanted to really make sure it is heated and cooled properly. And since we are not replacing any of the original windows to the house (because they are all historic at this point and it seems to be more of a waste than a green savings to throw out perfectly beautiful old windows), I wanted to do all we could to green the space as much as we could. Plus, all the new insulation in the roof will help our whole house regulate a better temperature more affectively, we hope!

This will be my two youngest girls bed room. Remember this photo the day before demo started? It’s a nice before shot, when there was still drywall on the walls. The hardwood floors are under the plywood, which has just been placed there to protect the pine floors, which will get refinished before the project is done. 

The bathtub, that made it up the stairs! It will get tiled into this alcove in the bathroom. Next to it will be a small place for a piece of furniture for the girls bathroom supplies, next to a divider wall giving the toilet area some privacy. 

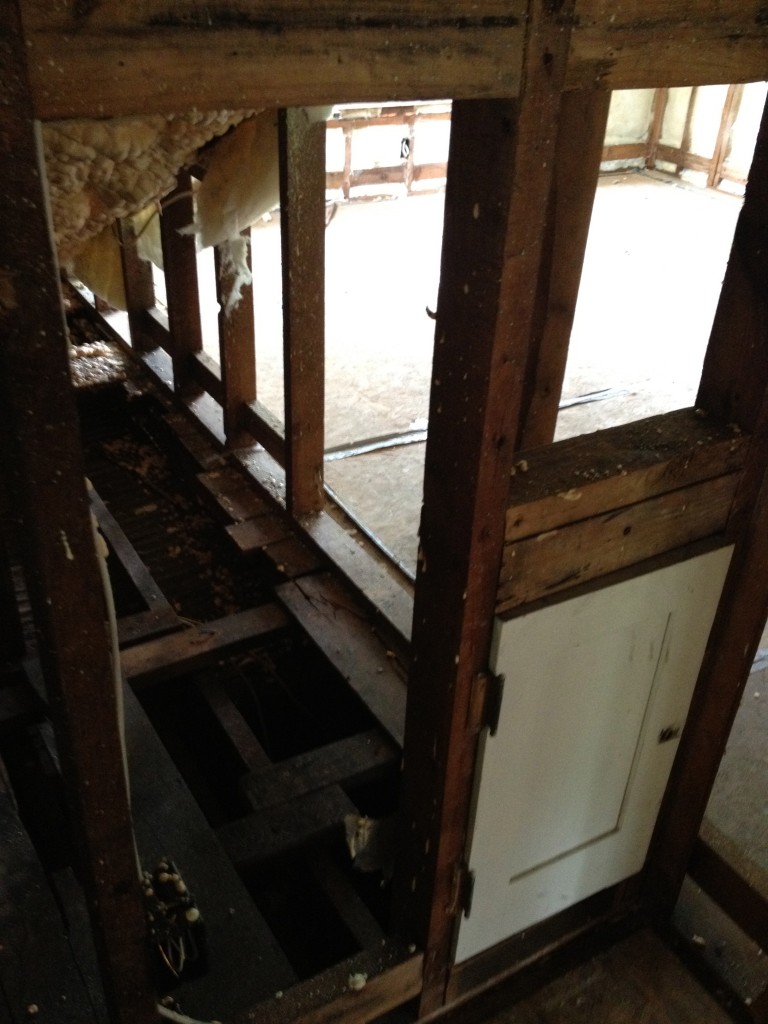
And this space, where the crawl space door is – drum roll please – will be a laundry chute down to the basement!! I’m still working out the details how to make it safe enough to ensure no children will be able to take a ride down it. I’ll keep you posted on that. And if you have any ideas or experiences using laundry chutes with children please share!

To follow how all this develops and read about us coping through construction, continuing into next month when our kitchen renovation starts as well,  be sure to subscribe to Simply Natural Mom – by Facebook, Twitter, email or RSS feed.

Also check out my Pinterest boards, Renovation Inspiration and Craftsman Style Kitchen.

Filed Under: Renovations Tagged With: closed-cell insulation, Spray foam insulation

posted on July 13, 2012 by Rebecca Simmons

A Simple Moment

A Simple Moment is a post that appears here every Friday.
A photo I want to remember of a simple moment, with a few simple words.

If you are inspired to do the same, leave a link in the comment section for all to see and read. 

A Simple Moment was inspired by SouleMama. Visit her site to see many more moments.

Filed Under: Simple Moments

posted on July 11, 2012 by Rebecca Simmons

The day my “run-flat” tire went flat, and smoky!

This is a little off topic from my usual natural mom content here, but I just have to warn, vent and tell about what happened to me on Tuesday.

I drive a 2009 Honda Odyssey, Touring model. It has all the bells and whistles like a built in GPS and DVD player. I like the GPS because I always get lost and my husband gets tired of me calling him for directions.

I like the automatic doors because I never have to ask my kids twice to get in the car or worry about them slamming the door into the car next to us in the parking lot. The automatic hatch is a gem too, when every finger is in use carrying the 401 items that get unloaded from the car daily, at the same time while balancing a toddler on my hip.

Other than that, I’d rather be driving an old VW bus or a new Prius. I’m not a mini-van lover kind of mom. It’s safe. So I drive it. We call it Betty the Bus.

With all the high rated safety features on my van, comes run-flat tires. Which is essentially a spare tire inside a tire, giving drivers the ability to drive on a flat tire long enough to get to a dealer where you can have it safely fixed.

The complete opposite scenario happened to me on Tuesday. Before I warn and vent any further, I’ll happily disclose that Honda, as well as Acura, stopped using these tires after 2009.

Lucky me! My van just missed the cut off. The time we looked into buying traditional tires for the van, we found out that requires a major expensive overhaul of the entire wheel system. So we are stuck with the tires.

And on Tuesday, I REALLY got stuck with them.

I was traveling from Knoxville, Tennessee where we live to my parent’s house in Canton, Georgia, just north of Atlanta. It was me driving, with my three kids and our dog Lulu.

Nearly halfway through the trip I pulled over due to heavy rain, and decided to take the back roads. It was a good thing. Because when I pulled back on the road the check tire pressure light came on. And then the light came on saying I was driving on a run-flat tire, with a warning to go 50 MPH MAX.

Oh great! Here I was driving with with three kids a dog, who was thankfully contained in her travel crate inside the van (we removed one of the bucket seats and that’s where she rides).

There was a Honda dealership in Cleveland, Tennessee less than seven miles away from where I was at. But it was 3:00. I know these things are not quick to have changed. I have waited up to two hours getting one fixed before, with a scheduled appointment. Plus, the service department closed at 5:00.

AND what would I do with my 55-pound dog? Surely she would not be allowed in the playroom while we wait….and wait….and wait into the dinnertime hour with half of our trip still ahead of us. That is not the scenario they use to sell their family friendly vehicle, with images of taking along the dog for a family camping trip.

The manual says I can drive up to 125 miles on multiple run-flat tires at a time. I just had one flat tire, with a piece of metal stuck in it.

I made the executive decision to stick on the back roads, not go over 40 MPH, let the kids watch as many movies as they wanted in the car, and putz my way along until I made the 90 mile journey to the Canton dealership.

My dad would meet us there. I would leave the van to be worked on the following day and get a ride back to his house with the kids (and the dog) in his giant SUV.

Sounded like a good enough plan. Not too painful. We would make the best of it.

I pulled off to the side a few times to let trucks and cars pass us who were obviously wanting to travel at a faster speed than us. Once a nice man driving with his wife and child offered to change my tire for me.

I WISH I could have said yes. He was befuddled when I told him the van didn’t even come with a spare tire. That it is not even possible to change the tire, without a high tech fancy system that only Honda dealerships and certified Michelin PAX service providers own and operate.

I double-checked the driver’s manual that displayed photos of the warning lights that could appear while driving on the PAX run-flat tire system. The first was a basic one I mentioned above, not to drive over 50 MPR. I got that.

The second had a warning saying Get to Dealer. The third one said in big red letters STOP DRIVING!

I left the mode on in my dashboard the whole 80 miles I drove, watching it to make sure the signal didn’t get more telling of a stronger warning.

The last 20 miles I had to travel on a small interstate – I 575.  I began feeling like something was not right. The sound of the tire got louder, the road felt bumper. I had read a page in the manual that said these sounds were normal. So I kept driving, nervously, cautiously, and even more slowly.

Ten miles from the dealership the tire completely blew up. Smoke, panicky children, a mom trying to keep her cool.

Not the picture of what is touted as the safest family vehicle on the market. Especially seeing how closely I was following the directions of the manual.

The old VW bus is looking even better now. One that doesn’t even come with a manual. One where I could have taken the nice man up on his gentlemanly offer to help me change a flat tire.

I really wish I could say I knew how to change my own tire, and that I did so to teach my girls a lesson on self-sufficiency. But I don’t know how to do that. The last time I got stuck with flat tire I was in college.

I was, and still am, a Daddy’s girl. I remember calling my dad who was four hours way, and him saying, “What do you want me to do about it?

Then I called the fraternity house where I had a lot of friends, and they sent a freshman pledge to my rescue. Those were the simple car times with my little two door Toyota and a tire that costs about $100. Now mine costs $350 to replace.

Tuesday I did call my dad. And he came to my rescue, plus my three kids and my dog.

All in all, I think I did an okay job keeping my cool. Except in the five seconds I panicked that the van was on fire and I needed to get the kids out. I opened one of the doors and the burnt rubber stinky smoke filled the car. Then common sense told me the smoke was from the tire, not the engine. The tire was in the back, away from the engine, and on the opposite side from the gas tank.

We would be fine, as long as a car didn’t hit us sitting there on the side of the road. We WERE able to pull off pretty far, under a bridge. So we all stayed buckled up until my dad got there, who was sitting 10 miles down the road waiting for us at the Honda dealership.

I also called 911, to have a police car there to caution drivers of what we had going on. When my dad arrived we transferred car seats and moved the dog crate – with the dog still in it!

The police officer was SO nice. I called AAA but they said it would be an hour wait to have my car towed. Not so nice, seeing my kids had one bathroom break (and none for the dog) since this whole adventure began when we pulled out of our Knoxville driveway at 1:15. Waiting another hour would have made things even worse.

I originally needed to get to the Honda dealership by 7:00 to get my van checked in, to be worked on in the morning. I missed that deadline.

The police officer arranged a local guy named Nathan, who works through AAA – apparently – to tow my car.

So we drive off, leaving my van with the police officer that said Nathan would drop it off at the dealership and put the key in the drop box. I had no idea if they even had a drop box for keys.

“Sure. Sounds great at this point,” I said. Thankfully it all panned out the right way, and my van really IS at the dealership this morning.

I will be giving the Honda folks the FULL story I laid out here, and telling them exactly what I think about those so-called safety tires.

Maybe they’ll offer me a trade in, for a vintage VW bus. I’d take it in a heartbeat. And name it Good Tires.

Filed Under: Mothering, Travel Tagged With: Honda run flat tires, PAX system tire, PAX tire, run flat tires on mini vans, run-flat tire

posted on July 9, 2012 by Rebecca Simmons

Inspiration for making homemade cleaning supplies

A couple weeks ago I decided to make a batch of homemade laundry detergent. While on a shopping mission to find Arm and Hammer washing soda locally, I decided to restock our laundry room cabinet with homemade cleaning supplies, like vinegar, baking soda, hydrogen peroxide, lemon juice and essential oils.

I have to admit, the past few years I have gotten lazy about making homemade cleaning supplies. Instead I’ve been taking the easy route and buying products by Seventh Generation and Ecover. Even after creating the newly freshened up space to make the cleaning supplies, I still needed a little incentive to get me over the hump and start mixing.

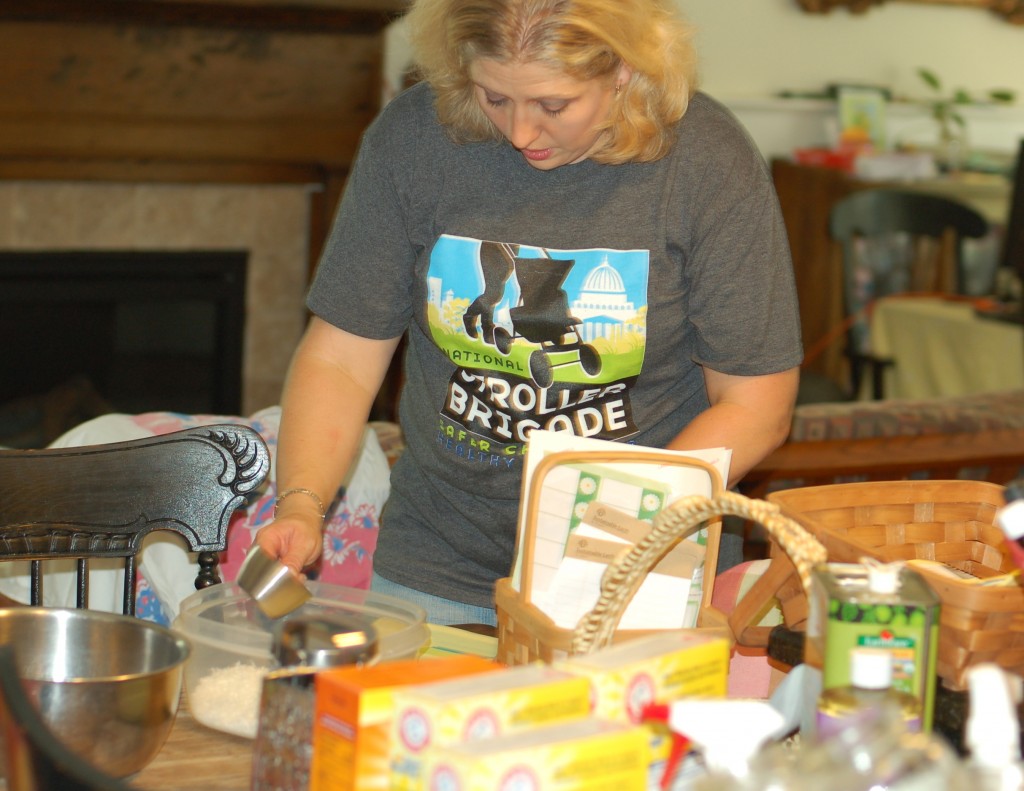
Sunday I went over the hump, when I attended a Green Momma Party at the home of Anne Brock from Flour Sack Mama. She opened her house for a tour on ideas and ways to rid our homes of harmful chemicals. Anne invited me to give a presentation on some of the natural play ideas I feature on Simply Natural Mom. So I shared about our Montessori lesson shelves to simple ways to keep children busy using natural materials and items you might have at home.

To end the tour, she generously had her kitchen stocked with natural cleaning supplies, essential oils and piles of empty mason jars for us to fill up and take home.

Together us moms munched on chocolate covered strawberries, chatted about motherhood, and made creamy soft scrub to clean our bathtubs. This was a lovely way to spend a Sunday afternoon, in my opinion.

In addition to the jar of creamy soft scrub, I took home a jar of homemade furniture polish, and a jar of laundry detergent that uses powered oxygen bleach intend of Borax. Anne also treated us to a bag of dried lavender, mixed with dried rice and essential lavender oils, to use as a naturally scented drawer cache.

Other cleaning supply recipes Anne shared was an all-purpose cleaner using vinegar, toilet bowl cleaner and drain opener. All the recipes are available here, at the Women’s Voices for the Earth, the parent organization affiliated with Green Momma Parties. There are some other great recipes here as well, including a reusable diaper wipe solution, grapefruit sugar scrub for mom, and non-toxic bug repellant that Anne testified to truly work.

Here is Anne doing a demonstration on making laundry detergent, as she invited guests to jump in, grab a recipe and start making things to take home.

If you are not aware of the dangerous chemicals in most household cleaning supplies and the risk they pose to women, please read more about these issues over at Women’s Voices for the Earth.

“Certain chemicals in cleaning products have been linked to fertility problems, birth defects, increased risk of breast cancer, asthma and respiratory disorders, and hormone disruption,” is just one snippet it you’ll find on their site.

Part of me has heard this information before and believed it for a long time.  A bigger part of me is thankful the information is it going more mainstream, with science-based evidence backing it up, and organizations like Women’s Voices for the Earth and Safer Chemicals Healthy Families taking action to make our envorment safer for our children. It’s alway nice to get a refresher course and a new dose of inspiration on ways we can do better for our children.

With three daughters in our house, and with early onset puberty on the rise for girls, I’ll make any kind of homemade cleaning supply, laundry detergent or bug repellant to help keep them safe.

Making your own cleaning solutions and laundry supplies is easy. And it even saves money. You just have to get past the initial change in routine, and get the right set up.

We have a cabinet in our basement set up with cleaning supply ingredients and containers to hold the concoctions. My toddler even enjoys helping mix up the soap flakes and washing soda to make laundry detergent.

The first laundry detergent recipe I started with was this one from EcoKaren. It uses Borax, which some say is bad. But it works, even on those stinky towels that sit damp for too long. When I got home on Sunday night I did a load of towels with the laundry detergent from Anne’s house, and it did okay – well enough to replace the recipe using Borax. Which is good.

I also made this dishwashing detergent recipe by EcoKaren that does not use Borax. When I followed the recipe EXACTLY it worked great. When I eyeballed things and sloppily threw it all in the dishwasher the results were not as great. But still, I’d love to not buy dishwashing detergent again. So I’m going to stick with this one.

To find more recipes on homemade cleaning supplies, I’ve been pinning things for weeks, on my Homemade Cleaning Supplies Pinterest board. So you can check out that for even more ideas and inspiration.

In true Pintererst style, I’ll admit I have not actually made any of them on that board, other than the ones by EcoKaren. So I can not vouch for how well they work. But if Pinterest is good for one thing, it’s getting us rolling on thinking about all the things we would like to make, while making the idea seem very attractive.

On the subject of homemade cleaning supplies though, I must say creating a non-toxic home for my family is my biggest motivator.

To read more about the Green Momma Party hosted by Anne, visit her post on the event with more details about how to host your own party and contact your senators to advocate for the  Safe Chemicals Act. If you live in East Tennessee and would like assistance hosting your own Green Momma Party, you can contact Anne at floursackmama@gmail.com.

Stay tuned for another post soon, when I start making things from my Homemade Pampering Pintererst board. I can guarantee that grapefruit sugar scrub for mom will be getting added to it. So you don’t miss it, please subscribe to Simply Natural Mom – by Facebook, Twitter, Pinterest, email or RSS feed. 

Filed Under: Family, Tips Tagged With: EcoKaren, Flour Sack Mama, Green Momma Party, Homemade cleaning supplies, homemade dishwashing detergent, homemade furniture polish, homemade laundry detergent, homemade soft scrub for bathtubs, Women's Voices for the Earth

posted on July 6, 2012 by Rebecca Simmons

A Simple Moment

A Simple Moment is a post that appears here every Friday.
A photo I want to remember of a simple moment, with a few simple words.

If you are inspired to do the same, leave a link in the comment section for all to see and read.

Oops. I skipped right over Forth of July. I hope everyone had a blast! This is our annual neighborhood shin dig. Always a good time.

A Simple Moment was inspired by SouleMama. Visit her site to see many more moments.

Filed Under: Simple Moments Tagged With: soule mama this moment

posted on July 6, 2012 by Rebecca Simmons

Montessori lessons at home :: part two

Last month I posted about my efforts to set up some Montessori lessons this summer, as a way to help keep my younger two girls busy – mostly my toddler. Because when she is busy, she is happy. And when she is bored, she just aggravates her sisters. Her stubbornness and determination must be channeled!

The post was Montessori lessons at home :: part one. Because I knew there would be more to come. Which is where we are at today.

It has been surprising how much all three of the girls have liked doing these simple hands-on lessons. I created them as an avenue of natural play while we pass the time of summer, and have fun through some very basic learning for my toddler. Thursday I stepped it up a notch by putting out some lessons that were more geared towards my middle girl. My oldest daughter enjoyed setting up some of the lessons and being a teacher to her. She also admitted she still likes doing some of these lessons herself, “just for fun.” And to be part of the sister gang too, I sure.

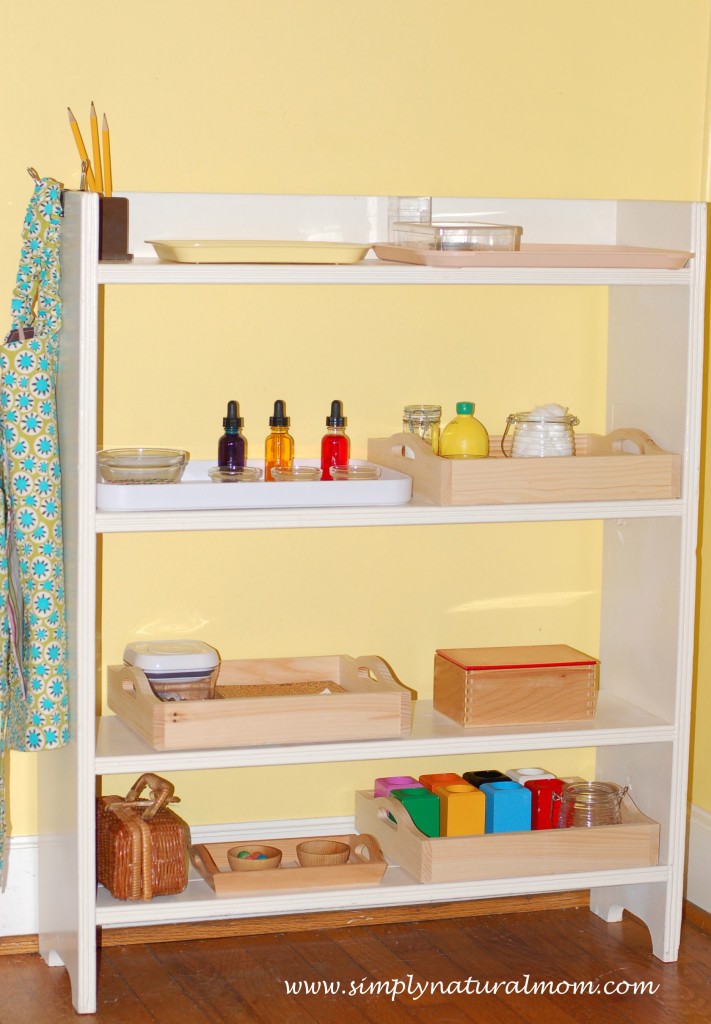
Here’s a run down of what is on our Montessori shelves today.

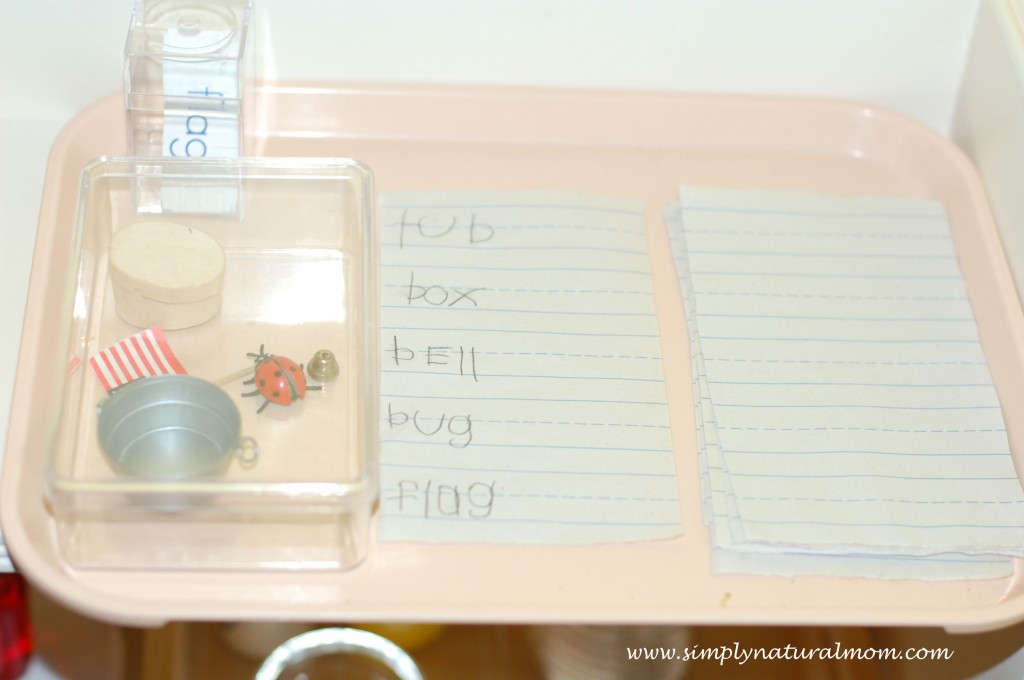
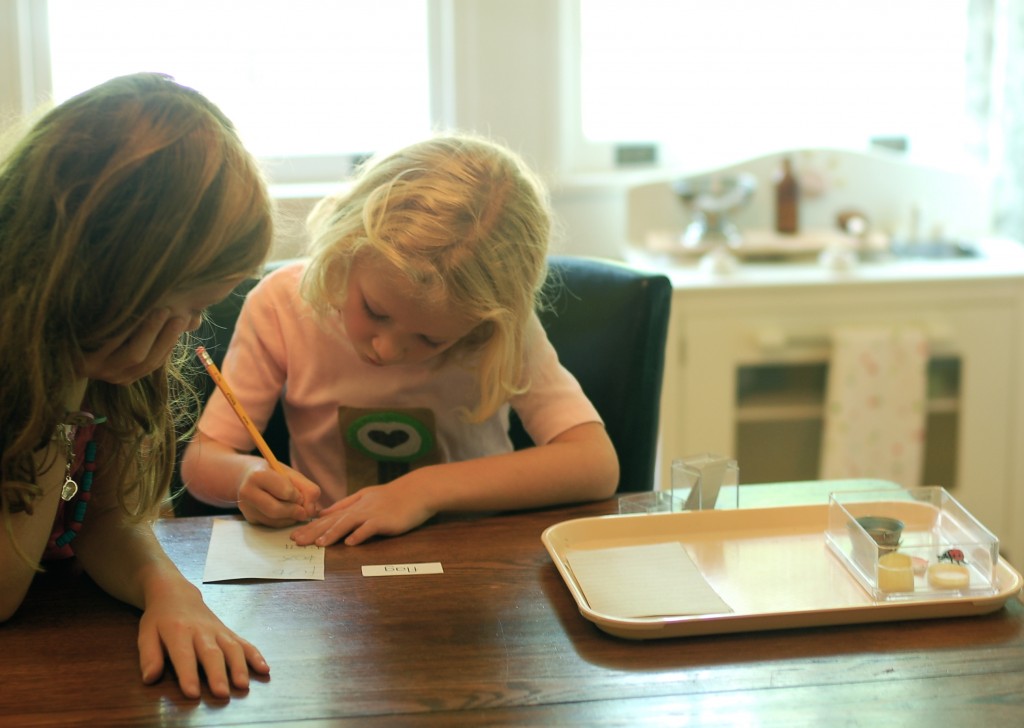
My middle girl, who in a normal school setting would be considered a rising kindergartener, has recently taking an increased interest in learning to read. The beginner Bob books are her favorite right now because she enjoys being able to read them by herself. This language lesson uses objects, with corresponding cards that she reads and then spells out the objects on paper.

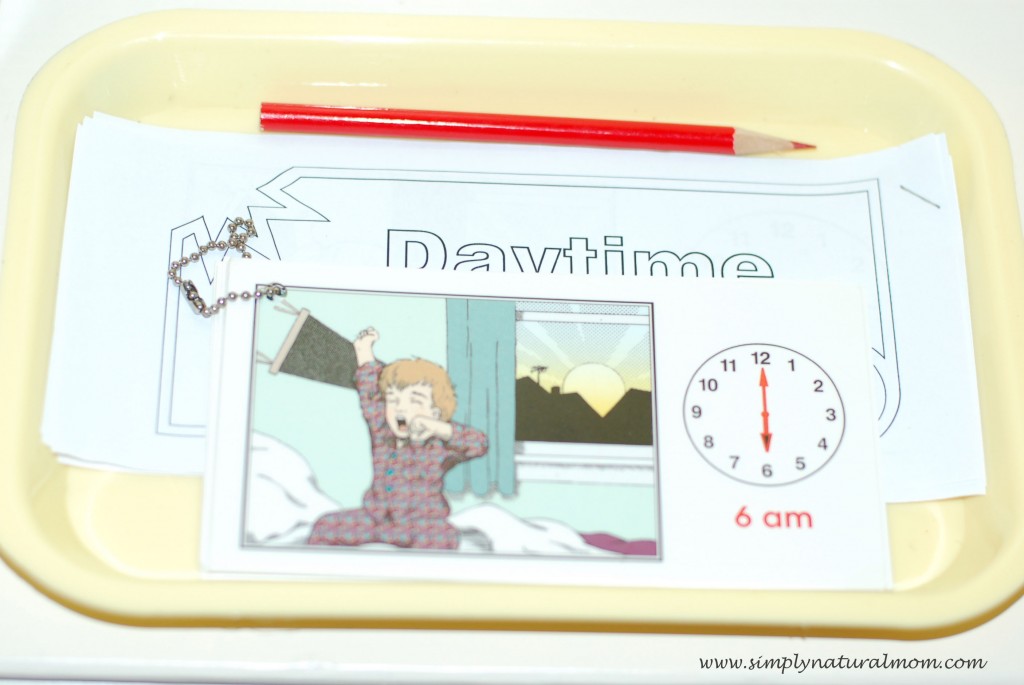
Tomorrow I am (or my oldest daughter is) going to introduce a time lesson that teachers the basics of when things happen throughout the day. Time is a very hard concept to grasp and sometimes not recommended to teach this young. But she asks about the time a lot, and wants to know more.

We had this lesson with my oldest daughter. And I have to say I found it to be true, that while this lesson was in her 3-6 year-old classroom, it wasn’t until she was past seven-years-old when she really began to understood the concept of time. And that it clicked that it’s 4:00 and in two hours we eat dinner. Rather than I’m hungry, I know it’s past snack time and dinner happens at 6:00 but it feels like it’s 100 hours away. Time is difficult. But this little lesson makes it fun.

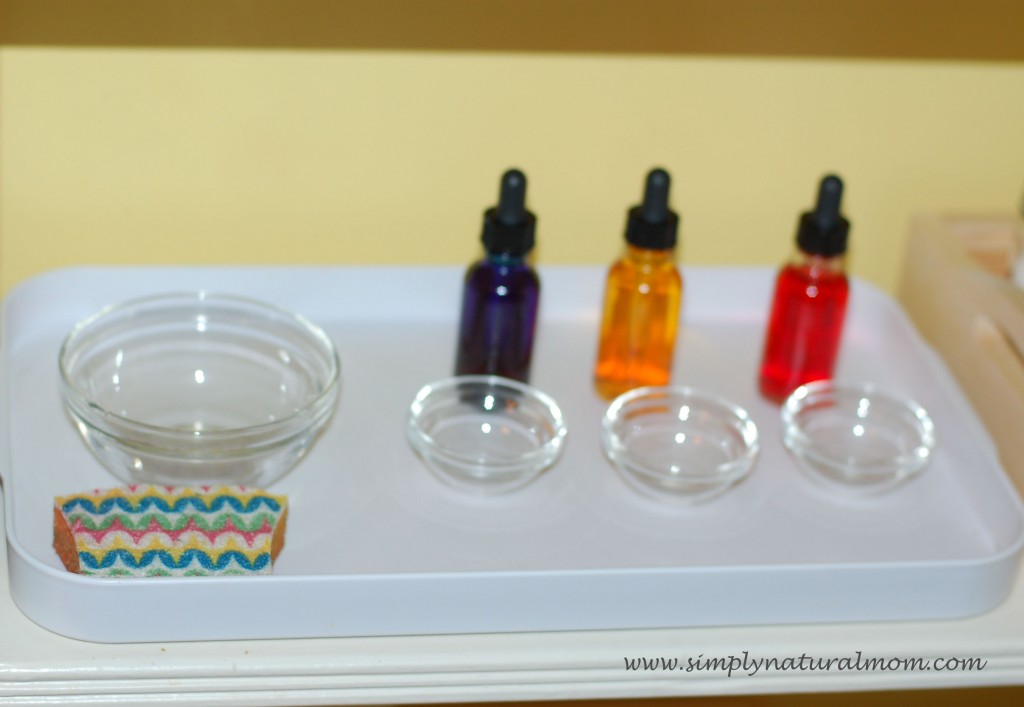
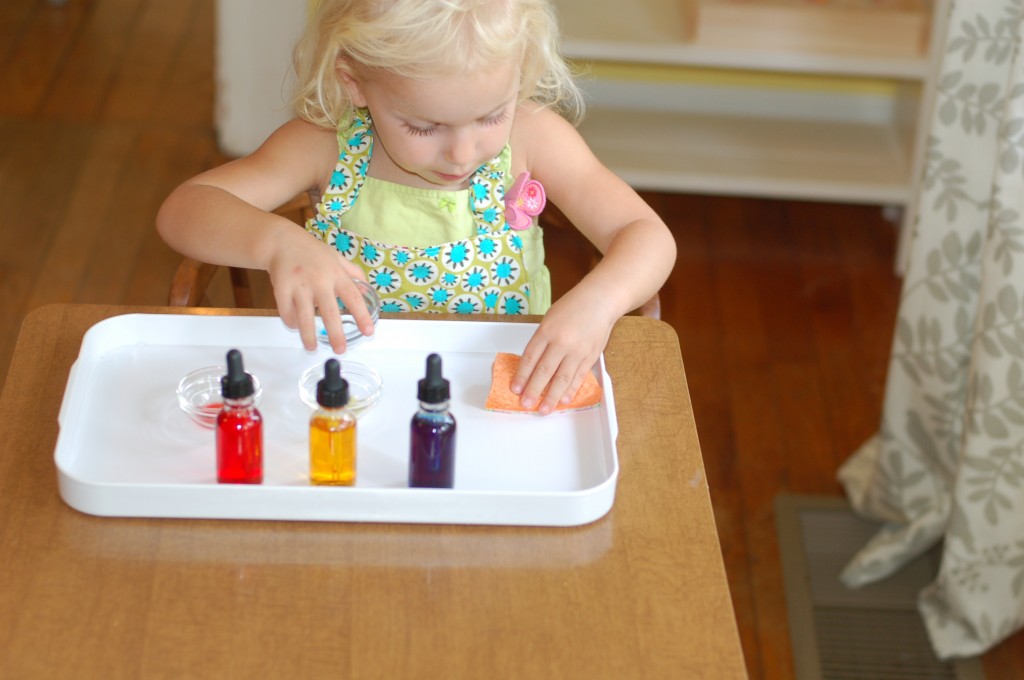
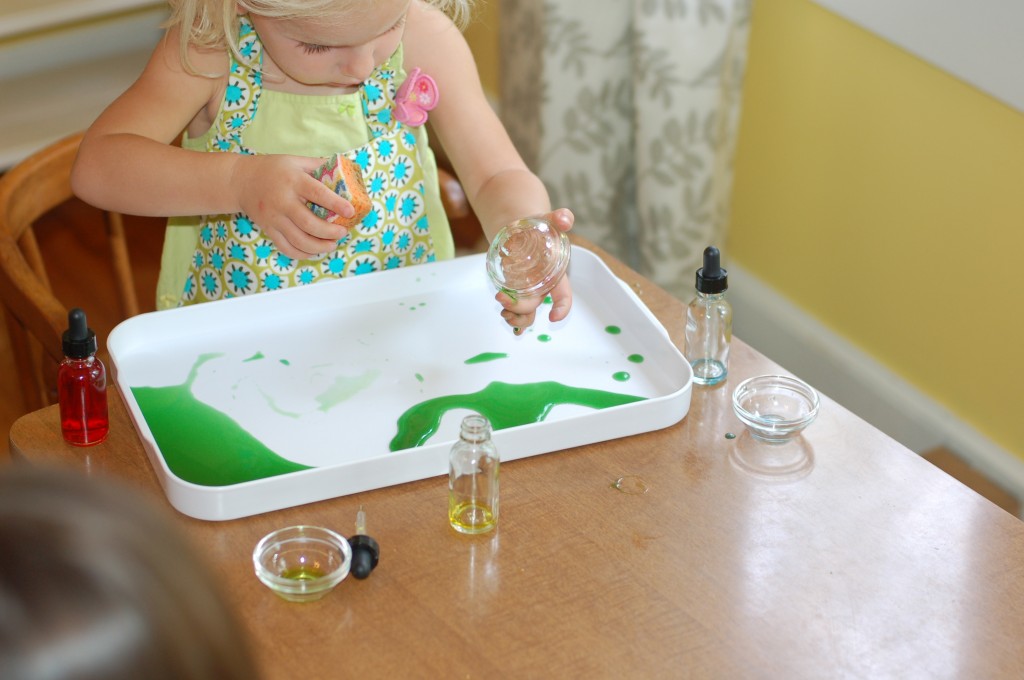
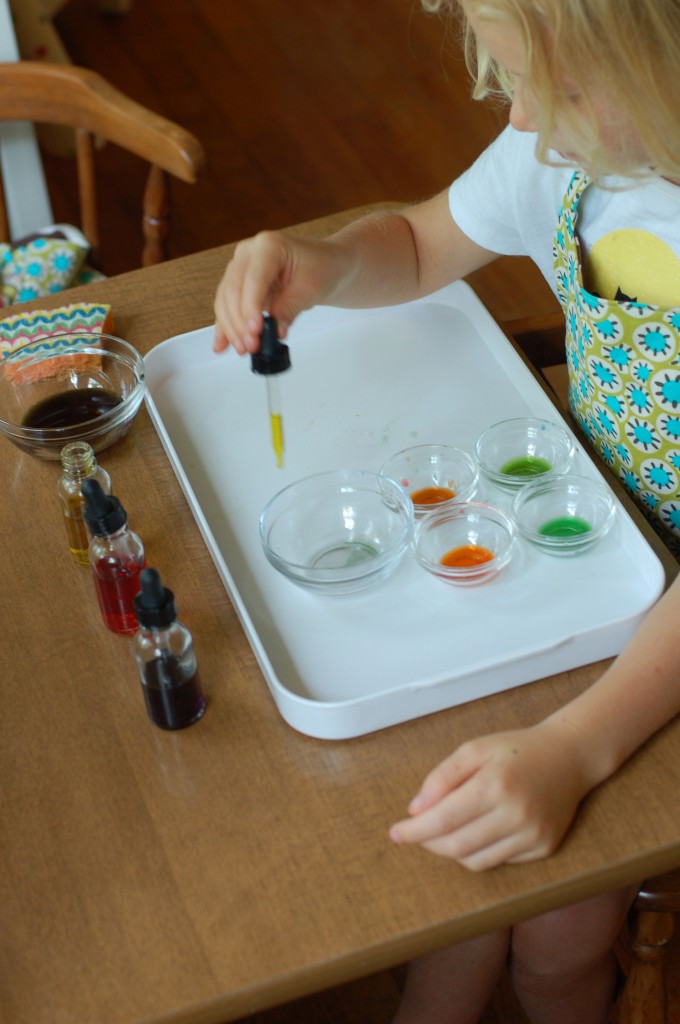
This color mixing lesson is a favorite with all the girls. It uses food coloring, droppers, small glass bowls and a plastic tray. I ordered this one from Montessori Services. But it could easily be made using things you have at home. However, I have wanted to do this at home for a long time and had a hard time finding dropper bottles made of clear glass that I could reuse. Mine were all brown. So I finally just ordered some. There are a lot of things in the Montessori Services catalog that are over priced and can be made at home. This was one set I’m glad I bought. The glass bowls, tray and droppers can be used to set up other lessons as well. The materials are versatile.

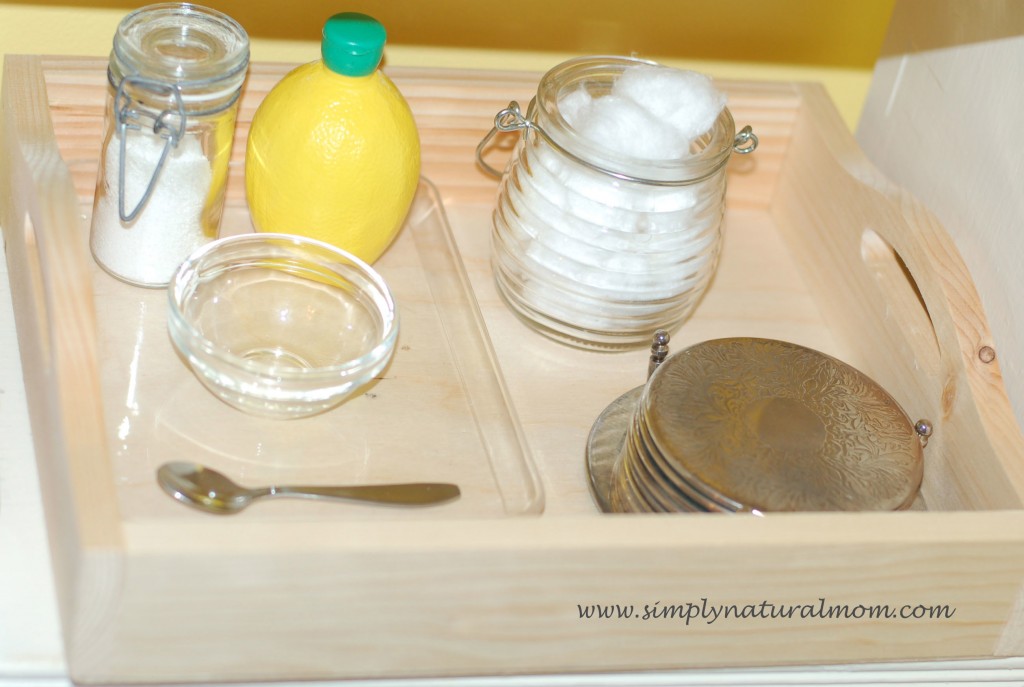
The next picture is a silver polishing lesson. I know the girls are going to be thrilled to find it on the shelf in morning (I stayed up late creating it and then writing about it here). They gravitate to the lesson shelves in the morning, before their play takes them elsewhere. Thursday morning the lesson activities lingered through lunch. This one is taken from ideas seen at my girls school and in the Montessori Services catalog. My girls love these silver coasters that migrated to our house, from my mom’s house, at some point for which I have no idea why. We are not nearly fancy enough here with our guests to break out the silver coasters, but the girls like to stack them.

For the lesson, I set up a homemade, non-toxic silver cleaning solution that works well enough to do the trick and get a shiny result on the coasters. (On that tarnished gravy bowl, I’m not so sure it could do the trick. Then again, what does a vegetarian do with a silver gravy bowl?) The white powder is Arm and Hammer washing soda and kosher salt, mixed 50/50. They’ll spoon some in the bowl, with a squirt of lemon juice, mix and use the cotton balls to apply the mix on the silver. Then they’ll have to take the coasters to the sink to rinse and dry. I know this will be a hit. Anything with mixing potions and a trip to the sink is always a hit. 

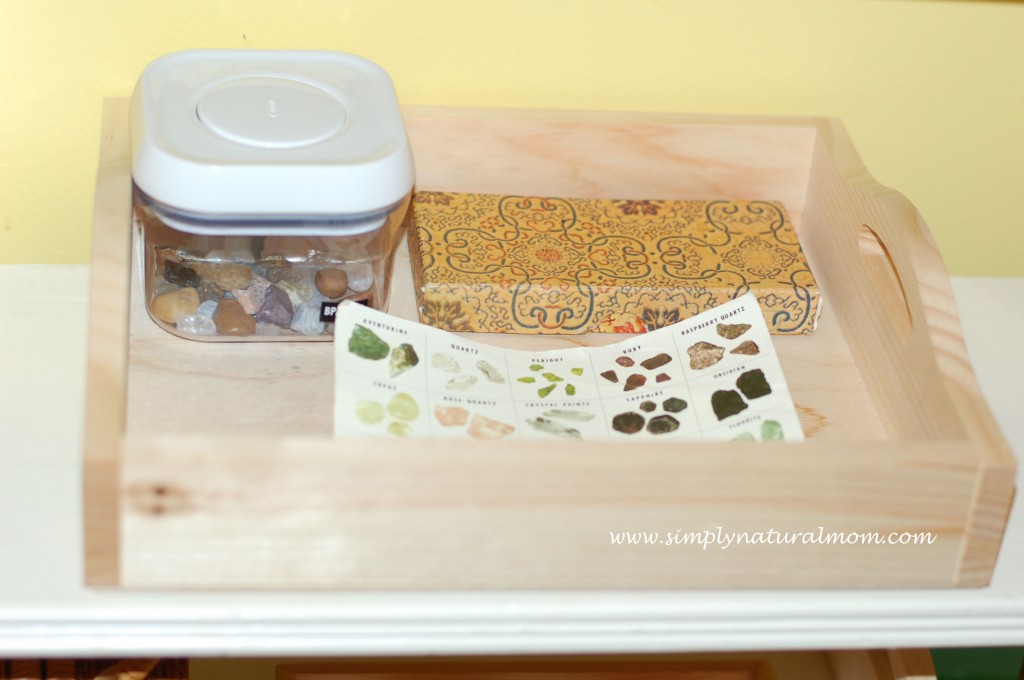
Next is a rock lesson using gems we had from one of those Appalachian gold mining tourist places. Placed next to it in the box is a magnifying glass, and a chart that came with the rocks to identify them.

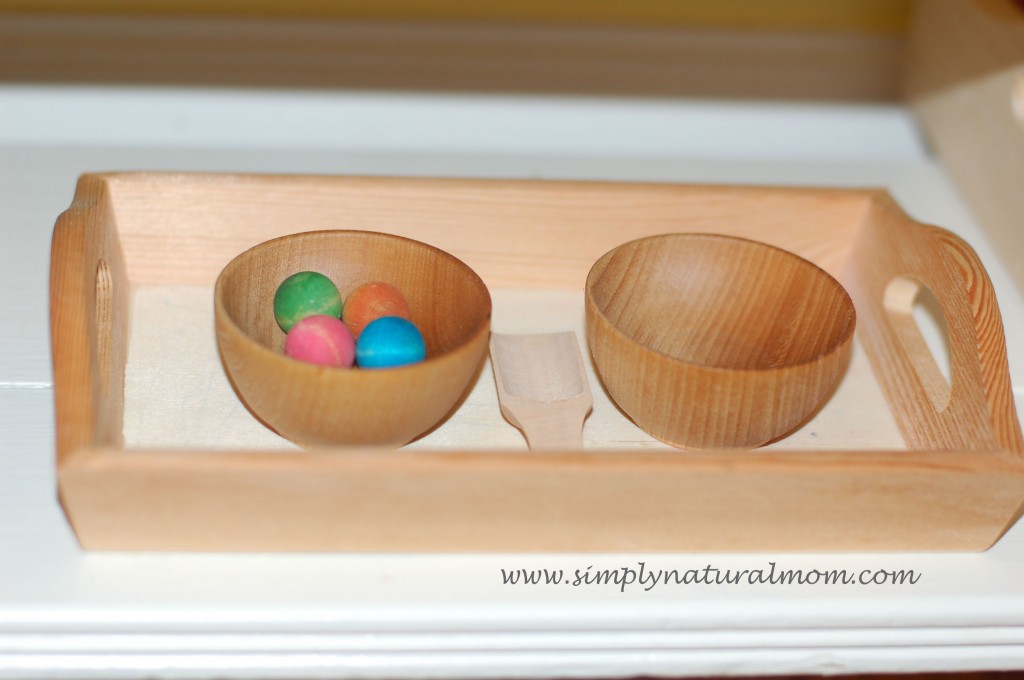
This is a simple scooping for my toddler, using things we had around the house. The balls were stained with watercolor paint and found in craft stores for near pennies. The tray is from the craft store as well. The scooper is from a bath salt gift box and the bowls came from this Spooning Activity Set, which is worth the buy because off all the stuff you get in it, and all the ways the various items can be used. 

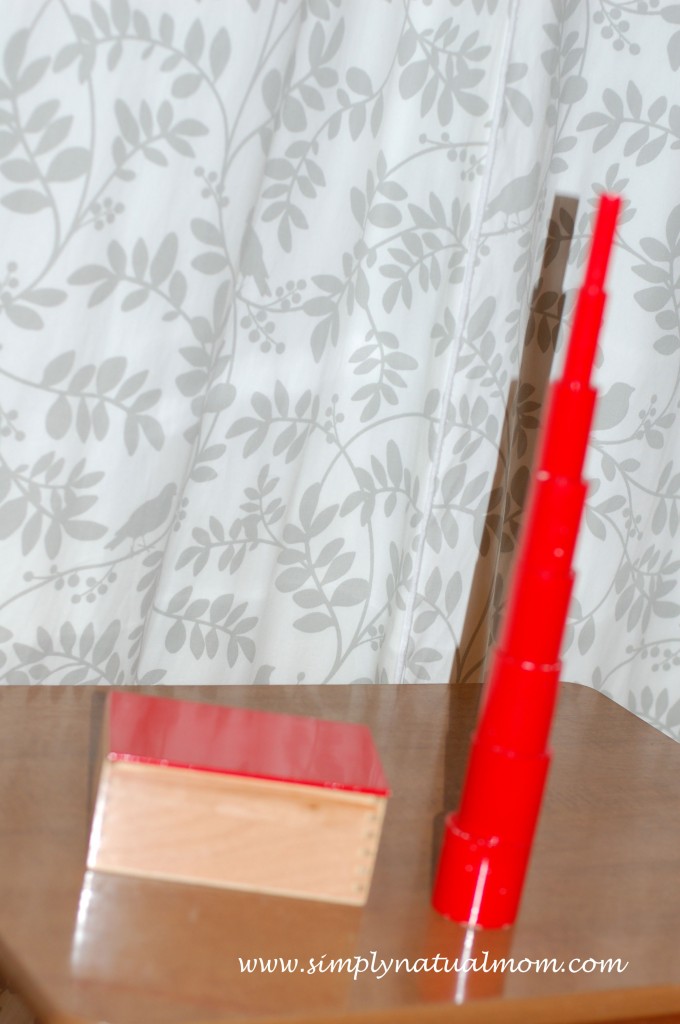
The red toped box shown on the shelf above is this red tower. I have a friend who set up a Montessori room for her girls one summer when her twins were not much older than my toddler. This was one of the many lovely items I ended up with, from her room.

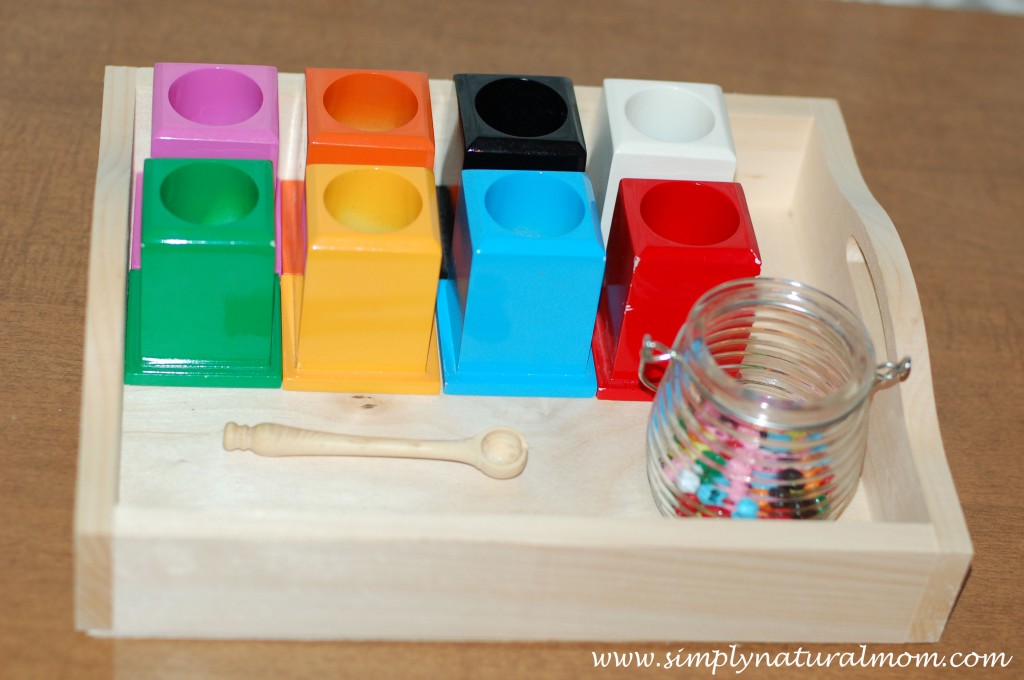
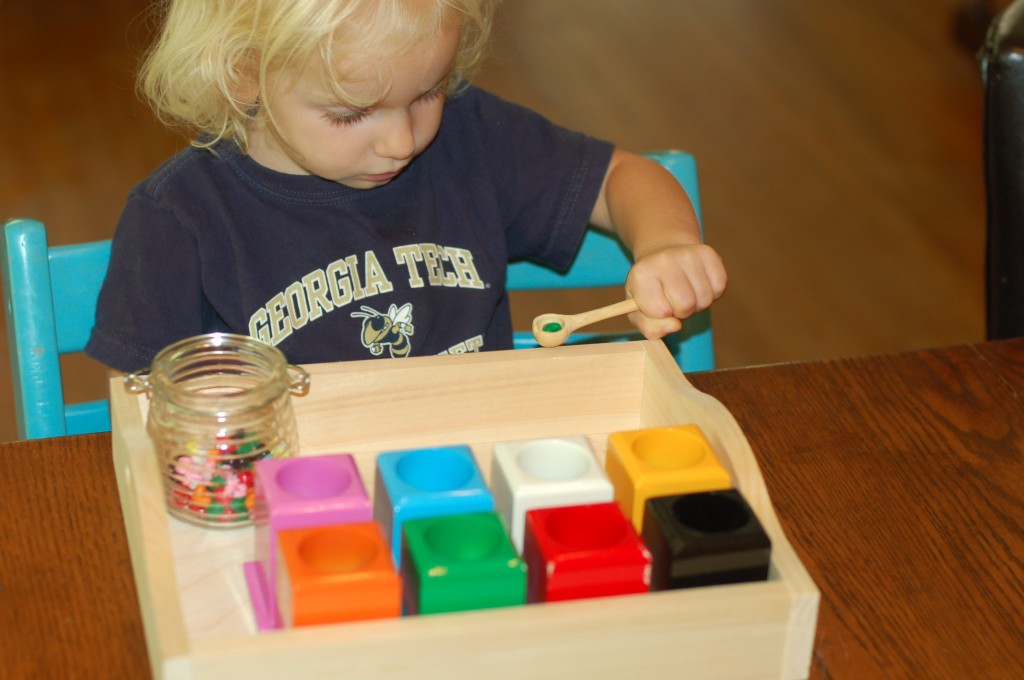
Also from that friend, came this set of multi colored pencil holders meant to hold the pencils of the same color.  Except I’m using them for my toddler to sort plastic beads, and put them in the matching color holder. I happened to have the beads left over from a birthday party several years ago (because I save everything, insanely) and the colors matched perfectly. The glass jar holding the beads is from the dollar isle at Target and is made to be a votive candle holder. The handles on the jars makes them great for kids. The spoon is from the scooping activity set.

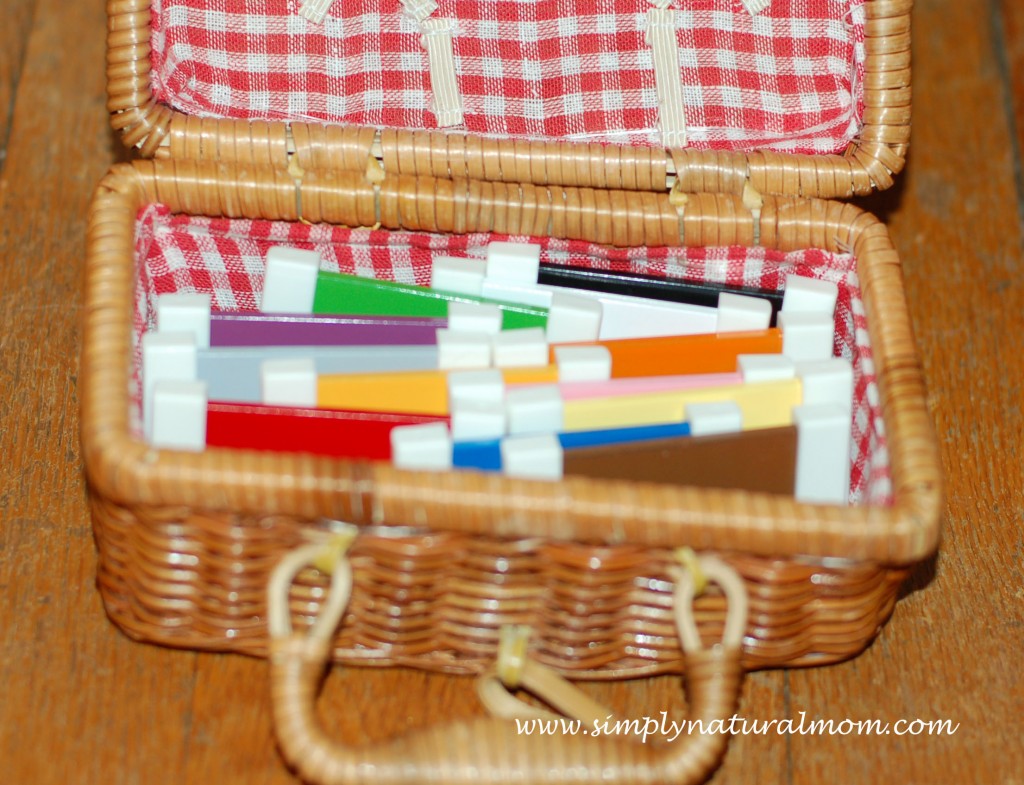
My toddler’s teacher at the end of last school year told me my little girl likes the challenge of opening things and to put things in containers that require figuring out how to open them. Inside this tiny picnic basket meant for a tea set, are color tiles (also something I got from my friend). I’ll have my toddler open it, and hand the tiles to me or her sisters, while naming all the colors. Then we’ll count them all as we put them back in the basket.

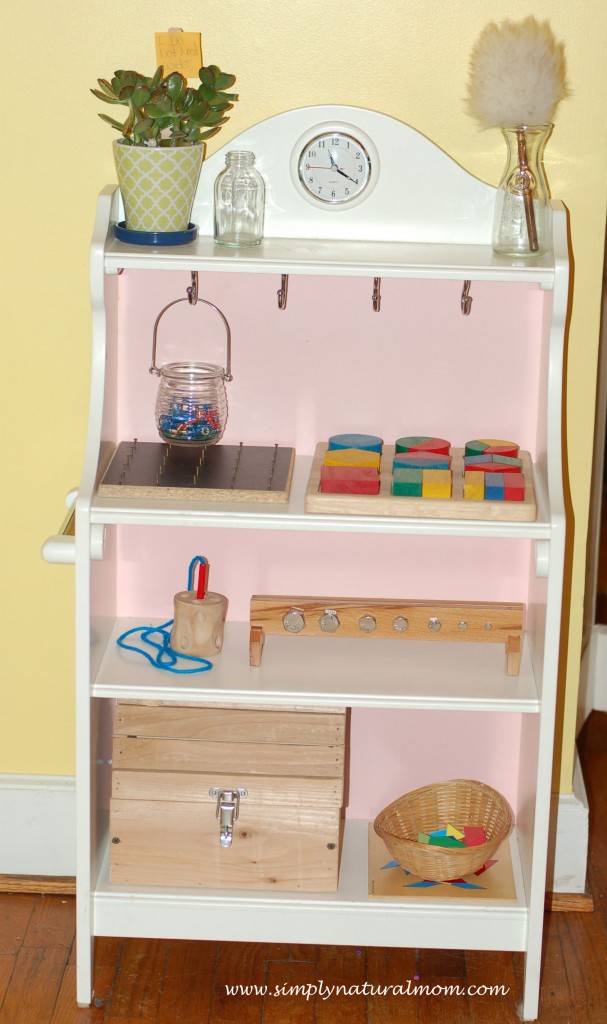
Lastly, here is a part of our play kitchen set that has been transformed into a summer lesson shelf, with more lessons on it – including the bead stringing lesson in the chest from my last post. Because the girls still love it, as well the friends who come rolling through here. The rest that is shown are puzzles and things, that seem fairly self explanatory.

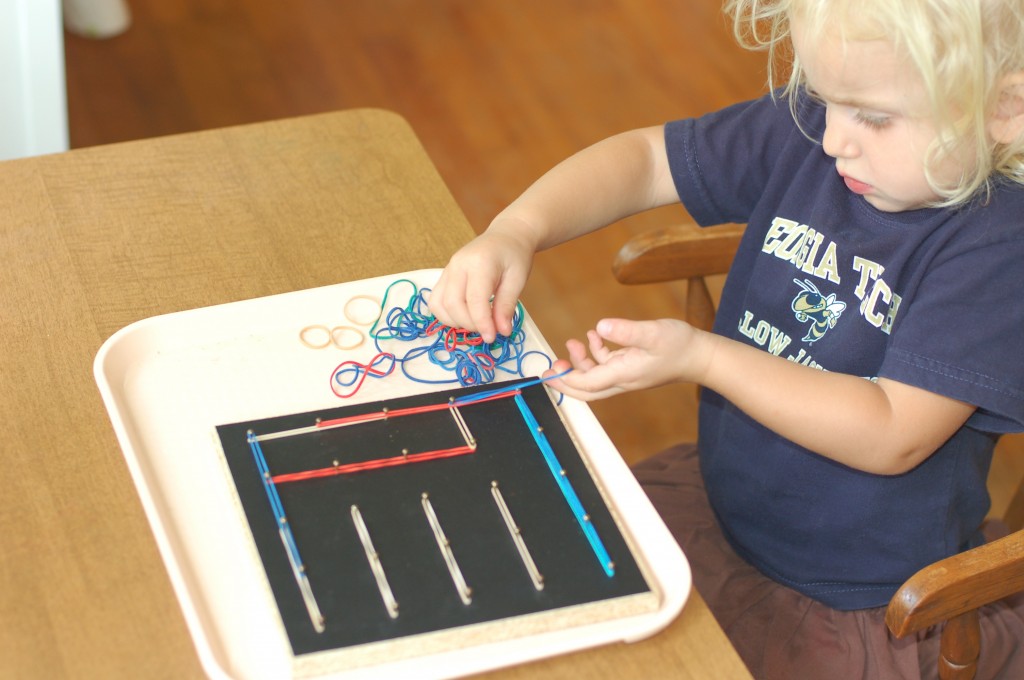
And for a few behind the scenes shots of these lessons being done by my girls….here you go. The first is the rubber band lesson shown on the shelf above, which could probably use a little explaining.

As you can see she is really concentrating. The smaller rubber bands are tough to do, requiring extra concentration, determination and dexterity. But when she sucseeded, she threw out her arms and said, “I did it!” This lesson is perfect for her right now – seeing she is stubborn as an ox! When I tell her she can not do something – even if it is saying no to a second cookie – her most often used response, in a calm and matter of fact way is, “Yes me can.”

Here is that color mixing lesson in full swing, being done properly and with some creative experimentation. The girls are wearing their aprons I sewed from this free Sew Liberated apron pattern, that I mentioned here. I suggest an apron for this lesson. It can get messy. And an apron, well, it always adds to the fun of things. Even for boys!

To leave you back where we started, here is my sweet oldest daughter helping my middle girl with that language lesson. Our middle girl was gone from home having some grandparent time for the early part of the week. We all really missed her – sisters included. Maybe that explains the sweet eagerness to help her Thursday. Either way, it makes my heart smile.

To stay informed and read about what we are adding to our Montessori lesson shelves each week, be sure to subscribe to Simply Natural Mom – by Facebook, Twitter, email or RSS feed. Also check out my Montessori Pinterest board.

Filed Under: Montessori Tagged With: color mixing lesson, montessori, Montessori at home, Montessori Services, rubberband peg

posted on July 3, 2012 by Rebecca Simmons

Enjoying the little things, in quieter times

It was oddly quiet at my house last weekend. My husband did a marvelous thing for me. He took the three girls out of town (to MY parents house in Atlanta) so I could have some “me time.” It was the first time my  toddler spent the night away from me, ever! And the first time I had the house to myself for more than a few hours, since I became a mom. Pause, think again. Yes it is true!

What did I do? I did whole lot of nothing. I did little things. I went to bed early. I slept in until 11. I enjoyed coffee and read the newspaper in quiet (minus the dog barking who barks at a feather falling on the floor). And I shopped. Or well, I went to stores that I love, where I looked for hours. And I did so without anyone at home wondering when I would return or what they were going to eat for dinner. I had a friend stop over for an impromptu salad and glass of wine. I read my favorite magazines. I didn’t take a single photo or read a single blog, minus browsing for design ideas for when our upstairs is finished.

Presently, there is no drywall upstairs. But I bought new bath towels to wrap up the girls when they get out of their new bathtub. Because thinking about those little details help me see the light while living through a summertime renovation, with all the kids home – usually.

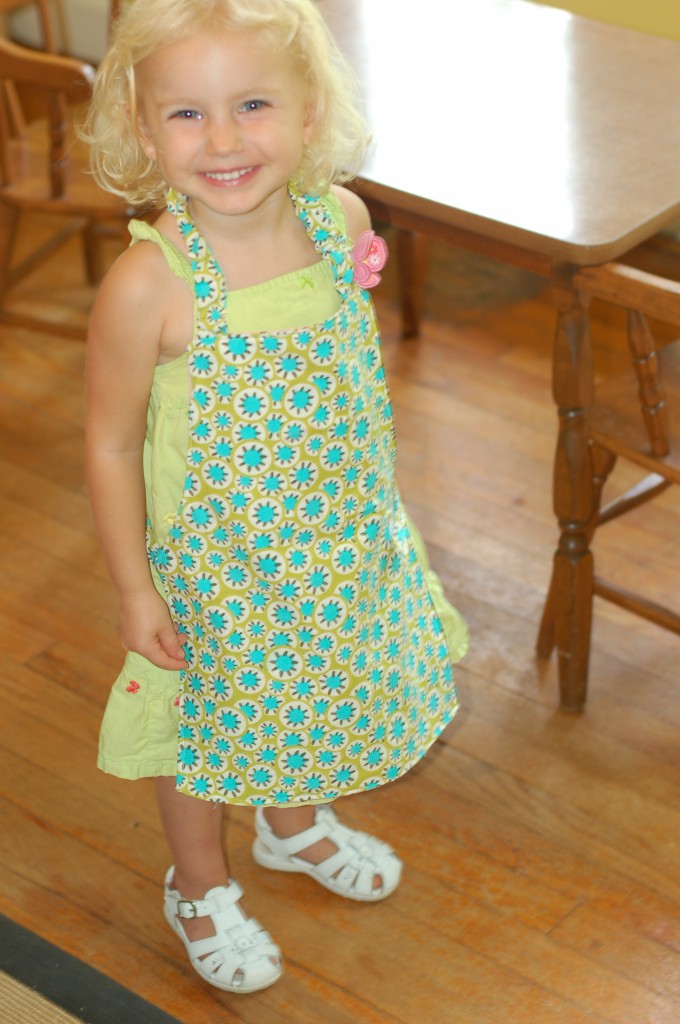
I did some sewing one evening. I made two children’s aprons from this pattern at Sew Liberated. They were for my two youngest daughters, serving as an experimental project for a bigger project I’ve committed to doing. Which is sewing 18 of these aprons for the 3-6 age students at my daughter’s Montessori school before school starts. Getting this started was the small step I needed to lift the job from my to-do pile, into the work-in-progress pile. And that little step felt very good.

I asked my toddler to pose while wearing her apron so I could put it on my blog. This is what she did. Just as I asked her to do.

After being separated from her for two days I think I could eat her little cheeks right up.

My middle girl stayed back in Atlanta for some special grandparent time. It feels very odd with her gone. I could not sleep Sunday night, feeling the void of her absence. Then my toddler snuggled up with me, and I went right to sleep. Her little warm body has a tremendous calming affect on me, just as a mother does to a baby. It really does work both ways!

Taking advantage of my middle girl being gone and having their room to herself, my oldest daughter had a very long play date. They enteretained themselves all day and into the night. Doing simple things around the house, like playing in the basement doll space, in a baby pool in the backyard (because we are never too old for that), and making mud pies in the Mud Pie Cafe. They are getting to be such BIG kids. They are definitely not interested in posing for pictures for my blog.

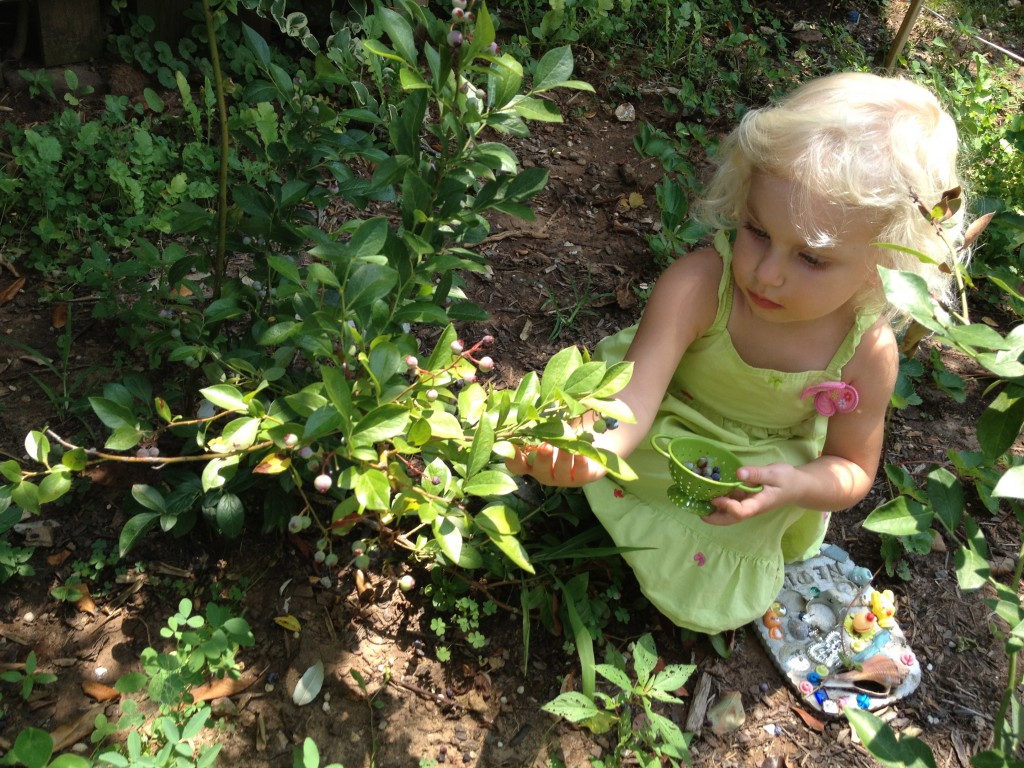
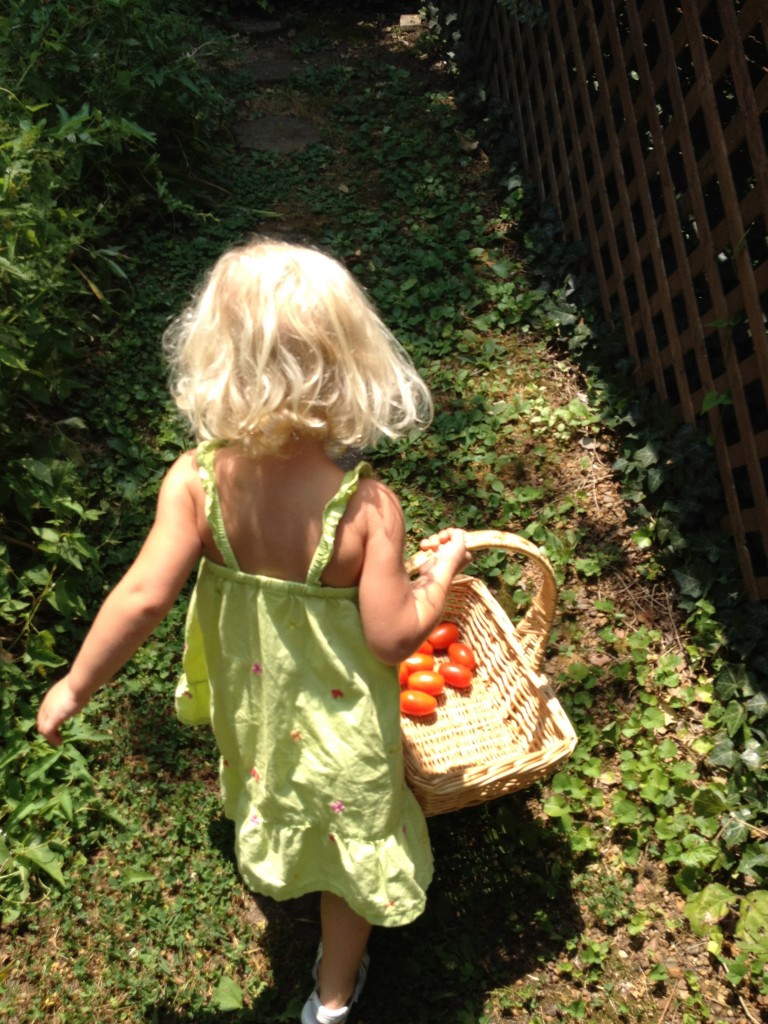
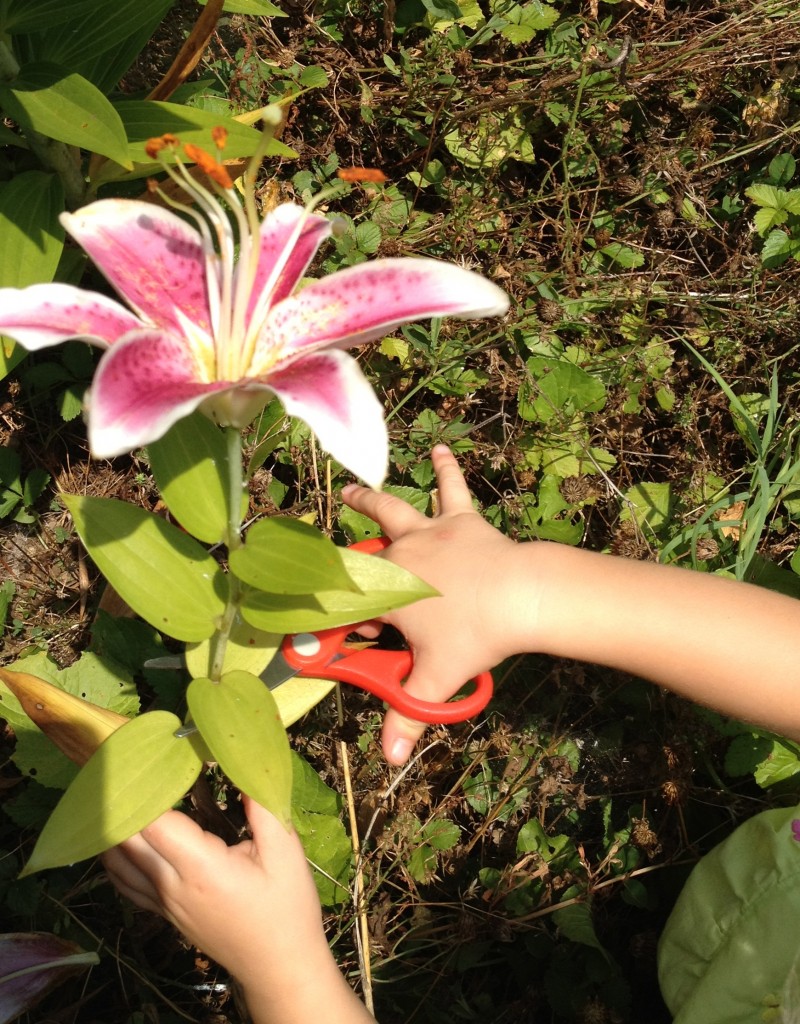
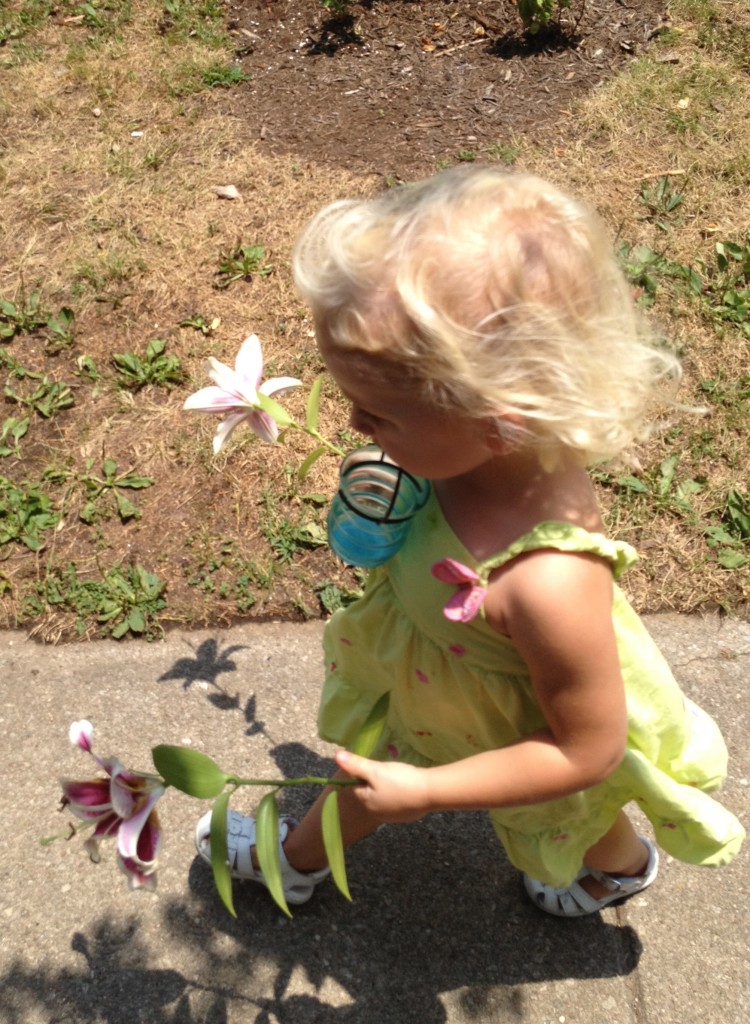
Meanwhile I enjoyed the company of my toddler. Doing little things together like picking blueberries in the backyard berry patch, watching bees, cutting flowers, and taking fresh picked tomatoes from our backdoor garden to the neighbor’s next door.

I love seeing these little hands doing big things. Even while we work on the lesson that we only pick the blue berries, not the green berries. Or that the vase was for the flowers, not for multitasking. Oh well!

Notice the brown crunchy looking grass? It’s true. We’ve hardly any rain in a month and the temperatures have hovered around a record breaking 105 degrees outside the last few days. We are lucky we got outside at all! But every little bit counts. And after being away from this little girl for two days, I must say I missed her BIG TIME.

I’ll be happy on Wednesday, when all the Simmons girls plus Daddy are under the same roof again.

Filed Under: Mothering Tagged With: child's apron pattern

  • « Previous Page
  • 1
  • …
  • 24
  • 25
  • 26
  • 27
  • 28
  • …
  • 47
  • Next Page »

Subscribe


Archives

Copyright © 2025 | Fabricated theme by The Pixelista | Built on the Genesis Framework
[footer_backtotop]