• Home
  • For the Newcomers
  • Iyengar Yoga Classes
  • Contact

posted on April 23, 2012 by Rebecca Simmons

Sewing a doll dress and matching girl skirt

Friday my oldest daughter had a birthday party to attend. Together this friend and her do a lot of doll playing. So she wanted to give her something for her new doll, which she received for her birthday. It was an American Girl Doll and this gift request came on Wednesday.

There was no time for anything but something homemade. I had never sewn an outfit for a doll before. But I went online and figured it couldn’t be THAT hard.

I did it! And now that I’ve done it, next time it will be even easier.

I’m no pro at this, but I’ll tell you a little how I made it happen.

I started by downloading a free pattern for a pillowcase style dress for a doll, by Liberty Jane Patterns. It’s a simple pattern that looks more complicating than it is. But most of the free pillowcase doll patterns I found came with matching outfits for a girl, and I didn’t want to mess with that many pages of patterns to sort through. I chose a pillowcase style because I wanted something basic, to fit my sewing skills.

Plus I already planned on making a matching skirt for the birthday girl, and that was all the fabric I had on hand. I was after all starting this project Thursday night at 11 p.m.

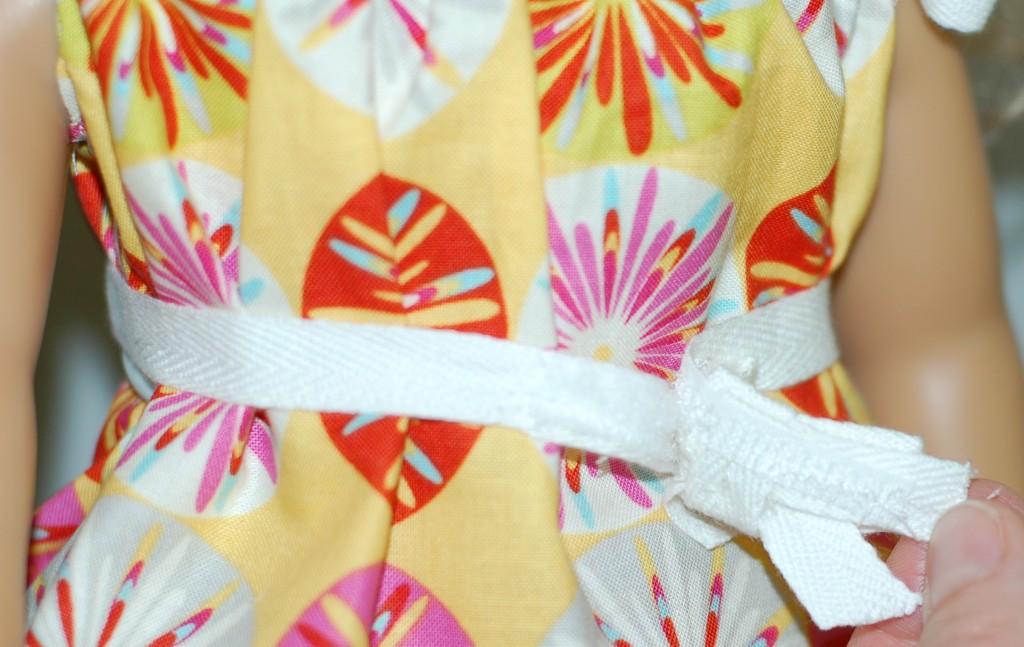
The You-Tube tutorial on the site was most helpful. Instead of sewing ties, I took a shortcut by using ribbons. And instead of using a rubber band to accent the dress and provide its form, I took it a step further by sewing on a more permanent tie. I did so by sewing a ribbon on the back of the dress, and then put velcro on the front parts of the tie that had a permanent bow sewed on. This way it could be adjusted, similar to the band style in the pattern.

I printed out the page with the pattern for the dress. But in the end, the dress was too short. I’m not sure if it was me or the pattern. Maybe both. Either way the pattern was a good place to start.

To make up for the dress being too short, I made matching shorts to go under the dress. To do that I cut out additional fabric using the original pattern minus the cut outs for the arms, and made it into a skirt with an elastic waist. Then I cut a slit in the middle of the skirt and sewed the legs together to make shorts. It worked beautifully!

Here’s the doll dress, with the matching lazy days skirt  for the birthday girl.
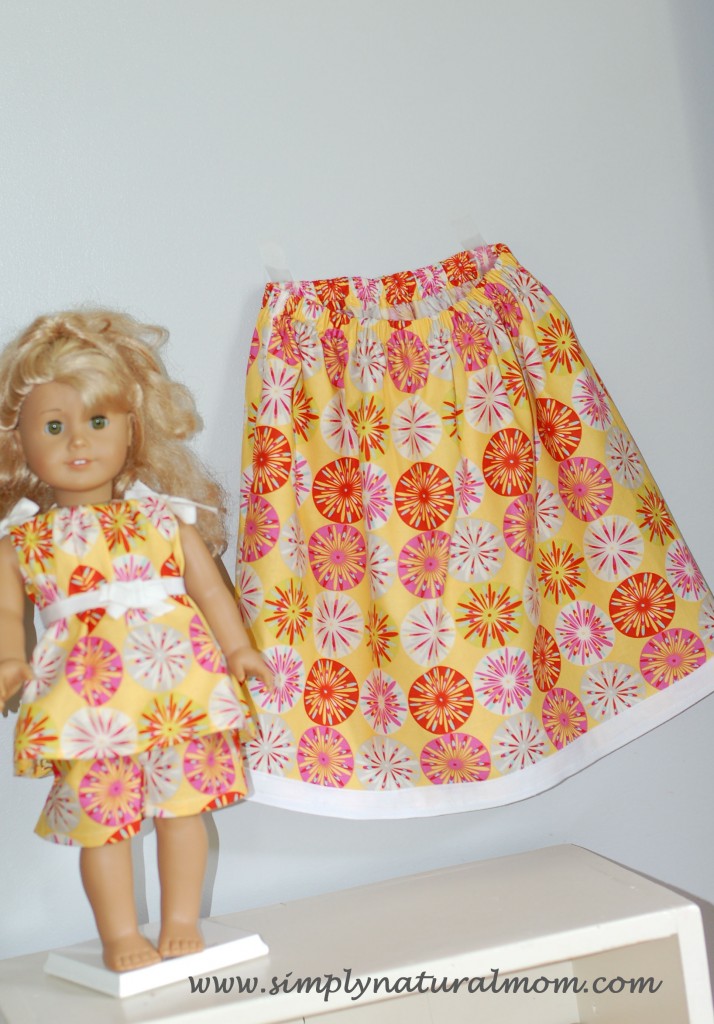
 

And yes, my daughters instantly requested these for themselves and their dolls as well – plus dresses for themselves. I supose more sewing is in order. Which is fun for me.

For more homemade good times with American Girl Dolls see our Homemade American Girl Doll birthday party.

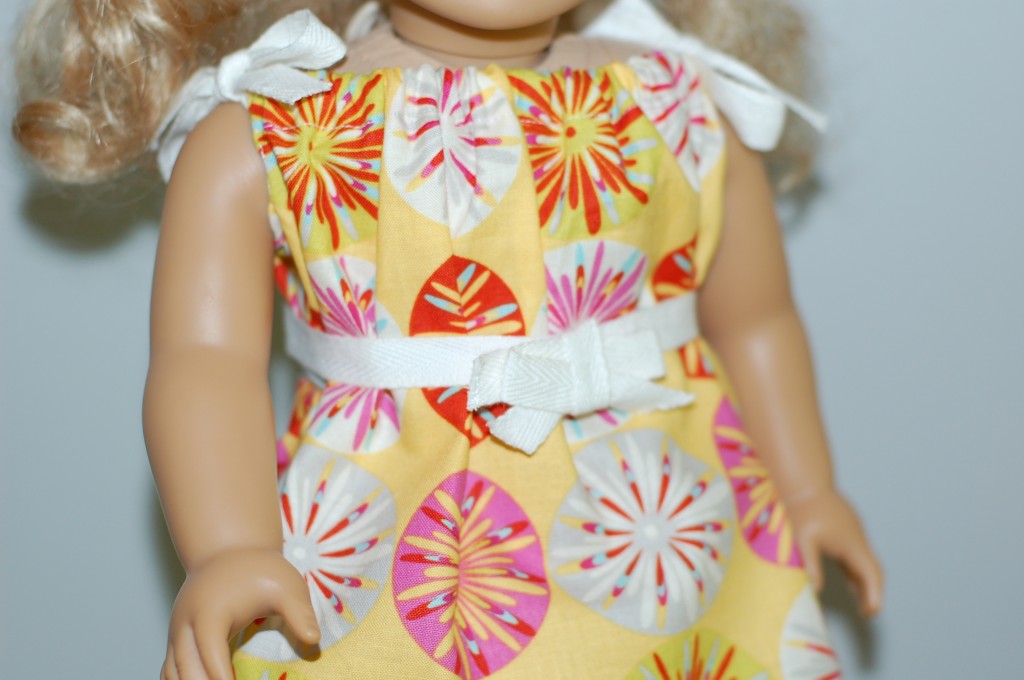
Filed Under: Handmade Tagged With: American Girl Doll outfit and matching girl skirt, American Girl pillowcase dress, easy to sew dress for American Girl Doll, sew an American Girl Dress

posted on April 20, 2012 by Rebecca Simmons

A Simple Moment

A Simple Moment, is a post that appears here every Friday.
A photo I want to remember of a simple moment, with a few simple words.

If you are inspired to do the same, leave a link in the comment section for all to see and read. 

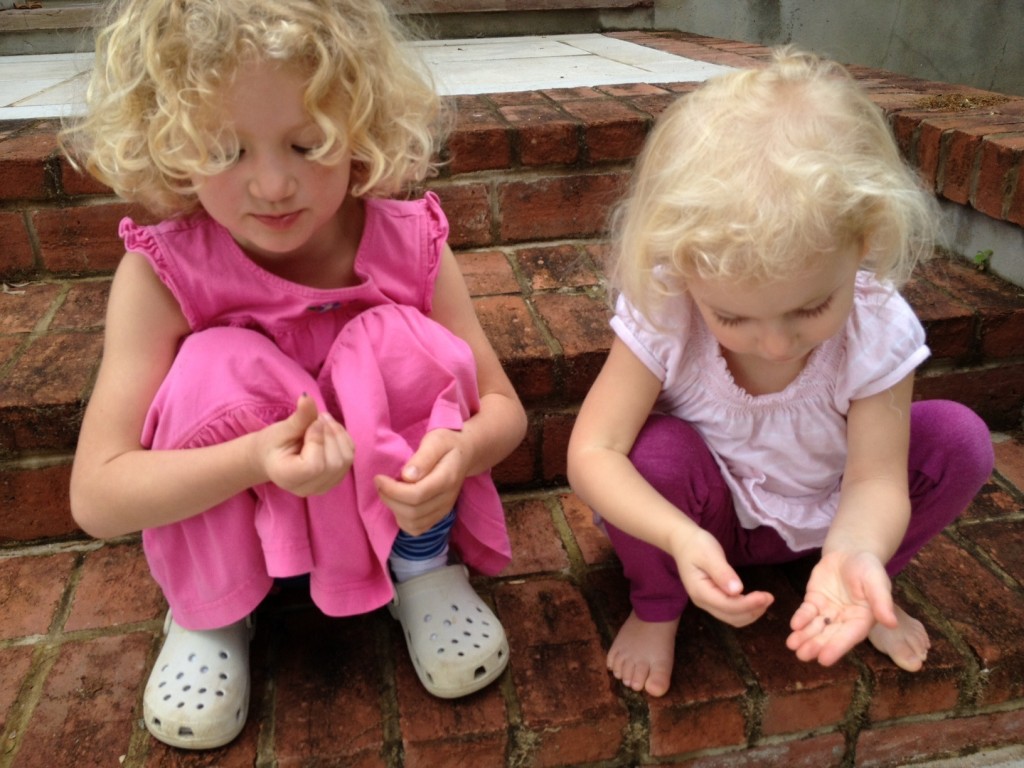
The simple glee and excitement coming from her little toddler voice was so pure – “O look! TWO Roly-Polys!” Which meant one for her and one for her bug-loving sister. This makes a mama smile!

A Simple Moment was inspired by SouleMama. Visit her site to see many more moments. 

Filed Under: Simple Moments

posted on April 19, 2012 by Rebecca Simmons

DIY ideas for Earth Day at home, Pinterest style

I’ve been thinking about how we can upgrade our compost system at home. We have The Earth Machine now and I don’t think it works well – at all! It takes too long, as in two years too long, to make usable dirt. It is not designed to turn the dirt as needed to make good compost.

I talked to Farmer Megan about it, from our CSA, and she told me to use old wooden pallets to build a compost bin where we have easy access inside it, to turn the soil.

Naturally, I turned to Pinterest to find photos how other people make them. And of course, I found some great looking photos that inspire me to get building. And then some more.

We all know Pinterest is great for craft ideas, cooking and dreamy kitchens we would love to have in our homes. Now it’s my new favorite place to find how-to tutorials!

So in honor of Earth Day, I rounded up a few of my favorite how-to finds on Pinterest for things like making compost bins, rain barrels and home recycling systems. You can find them on my board labeled Earth Day.

Here is a sampling of what you’ll find. With some stories to go along with them.

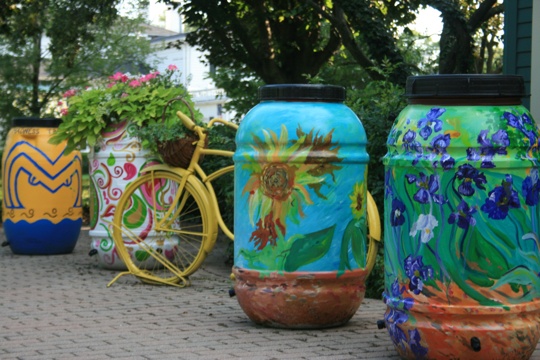
Painted rain barrels are so fun!

We have a painted barrel (shown in the banner photo above) that we got several years back through a local auction for charity, which was painted by local artists and part of a series that was displayed around our city.

I did a little research online, and painting your own rain barrel looks simple and fun. I pinned this tutorial in my Earth Day board. The above photo is from a rain barrel auction in Chicago, like the one in my town. It was pinned from Apartment. Therapy.

Painting your own would be a nice project to do with the kids – letting them do some of the painting, and stamping their handprints all over it. Plus, rain barels are a great way for kids to play with water in the backyard, water the garden, and make mud pies without forgetting to turn the hose off!

You can either make your own rain barrel, or buy one at local hardware store. Also, check to see if your city has artists doing them for charities. Ours is an annual event, and they are becoming popular across the country. Through the online auction, I payed $60 for mine. Which is about the cost of a plain one at a hardware store. And it was for a good cause, benefitting Ijams Nature Center.


Recycling bins fit for a kitchen!

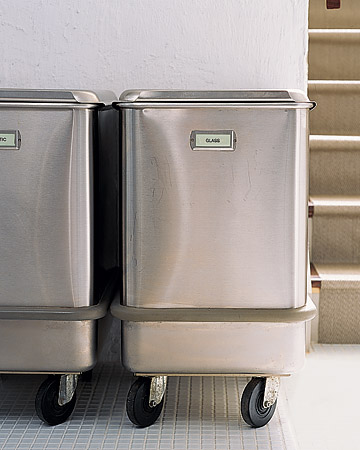
These rolling food storage bins were found on Marthastewart.com. She has them in her basement, apparently – over at Martha’s Basement. She – and her staff of a zillion helpers – say you can get them at restaurant supply stores and adapt them to hold recycling. I drive by a restaurant supply store in my town often, and have thought several times that I might find something interesting there.

Now I’m going to check it out. Because the trash and recycling bins in my kitchen are always out of hand, overflowing and just plain ugly. Not like Martha’s. Because you know that Martha. Even her basement is fancy.

Sorry. I couldn’t resist the snark. BECAUSE – many moons ago, about three years after I graduated journalism school, I was knocking on doors in NYC looking for magazine jobs. And one of Martha’s snarky receptionists sent me to the mail room with my resume. True story. Honest to God. It happened. I did however get offered a job at a little crafty shelter mag paying me enough money to live quite comfortably… in a dumpster. Maybe. So as the story goes, we never moved to NYC.

BUT, I do like this recycling bin idea. I really do. Thanks Martha.


Composting that really works.

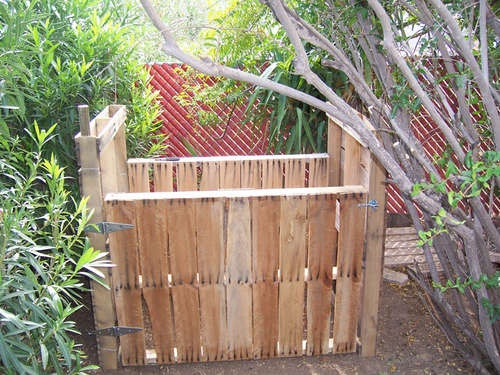
I think this is a great looking and functional compost bin. It’s pinned from the site Instructables. The best part about it is that my kids could easily open and shut the door. Which means they could take over the duties of carrying the out compost from our kitchen. They would really like that. I promise. It’s one of my oldest daughter’s favorite work job at school, when she gets to take the compost to the compost house. Oh the joy of a Montessori school! (They have chickens and keep bees too.)

After all that, if you are still looking for more ideas – check out my Pinterest boards Gardening with Kids and Creative Backyard Fun, for additional ideas on reusing things in fun ways outside.

Have a great Earth Day! Reduce, reuse and recycle. It can be fun. And artsy and educational for the little ones.

Filed Under: Family Tagged With: compost, DYI compost bin, Earth Day, kitchen recycle center, make your own rain barrel, paint your own rain barrel, Rain barrel, rain barrel auction

posted on April 18, 2012 by Rebecca Simmons

An update after the 10 Day Real Food Challenge

Continuing our efforts from the 10 Day Real Food Challenge, to eat more real food and buy less boxes of crackers – here’s what we’ve been up to as we work to replace some of the beloved kid favorites at our house.

Wondering what I would end up with, I experimented on the fly by baking some of our whole wheat pizza dough on a baking stone with no pizza toppings. What happened was some darn good, basic, homemade crackers. All the girls thought it was great! I thought it went nicely with our Lentil Chard Soup.

I pulled off making the spontaneous Pizza Crust Crackers by rolling out one of our balls of dough like I would for pizza. Then I baked it at 500 degrees for about 5 minutes, flipped it over and did the same – watching to make sure it didn’t burn. I cut it into triangles like a pizza, except they were big wedges of homemade crackers – something I thought would have been WAY too time consuming to ever make myself. But it was so easy! The girls loved dipping them in hummus.

This is a great example of not being afraid to experiment in the kitchen. I rarely ever stick to, or even use, a recipe. Sometimes the things around us can be the best guide.

{I would insert here a photo here of our surprise yummy crackers. But honestly, my kids are getting tired of my camera being attached to me. So on this day in the kitchen, I took zero photos. Sometimes life dictates the things we should not be controlling. So in this post, there are words with not many photos. I hope you understand.}

Smoothies are still a staple here. And now it’s popsicle season, which we make out of smoothies. Which means my freezer is full (but not for long) of colorful rocket and star shaped homemade popsicles. Last week my two big girls had strep throat and many smoothies were made. We did however, come up with a new recipe – new to us at least. With apple sauce, blueberries, bananas, raw spinach, orange juice and vanilla egg white protein power. When the girls have been sick I add a powder form of probiotics to their smoothies as well. Still this week, they are asking to have 2-3 popsicles a day. I say yes of course, with a smile, knowing how good they are for them. For more on our smoothies go here.

Tuesday night I had success making Homemade Fish Sticks that got rave reviews from my patrons at the Mom’s Restaurant. We called this one Fish and Chips night. Making my own fish sticks is something else I NEVER thought I would do. But I was at Earthfare, leisurely shopping one night past bedtime – sans the kids and sipping on a cup of coffee – when I decided to ask the guy behind the fish counter about it. He was helpful, encouraging, and it was SO easy – aside from being a little time consuming in the prep and clean up department. I bought a pound of fresh wild caught cod fish, cut it into nuggets, dipped it in melted butter with a little lemon juice, breaded it with store-bought breadcrumbs and fried it in a pan with minimal amounts of olive oil, flipping it to get both sides.

Some say fried is bad. I say it’s a fine way to get some good fat into my skinny kids. Another kid food tip is using butter, lots of real butter. It’s like ketchup. It makes everything better for kids. Again, good fat can be a good thing – as long they are active and burning it off. And mind are, spending more time outside than in.

I found a sharp cheddar cheese and homemade macaroni combo that met muster with two out of my three macaroni and cheese loving girls. But I still need to do some more work on that, to make it a home run for all of them. Surprisingly, it was my oldest daughter who was the biggest fan of the combo I made.

I’m still looking for a good, practical, substitute for all the expensive boxes of kids cliff bars (and the like) we have conveniently become attached to. I have one more kind of Larabar I want to sample. If I can find one that all three girls like, I’ll see if I can do a copycat recipe and start stockpiling a homemade version. So far, not one flavor has met muster with my oldest child. She’s the one who recently ate Cream of Spinach Soup and proudly declared herself no longer picky. Sweet girl she is, always trying to please mom.

She really doesn’t want to be picky. But oh man she is.

All in all I think we are getting somewhere, in making ourselves less dependent on convenience foods that come in a box. An organic box nonetheless. However sometimes I think it’s just expensive junk food, that we tell ourselves is better – which it is, sort of. Then again it’s all relative, I suppose.

The best news of all is – I found a Homemade Vanilla Yogurt Concoction that has us on our way to saving money, by making our own yogurt versus paying nearly $5 a quart for the Sunnyfield variety at the store. I was struggling because I ran out of my special order yogurt starter by Dairy Connection, and the freeze dried one available in the store produced a flavor that was too sour for our liking. Then one night this week, I stubbled upon Soulemama’s yogurt making tutorial and she uses a 1/4 cup of yogurt as a starter. Duh. How simple! I was able to use the plain store bought kind from the brand my daughter likes, and make it that very night.  I added some agave nectar and vanilla extract to sweeten it, when it was ready to be served. After a few other failed attempts, and many over a longer period of time, this way worked! Hallelujah.

For those of you asking, why not just flavor it with honey or maple syrup? It’s because she doesn’t like those things. But don’t call her picky! Oh if you only knew how far we have come. 

Thankfully, the other two girls are easy peasy and will eat just about anything. And all in all, I’m super proud of my three girls for being great sports when I all the sudden started switching up all their favorite kid foods.

It’s more work for me, all this cooking. And cleaning the kitchen! But they are worth it (having wine in the kitchen, versus whine, helps).

One more thing – in addition to this and all the real food I cooked up this week from our CSA – I made these scrumptious Mexican Black Bean Burgers. They were a lot of work on the front end. But they made eight extra burgers that are now available in my freezer as a quick throw on the panini maker meal. We cooked ours on the grill Sunday. My husband got a new grill over the weekend and I gotta to give it to the man.

He didn’t complain one… single… bit when the first time it got fired up, I loaded it up with bean burgers, beets, potatoes and veggies. He SO deserves a big shout out too, for being a good sport who is always willing to try anything I decide to make. Even on his brand spanking new grill!

After nearly 13 years of marriage and three kids, love most definitely comes in many other forms than we could have imagined on the day we said I do. I think that is a very, very good thing.

Filed Under: Real Food Tagged With: 10 day real food challenge, homemade fish sticks, homemade vanilla yogurt, Pizza Crust Crackers, smoothies with spinach

posted on April 18, 2012 by Rebecca Simmons

Our first CSA delivery this season, how we eat it and how we store it

Wednesdays are exciting here at our now BLUE house, that is getting painted from previously being known as The Brown House. On this day, our sidewalk turns into a pick up place for eight families to get their CSA (community supported agriculture) produce from Farmer Megan, of Care of the Earth Community Farm.

This is the third year my house is a delivery point for other CSA members. The perk for me is that I get delicious, crisp, fresh picked veggies (and sometimes fruits) delivered to my front porch. All the members enjoy a sense of community picking up together, and talking about what we have been cooking with our goods.

Farmer Megan days and the friends it brings to our front lawn, is a definite hit with my kids as well. It’s part of the enjoyment of the food process that I’m try to teach my children, as they learn where their food comes from and the importance of eating real, unprocessed food.

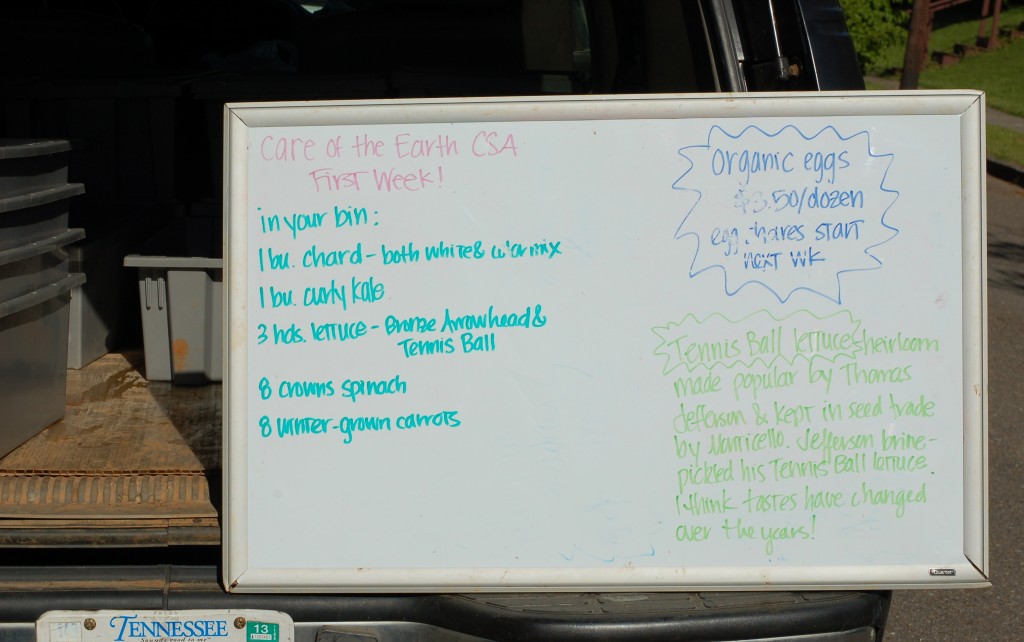
Wednesday was the first day of the new season. We get a full share plus two dozen organic fresh farm eggs a week. Sometimes it can be challenging to eat all that in one week, depending on the time of the season. At the start of the season the offerings are less. It increases as the hotter months come and more crops are ready to be harvested. Relying on what is fresh, and not being 100 percent sure of what groceries you’ll be cooking with from week to week, is part of the challenge I like about a CSA.

Farmer Megan offers loads and loads of resources, recipes and even a blog just for members featuring helpful ideas and food inspiration. Over the years, this young farmer has become a friend of mine. So she doesn’t mind me passing along some of her resourcefulness here.

Really, she fascinates me. She went to our town’s most prestigious private school, then college in New York to study public heath. She got a degree, went to work on a farm and decided to be a farmer. Now her and her husband do all the work at their farm and feed 100 CSA families – just the two of them and their one vintage tractor. They are an organic farm, doing things by hand, all the way down to squashing the bugs off the cabbage leaves with own four thumbs.

This is what we got in our box on week 1, as written on the board she displays at her weekly deliverers.

This is how we eat it

Spinach :: I made a Cream of Spinach soup that my children actually loved. I’ve made it before. But the key this time was to use heavy whipping cream and 1/2 and 1/2, divided equally, instead of whole milk. And when I pureed the soup with my immersion blender, I did so just barely, leaving bits and pieces of spinach still intact which made it appear more like soup and less like green baby food. My seven-year-old is a very picky eater. She loved it and beamed with glee, proudly declaring, “I’m not picky anymore!” Then she asked me to make it again the next day. Ah, success that makes mom smile – really BIG.

Cream of Spinach Soup

  • Lightly sauté 1 small chopped onion in olive oil. Add 1 pound fresh spinach with stems removed and 3 cups of stock (I use vegetable stock). Cook until spinach is soft.
  • Either transfer to a blender or use an immersion blender to puree.
  • Add 1 cup of heavy whipping cream and 1/2 and 1/2, divided equally.
  • Season with nutmeg, salt and pepper and serve hot.

With our spinach, we also love making quiche, scrambled eggs with feta cheese, adding it to pizza sauce or simply tossing it in a salad. I even put it in blueberry smoothies for the kids!

Kale ::  I mostly just sauté it in butter, with some garlic. It’s a nice easy warm salad on chili spring evenings. For a fancier version with an actual list of ingredients, I’m wanting to try this Garlicky Kale Recipe over at Broccoli Cupcake. Soon I’m going to try making these Kale Chips featured on The Family Kitchen at Babble. I’m hoping to get some likes from the kids. Wish me luck!

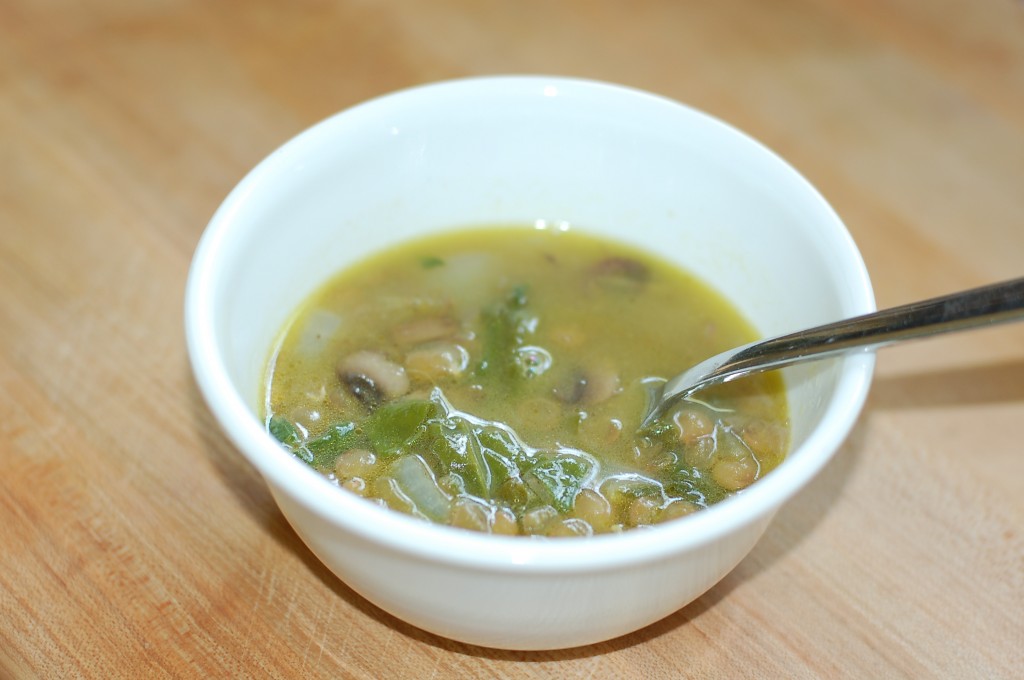
Chard :: I made a Lentil Chard Soup that I loved. My toddler liked the broth and the beans. My husband liked it okay (he’s not the biggest fan of beans). But I liked it enough that I would make it again just for myself. I made it on the fly, with leftover soaked lentil beans I used to make bean burgers, and broth from the spinach soup. You can toss chard in just about anything, just like you would spinach.

Lentil Chard Soup

  • Sauté 1-2 cups of finely chopped onions and sliced mushrooms, adding 2 cups of chopped, stemless chard. When done, onions should be clear and chard slightly limp.
  • Add 1 cup of vegetable broth and 1/2 cup of water. You can adjust the ratios depending what you have on hand, and how much liquid you want in the soup.
  • Add 1-2 cups of pre-soaked lentils.
  • Season with cumin, salt, and pepper while the soup comes to a low boil. Reduce to a simmer until ready to eat.

Lettuce :: Salads, salads and more salads. I love salad. But a good salad. Lately I’ve been on a kick of having salad served with boiled eggs, avocado, pine nuts and a homemade white wine vinaigrette. YUM! My two younger girls will eat plain lettuce as a side at dinner.

Carrots:: My kids nearly ate these carrots whole before they made it into the refrigerator, or even got washed! They eat carrots for snacks, in their lunch and as appetizers for hungry bellies while dinner is getting made at home. It’s their favorite vegetable.

This is how we store it

With good food like this delivered to my door, I don’t want to waste it or let it spoil before we can eat it up. So I follow the advise of Farmer Megan. Because you know, those farmers, they REALLY know. She has a whole big list sorted by vegetable and the best way to store it. But for now I’m going to list a few of the spring crops, borrowing her advise. And did you know – the storage of the same crop can vary based on when it is being harvested (cool and wet versus hot and dry)? I’m telling, those farmers know A LOT.

A good rule of thumb for storing greens and spring veggies is to seal them in a plastic bag or air tight container in the fridge. Refrigerators are designed to store meat and cheese at lower temperatures than vegetables prefer. So providing them with a little insulation helps their longevity.

It is best to wash vegetables and particularly herbs just before use, unless they have gotten hot or dried out.  In which case, rehydrate first in cold water, spin, and bag.

Lettuce – store in bag in fridge, too wet leads to a soggy mess and too dry causes it to wilt; will last 7-10 days.
Greens (spinach, kale, chard, collards) – store like lettuce; spinach and collards will last up to 10 days, while chard and kale will last about a week.
Carrots – bag, otherwise they will quickly dry out and become limp; will last for up to 3 months depending on the variety.
Spring herbs – all herbs are best stored like flowers, in a vase at room temperature, but most spring herbs can also be refrigerated in bags.  Do not wash until use!
Strawberries – best eaten right away; you can store them for a couple of days in the fridge in a closed container with a paper towel or freeze to use for smoothies or jam.
Yes Strawberries are coming next week! First in our weekly bin, and then we’ll head out to the farm for the kids to have an afternoon getting an old fashion you-pick experience. We are ALL so excited about the upcoming event of strawberry jam here. I’ve been known to go a little nuts and can 40 jars of the goodness here – at this old BLUE house. I’m still getting use to that.


On our blue house ….A new update on our renovations will come soon. The window sashes are getting painted now. And soon, very soon, I’ll reveal my big ah-ha-I-absolutly-love-it-moment. My house is making me smile these days. And I think this here old house smiles too, on Wednsesdays when it gets to be the meeting place for Farmer Megan and my neighbors who are also cooking real, old fashioned food.

Filed Under: Real Food Tagged With: Carrots, Chard, Creamy Spinach soup, CSA, Kale, Kale Chips, Lentil Chard Soup, spring greens, vegetable storage tips

posted on April 17, 2012 by Rebecca Simmons

Conscious Reminders from Bless You Mom Cards

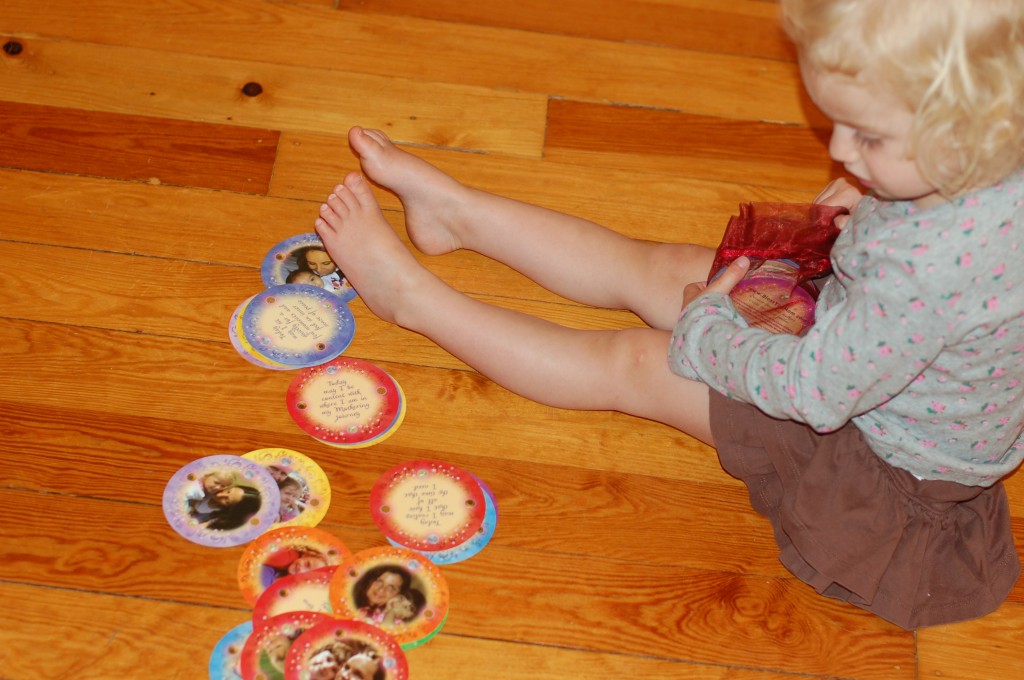
Yesterday with my toddler at my feet, like usual, I stood in my room getting ready for my day. Needing something to occupy her while I dried my hair, I offered her the bag of cards, Bless you Mom, Conscious Thoughts from the Mothering Journey.

They sit on my dresser, and have ever since Santa (wink, wink)  placed them in her stocking when she was one.

Looking at the faces of the loving babies, children and mothers, she puts them in and out of silk bag they came in – intriguing her just as much today as a toddler, as they did back then as a baby.

She picks them out randomly and I stick them on my mirror as gentle reminders of the parent I try to be. It’s not always easy to stay in the moment. And sometimes reading these little cards help get my day off on the on the right foot.

This is what the cards on my mirror have said recently.
  • Today may I remain grounded no matter what happens.
  • Today may I observe all the ways my child teaches me.
  • Today may my home be a safe, tender and holy place to grow.
  • Today may I honor my child’s unique creative expression.
  • Today may my words be clear, kind and uplifting.
  • Today may my frustrations be transformed into useful lessons.
  • Today may I choose harmony instead of power over my child.

I wrote about these cards last June, when I used to write the Brown House News blog for my family and friends. As we read the cards Monday morning, I decided I should share them here with you, my new readers. They are one of my favorite things and they deserve a place in the Stuff We Like category.

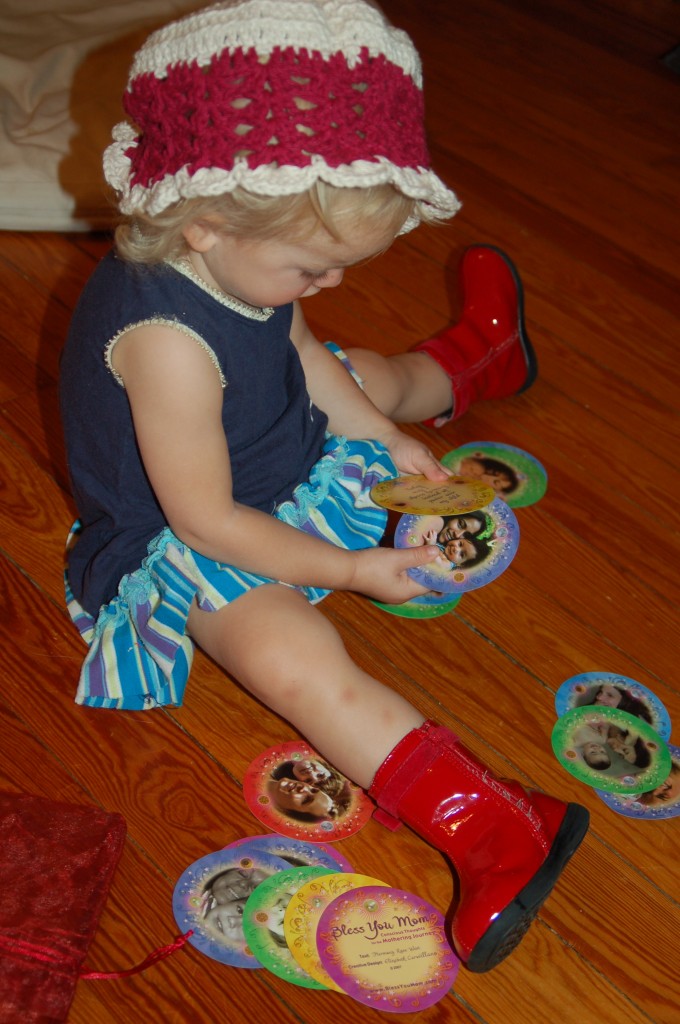
This photo of my youngest daughter sitting on the floor beneath my feet was taken last spring – with her wearing her favorite red boots. It’s funny how children get attached to shoes, right?

When she was doing the same thing Monday morning, nearly a year later (minus the boots), I grabbed my camera and took a fresh photo of her still playing with these cards.

As the mother, I’m still enjoying them as well.

Our deck of cards came from Mothering.com. You can also find them on the Bless you Mom site and on Amazon.

Filed Under: Mothering Tagged With: Bless you Mom, Bless you Mom Conscious Thoughts from the Mothering Journey

posted on April 15, 2012 by Rebecca Simmons

The Great Cloth Diaper Change, around the world

When I was pregnant with my first child in 2004, our birthing teacher introduced a bright colored cloth diaper during our Birthing From Within class. The idea was foreign to me. I had never even changed a baby’s diaper at that point in my life, much less known anyone to use cloth diapers. I wasn’t buying it.

Then I had my second daughter, and I had two children in diapers at the same time. That’s when the cost of buying disposable diapers became something I wanted to avoid. By then I had become a member of the Holistic Moms Network and found support being around other moms who made using cloth diapers look easy, and even stylish.

It is so important for moms to have the support of each other. Which is why I want to help spread the word about The Great Cloth Diaper Change being held this Saturday, April 21. Across 16 countries, in 305 cities, mothers and caregivers will team up as they attempt to break the Guinness World Record for the most cloth diapers changed at one time. The current record was set at last year’s cloth diaper change when 5,026 bums were changed, across 127 locations in five countries.

To find one of these events happening near you, visit The Great Cloth Diaper Exchange site under Find a Location. To participate in our Knoxville event, click here.

The event is part of a weeklong effort called Real Diaper Week. The goal is to bring awareness to cloth diapering and raise funds for the Real Diaper Association, helping more families find and use reusable cloth diapers.

According to this cost breakdown by Mothering.com, it costs $3800 to use Seventh Generation diapers during the total time a child spends before potty training – compared to spending $458 on a recommended cloth diaper stash. This is just one example. Other brands are listed at the link. But the savings can be huge. I enjoyed the added convenience of never running out of diapers or needing to buy disposables at the store.

According to The Great Cloth Diaper Change site, environmentally, cloth diapers reduce waste for families with children in diapers by more than 50 percent. And since solid waste gets flushed down the toilet, there is no poop filled diaper pails, or expensive disposal systems that require their own refill bagging systems. I always hated those things.

Once we started using cloth diapers I really loved the softness and natural fibers being used on my baby. It gives a mama a good feeling.

Just recently my third daughter became potty trained, and we donated our cloth diapers to a friend for her baby. For the first time in seven-and-half-years, we don’t have any babies in diapers.

Even if your babies have outgrown wearing diapers, please help spread the word about this event to other parents who use cloth diapers and those thinking about it but need to be shown how easy it can be. I can’t think of a better place to get advice than from a room full of caregivers changing cloth diapers all at the same time!

Whether you are a veteran cloth user or pregnant and have never even seen a cloth diaper – venture out to  The Great Cloth Diaper Change in your area and learn more about it.

It will be fun and you’ll help make history!

Filed Under: Uncategorized Tagged With: Great Cloth Diaper Change, Great Cloth Diaper Change knoxville, knoxville

posted on April 13, 2012 by Rebecca Simmons

A Simple Moment

A Simple Moment, is a post you’ll start seeing here every Friday.
A photo I want to remember of a simple moment, with a few simple words.

If you are inspired to do the same, leave a link in the comment section for all to see and read. 

Recently downtown on Market Square, my middle girl walked by a man playing his guitar and said, “That’s what I want to do when I grow up. Play my violin on Market Square.”

This week she practiced on the sidewalk just outside our backdoor, hoping people walking by would stop and listen to her.  She’s such a free spirt, this child of mine.

We do our best to nurture that part of her. Parenting is a BIG job.

A Simple Moment was inspired by SouleMama. Visit her site to see many more moments. 

Filed Under: Simple Moments

posted on April 12, 2012 by Rebecca Simmons

10 Day Real Food Challenge Wrap Up, banana muffins and making yogurt

As you probably read, we joined ChildOrganics in her 10 Day Real Food Challenge  based on the 100 Days of Real Food website. The 10 days is up and I want to share a little more about what worked for us in trying to eat by the rules.

During the process, I reached my goal of reaching for fewer boxes of convenience foods at snack time for the kids. And I was inspired to make some simple things at home that cut down on the amount of prepackaged items we buy.

One thing that helped was making muffins. It’s an easy snack to make healthy, sneaking in some oats and flax without much fuss happening on the receiving end. Featured in this post is our favorite banana muffin recipe. It’s versatile, yummy and a crowd pleaser with all the kids who pass through the revolving play date door at our house.


Whole-wheat Banana Muffins

  • 1 3/4 cup whole-wheat flour
  • 1/4 cup oats (optional)
  • 2 tbsp. fresh ground flax seed (optional)
  • 1/4 cup chopped walnuts (optional)
  • 2 1/2 tsp. baking powder
  • 1 tsp. salt
  • 1 egg
  • 1 cup mashed bananas (about 2-3 bananas)
  • 1/2 cup milk
  • 1/3 cup oil
  • 1/3 cup honey
  • Mix dry ingredients together in separate bowl.
  • Put whole bananas in mixer if y0u use a stand up mixer with a paddle, like a KitchenAid. If not just mash them with a fork.
  • Add wet ingredients to mashed bananas.
  • For a tip, add the oil then the honey, using the same measuring cup and the honey will slip right out.
  • Add dry ingredients to the wet, plus nuts if you are using them.
  • Pour in greased muffin pan and bake at 400 degrees for 19-20 minutes for large muffins, and 8-10 minutes for small ones.


Another recipe that helped us out over the Easter weekend was this Agave-Sweetened Chocolate Ice Cream recipe. While agave is still a form of sugar, it was allowed in the rules of the challenge. The ice cream was the most delicious chocolate ice cream we have ever had!

It was perfect for Easter because I was trying to limit the amount of sweets the girls ate after participating in Easter Egg hunts in our neighborhood, and at our church. Offering some yummy ice cream helped lessen the disappointment of me saying no you can’t have another candy.

My children understand why we limit sweets and make healthy choices when eating. But you have to agree, it’s hard on a kid on Easter when none of the other kids are doing a 10 Day Real Food Challenge. I’m sure you get my drift.

Special occasions like holidays and trips to grandparents house are always going to be hard when it comes to striving for a diet with zero processed foods and refined sugar.

For us this was more than just a 10 day challenge. I saw it as inspiration to start cooking more, and rely less on convenience foods. Slowly, I will continue to carve out more time to try more new things. The presentation of these new things can take time for children to adapt.

For instance, I like making yogurt and it’s very easy to do. But it will take some time to find the right method to get my seven-year-old to switch from the store bought brand she prefers, to my version flavored with vanilla extract. In many regards, the 10 Day Real Food Challenge should be presented as an introduction for some families.

It takes time and experimentation to find recipes and methods that create permanent substitutes for prepackaged foods we are used to buying at the store. Making our own yogurt is one small example.


 Making Yogurt

To make yogurt you need yogurt cultures or a starter. You can order yogurt cultures from Dairy Connection. I have also found freeze-dried yogurt starter at our local co-op, but it has a different flavor and consistency that is not our favorite. Now, I just use plain store bought yogurt with live cultures, or my own yogurt.

I use a Salon yogurt maker to put my 6 cup (1500 ml) mason jar of milk in, to keep it warm for the 8 hour incubation period. The Salon maker comes with various plastic parts and instructions to make yogurt. I don’t use any of the parts except the heated base. You can use anything that keeps the milk at 120 degrees for 8 hours. I have a friend who put hers in the window of her hot car in the summer! I’ve seen people use a heating pad inside a cooler. So really, you don’t have to have fancy gadgets to make plain yogurt.

  • Put milk in a mason jar. Whole milk works best.
  • Put a towel in the bottom of a pot, then put water in pot and place jar on the towel. This is so your jar doesn’t sit directly on the heat source and break.
  • Boil the water until the temperature of the milk is 185 degrees, using a candy thermometer to check. I dip my thermometer in the boiling water to sterilize it before I put it in the jar of milk.
  • Once the milk is 185 degrees take the jar out of the pot and sit it on the counter until the milk is 105 degrees.
  • Add 1/8 tsp. of yogurt culture, close jar and shake. Or use 1/4 cup of plain yogurt per one quart of milk.
  • Place jar in warming bowl for 8 hours.
  • Refrigerate until cool and ready to eat.
  • To make the yogurt thicker like Greek yogurt, drain the water out of the yogurt by putting cheesecloth on top of the jar and turn it upside down.
  • To flavor yogurt use maple syrup, honey or jam.


The other thing I managed to do during the 10 day challenge was to get back in the groove of making our own pizza dough. I made some spinach pizza snacks that the kids raved about, as much as the Amy’s version they like out of the box.

We made smoothies almost daily and had success making a new version of microwave popcorn. We ate even more fruit than normal. I think my girls ate 10 pounds of apples last week!

When trying new things, presenting it in a fun way like the Mom’s Restaurant worked well. And I enjoyed making natural homemade dyes for Easter Eggs.

I also started my experimentation process at making homemade macaroni and cheese that gets kid approval, and homemade chicken nuggets. For a 15 year-long vegetarian, the learning curve for cooking meat is steep. When I get that perfected I’ll let you know.

The good news is, Farmer Megan came Wednesday for the first day of our new CSA season. Soon I’ll get the kids back out to the farm for a refresher lesson of where our food comes from. They always try new veggies when they can pick them straight out of the ground. And in my book, the best way to eat veggies is raw.

Soon, we are going to be setting up a real salad bar night, using our wooden play market stand. The idea came from my friend Gabe, who did a version of this at her Wednesday night church group to feed the kids.

But more on all that later….

What is your family’s favorite snack recipe? I’d love to try them! Leave a comment or a link and let us know. 

Filed Under: Real Food Tagged With: 10 day real food challenge, 100 days of real food, banana muffins, homemade yogurt, make your own yogurt, yogurt cultures, yogurt making at home

posted on April 8, 2012 by Rebecca Simmons

Simple tree swing using a rope and an old pool noodle

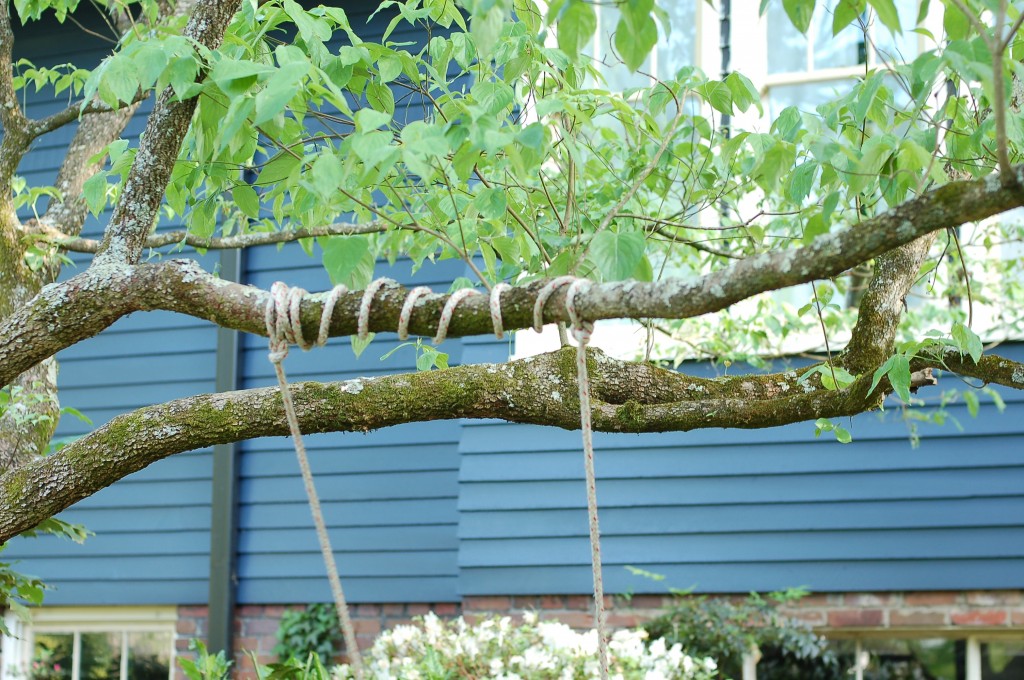
While playing in the backyard on Sunday, the girls had the idea to make a swing with a rope. They found a tree branch, and I lent them a hand. After it was installed they decided some padding on the bum would be nice. So we added the blue noodle for a seat, using a piece of an old pool noodle.

Their idea was inspired by the playground at their Montessori school. Where teachers have hung ropes from play structures and monkey bars, using knots, disks and making simple swings for toddlers that are just inches off the ground.

So basically, this simple backyard fun went like this – Rope, noodle, knots…. and S-W-I-N-G. The fun began.

Filed Under: Family Tagged With: backyard rope swing, rope swing, rope swing with a noodle, simple rope swing

  • « Previous Page
  • 1
  • …
  • 30
  • 31
  • 32
  • 33
  • 34
  • …
  • 47
  • Next Page »

Subscribe


Archives

Copyright © 2025 | Fabricated theme by The Pixelista | Built on the Genesis Framework
[footer_backtotop]