• Home
  • For the Newcomers
  • Iyengar Yoga Classes
  • Contact

posted on October 21, 2013 by Rebecca Simmons

Turning nine, and the girls only skate party

If you’ve been around these parts long, you know I like to throw parties. Even when I try not to go all out for a kid party, I usually do. It’s just fun for me. And I love doing it for my girls. Homemade parties are my favorite.  For eight it was a backyard movie night. For seven it was an American Girl Doll party. Before that there were tea parties, dress up parties, a Madeline theme party, and a two-year-old front porch party with crafts.

But now she is nine. And we are moving on to a new era. Where everything needs to be cool, fashionable, with fun music, and lots of friends. She has learned it’s easier to mix her different groups of friends in a large setting versus and intimate one, where she fears certain groups won’t mesh with others. Girls can be SO complicated when it comes to this. So the past two years we’ve gone big, with over 20 girls at a party.

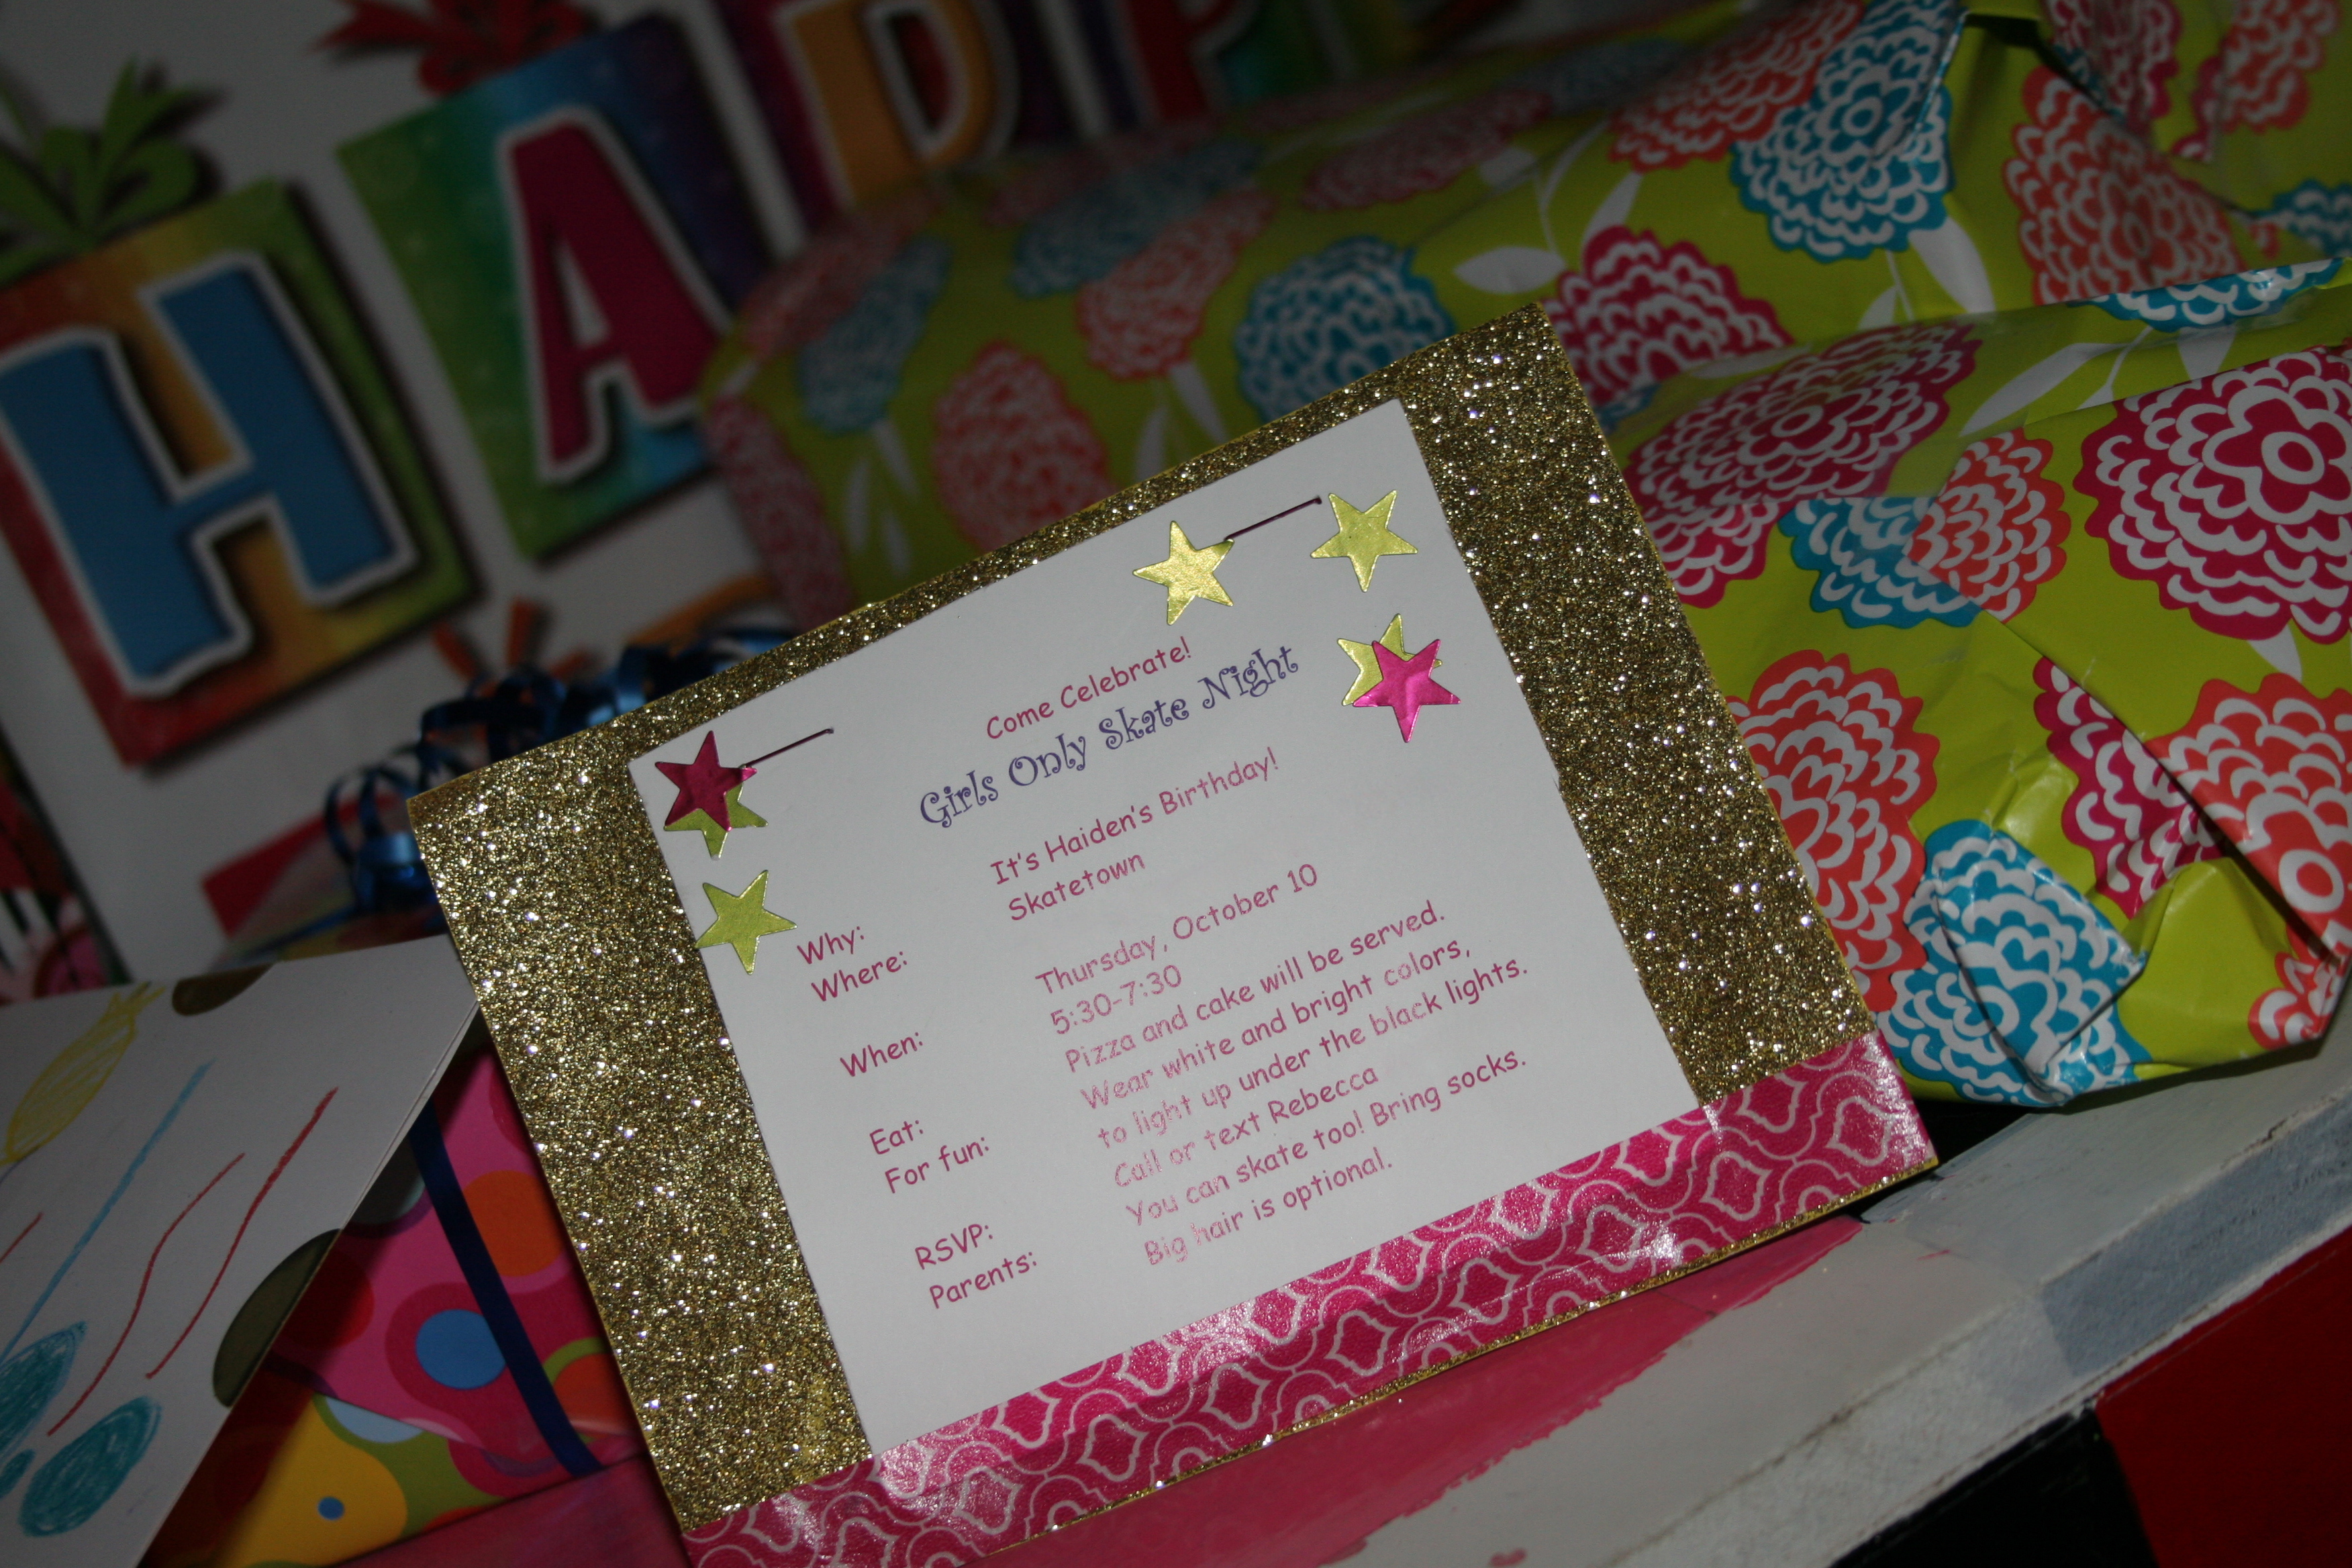
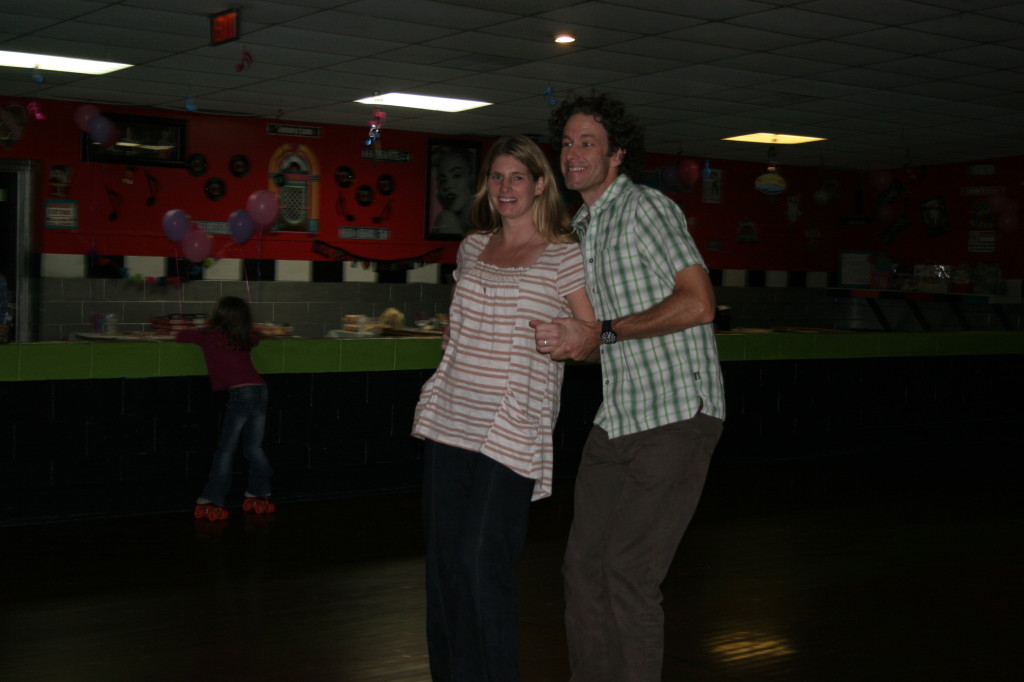
This year it was a Girls Only Skate Night Party. And it was a blast! It was not a homemade party with cute mama made table clothes and hand sewn gift bags. But it was just want my girl wanted.

My youngest girls’  birthday is only seven days apart. Therefore, this year I hosted two birthday parties in three days and decided to cut myself some natural mom slack. It worked out nicely, because my oldest thought it was a special treat to actually shop for party decor.

For the first time we had disposable table clothes, grocery store cupcakes (specially ordered with no food coloring) and party favors ordered from Oriental Trading Company. I was in total survival mode to make it through the busy week with a calm that left time to enjoy the important moments. It was a week I had to make compromises to make it all fit  – and where the important things to my daughter took precedence.

At age nine, that meant:

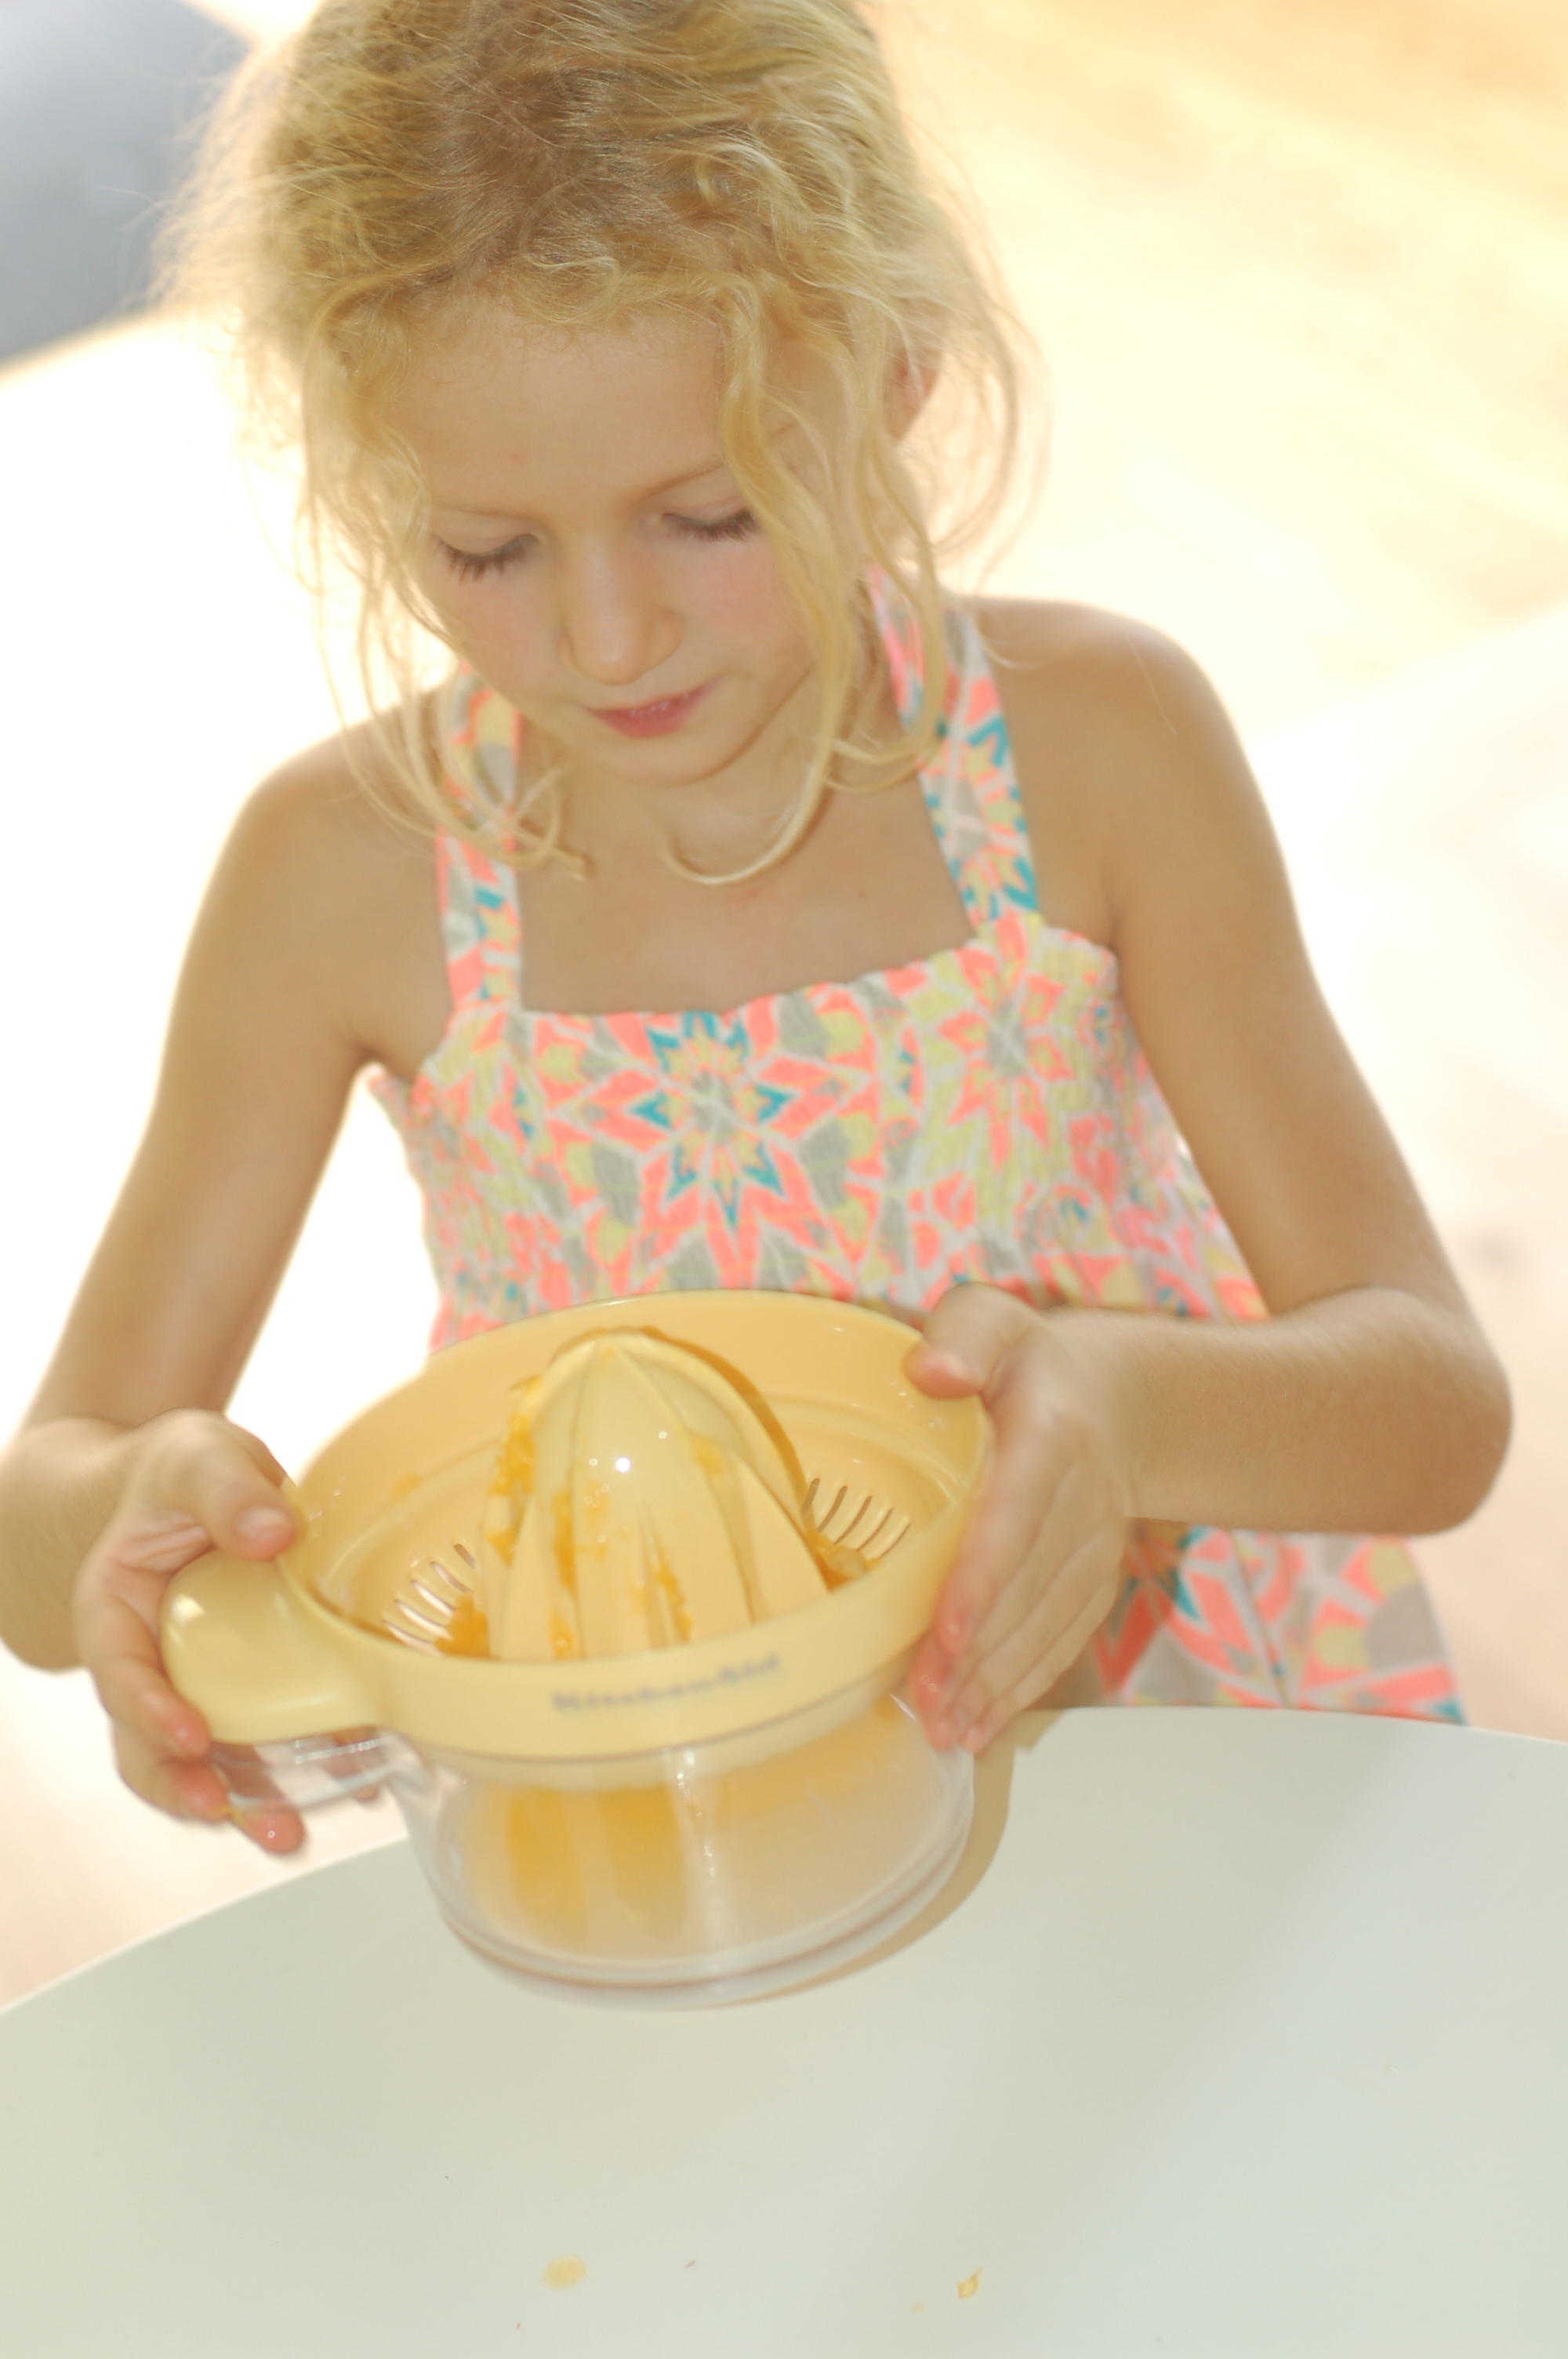
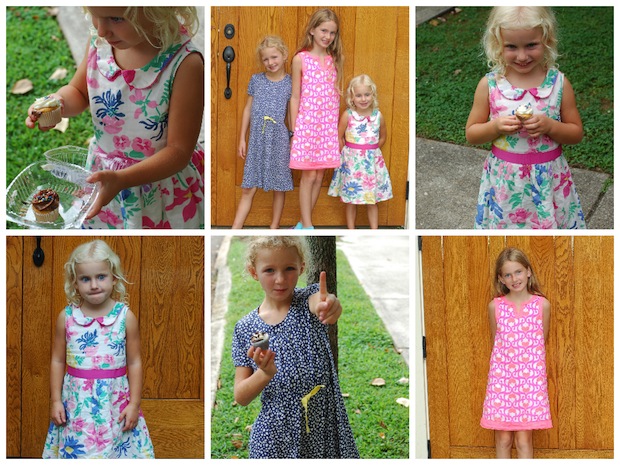
*Patiently standing by while she insisted on making her own three leveled birthday cake, on the day of her birthday. And decorated it – using WAY too much food coloring and an unforeseen amount of sprinkles and sugar. And then me not telling her what I really thought about it. 

*Carefully creating her board of photos to share with her class during her Walk around the Sun, with a coinciding script typed out to avoid anything embarrassing. No more stories about her being born in a bathtub. 

*Getting a new pair of roller skates with bright pink wheels, that she opened on her real birthday. Thanks grandma and grand dad.

*Taking time to create the perfect playlist for the party, which we downloaded new music for and put on a Ipod for the DJ to play at the skate rink. She banned me from playing Celebrate, Madonna or Michael Jackson. Booooo.

*Shopping for the right cake plates and dance party looking decor, with balloons (something we rarely have at parities). Goodbye enviorment.

*Planning the right outfit to glow under the disco lights. Thankfully we had one. 

*Having plenty of glow in the dark paraphernalia to pass out to friends at the party. Which was really fun for me to skate around handing out glow necklaces. 

*Picking up two best friends from school and having them along for the day of the party. And me thankful for her sweet school friends she has known since age 2.

Yes this nine business is a new era. But I think I’m going to like it! 

She still appreciates the homemade touches of mom. But for her party, she wanted it her style. And I respected that.

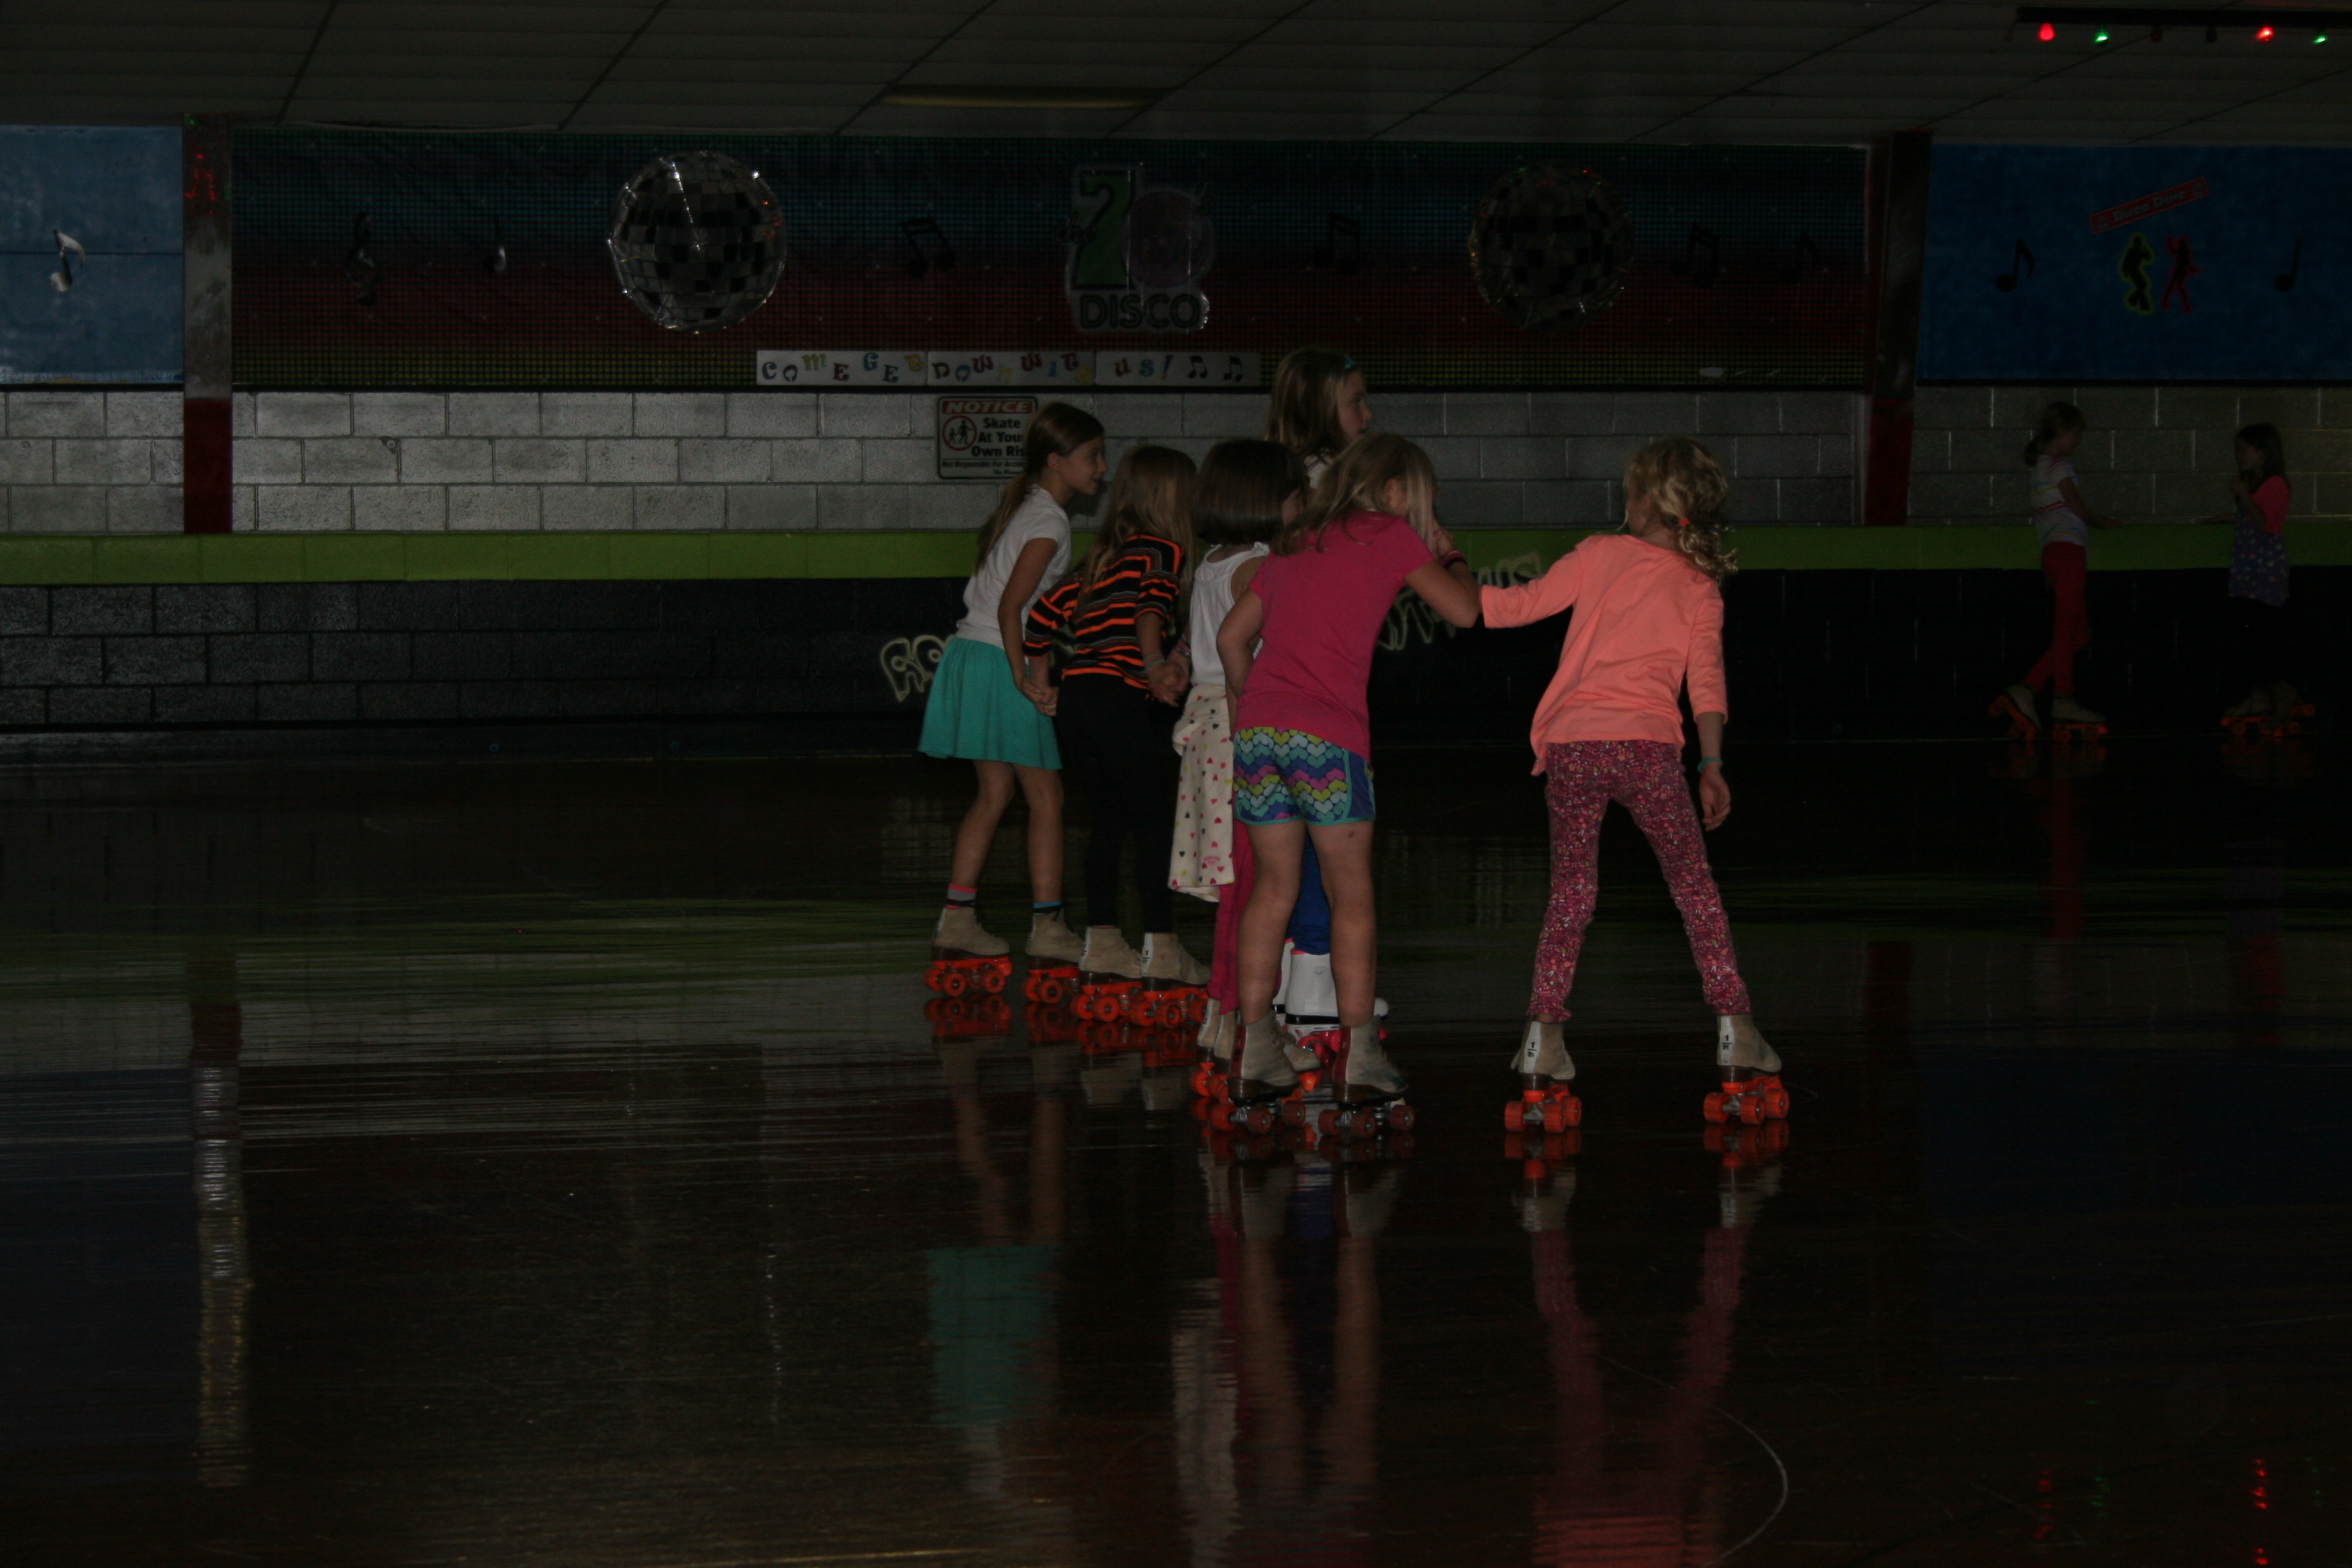
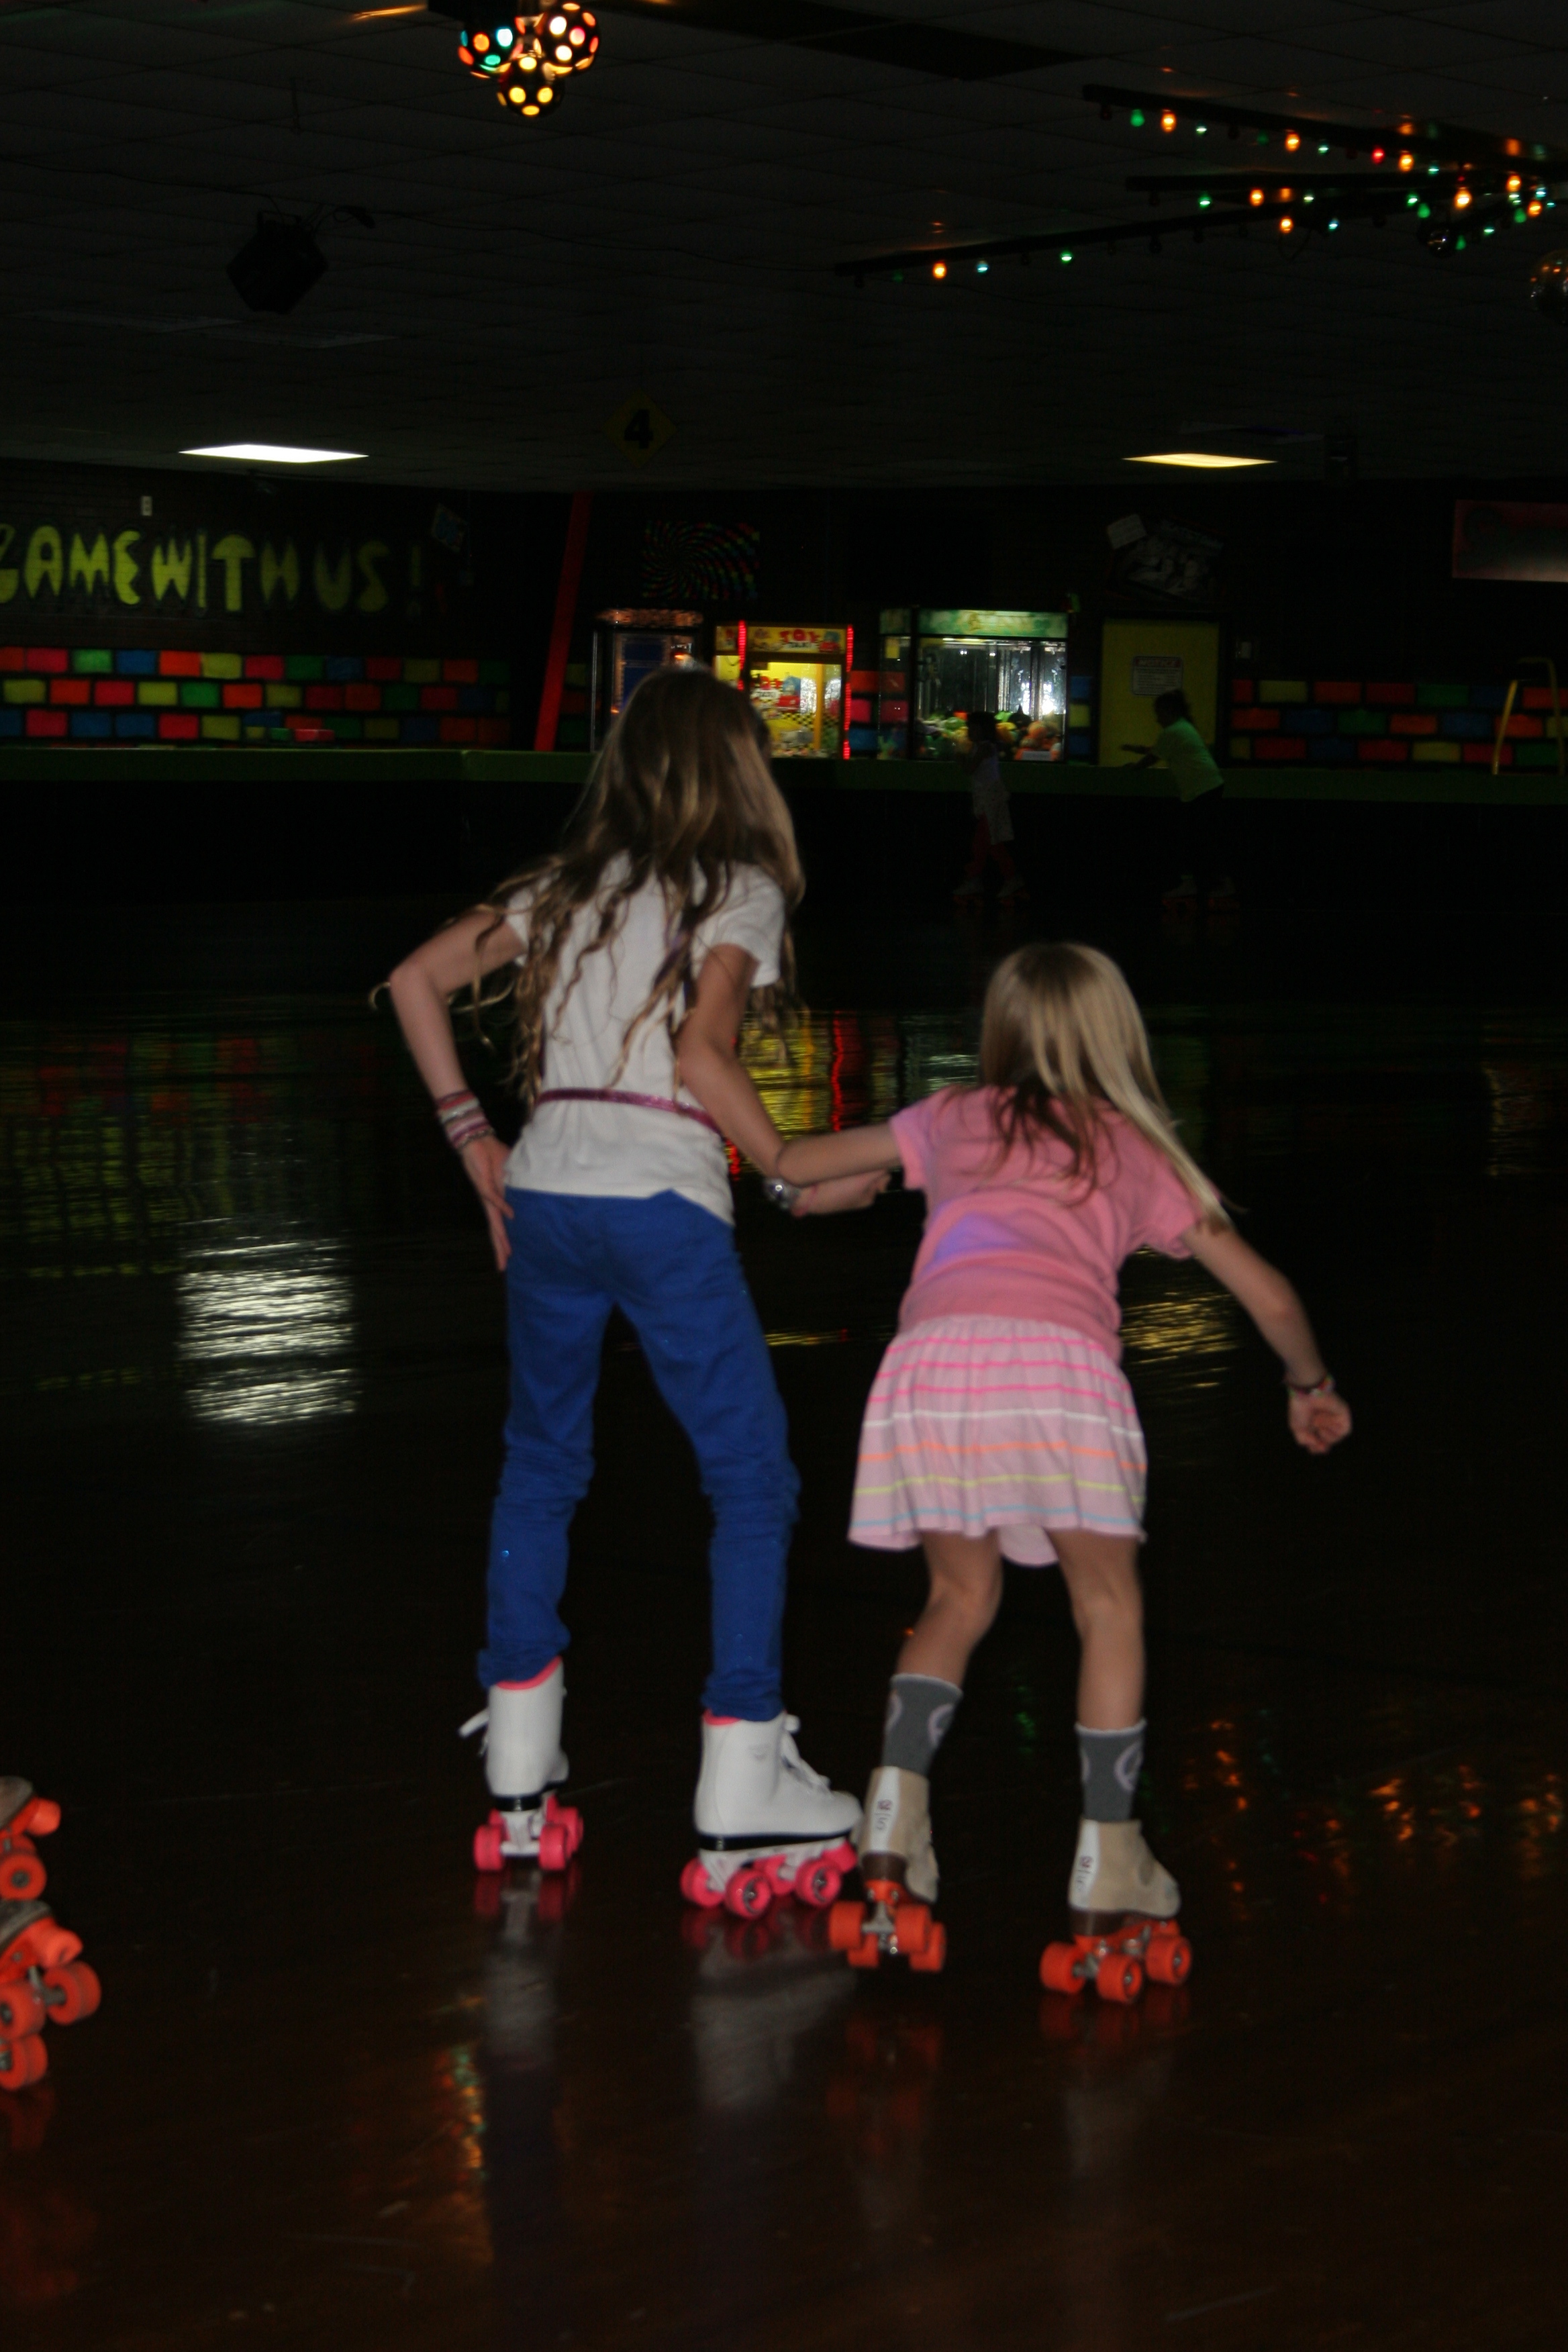
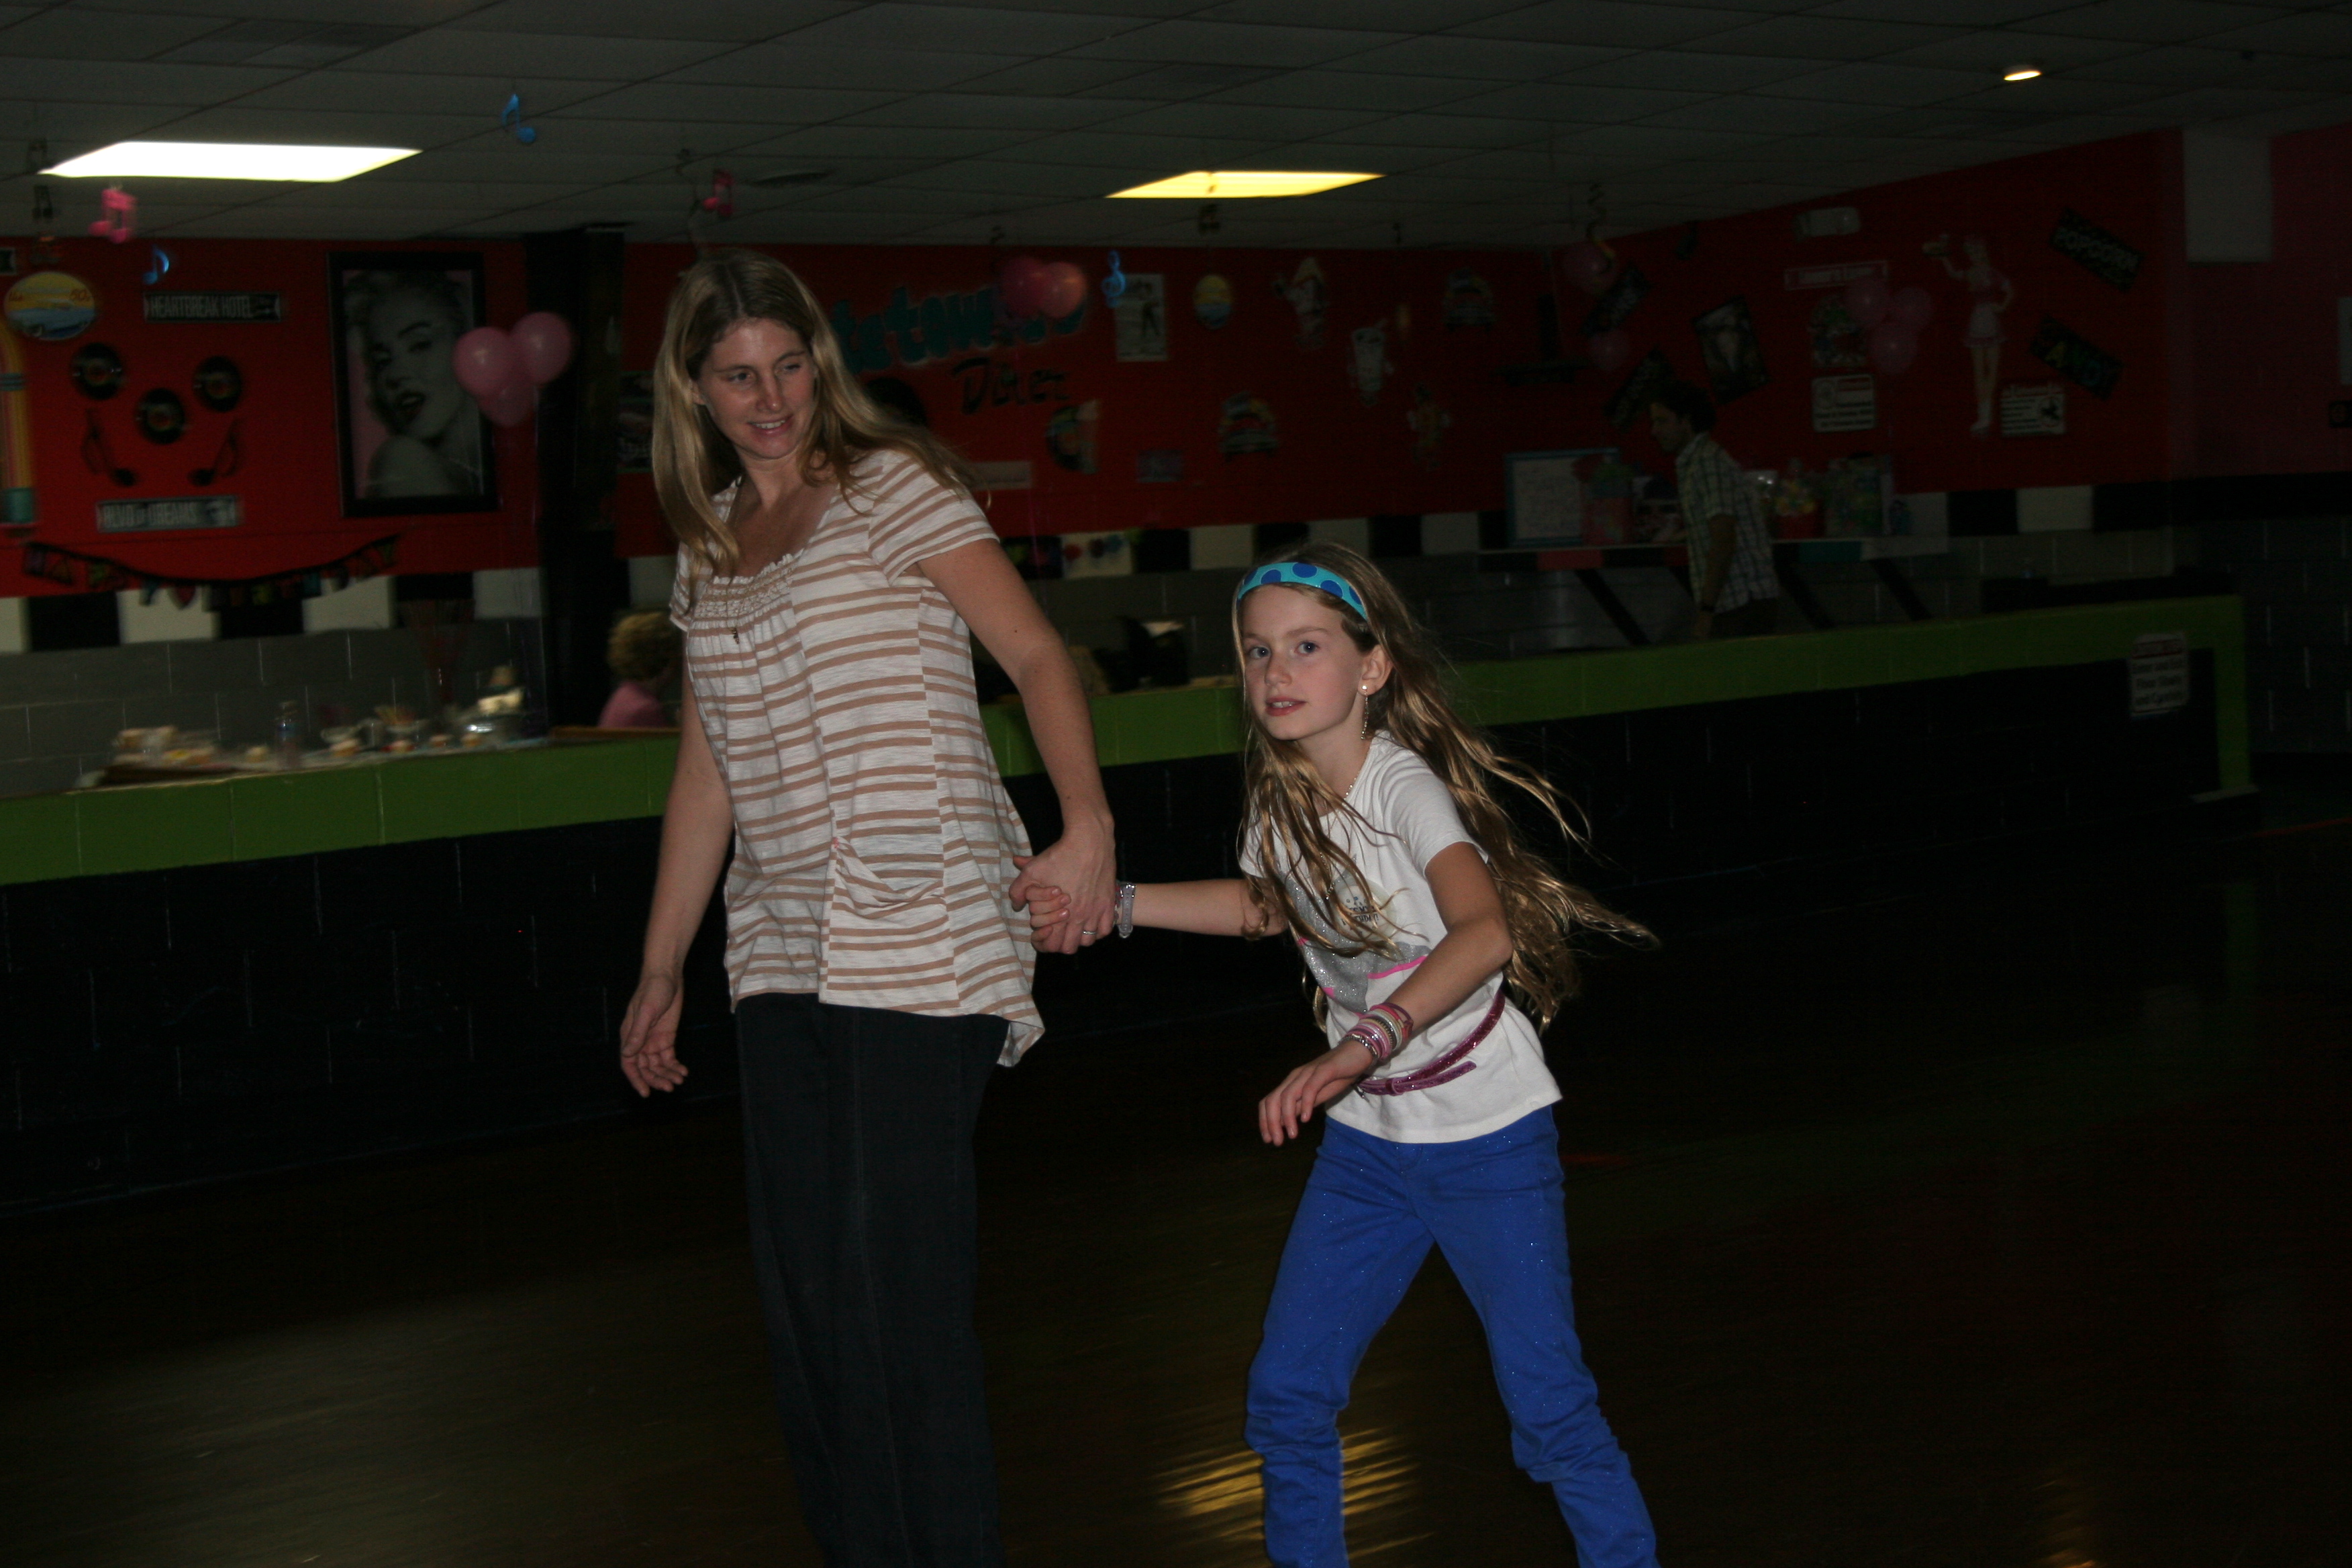
The parents had fun skating too. Even though it was to One Direction instead of Celebrate. I had a friend take the photos. And I was having so much fun I didn’t take any photos myself, of the decor, the tables, the fun set up of glow in the dark necklaces, bracelets, glow glasses or the cup cakes – nothing. I was totally having fun in the moment, watching my sweet nine-year old, and reliving my own skate night days with my mom friends.

When the DJ called everyone over to the tables for cupcakes I had to race the girls over there and frantically serve them  while I was on my skates. I was like a roller skating waitress and the kids got a kick out it. The girls barely wanted to stop skating to eat a cup cake. I couldn’t find the candle, and by the time I realized it, the girls had gobbled down the cup cakes and we missed the chance to sing Happy Birthday. We did a quick impromptu version and everyone was happily back to skating. It was a fast two hours, that moved at the speed of nine-year-olds having a great time. Actually, it was a whirlwind. It was not one of my slow-style homemade party where all the guests are greeted, thanked for coming and properly shown their way to the door in the end. But it was her party – and she thought it was perfect.

To make sure all these novice skaters had a good time, it was key that we rented out the whole skate rink for the party. It was, in comparison to some birthday facilities, a very good deal. We brought in all our own food. And it included up to 100 skaters, so siblings and parents were all welcome to join in. If you are looking for a large place to hold a lot of kids, I highly recommend a roller skating party. I’d also advise renting the entire rink out because it means you control the music. And well let’s face it – the roller skating crowd today is not the same as it was when were kids having Girl Scout lock-ins at our rink in the heart of suburbia. It’s best to have the place to yourself.

All the girls had fun, and one friend told her it was her best party she had ever had. I had a mom tell me it was one of the most fun kid parties she had been to in a long time. And even the girls who had never been on skates quickly got the hang of it.

IMG_5517IMG_5559IMG_5548IMG_5502IMG_5563IMG_5567

Filed Under: Birthdays, Family Tagged With: roller skating rink birthday party

posted on September 22, 2013 by Rebecca Simmons

Welcome fall, a season for gathering

I love the chill in the air. The russeling of the leaves. Pumpkins – oh my! Fall is here. And I’m ready to embrace it. It means gatherings. Birthdays – 2 of them in one week! This season is going to be a good one. I just know it.

This weekend I hosted a reuninon of beautiful mamas, that was a throw back to old times. Seven years ago a couple of women formed a local Holistic Moms Chapter where we had meetings with slews of babies running about. Those babies have grown now, our schedules have changed, and the need to fill our days with play dates are gone. So we had a party and created a new reason to unite.

It was so good to see those confident, fun-loving natural mamas who were there with me in the beginning days of our organic mama journeys. We shared ideas, passions, cloth diaper secrets, farm fresh egg co-ops, taught each other how to make yogurt, and conversed over everything from circumcision to vacinations.  Some are expereinced homeschooling moms now, running farms, working as lactation consultants, birthing babies (not their own anymore), working at our local wellness center and salt room,  and so much more. I feel SO blessed to know those women!

The gathering inspired me to do some fall decorating and embrace the season of togetherness that is coming upon us.

IMG_1804IMG_1826

I also got out a few old favorite things, photos and such. Hanging bits of joy around our home. Adding in the details that have been missing since we finished home renovations in the spring and I ran out of steam for these things. Unfortunately my camera is on the fritz and the iPhone is not filling the void well enough. So the photos are not the best. Sorry.

IMG_1842IMG_1846IMG_1849

A cozy reading spot was much needed here. The love seat had been living in the basement – this old thing from our early married days. It now has a reused purpose with some new pillows. Once we get past the days of kids spilling/wiping/jumping on the furniture, we’ll invest in new upolstered pieces. But for now, it’s reuse and reinvent. It works.

IMG_1850DSC_0146

Fall also means football, of course. This weekend my husband took the girls to a Georgia Tech game. And I had kid-free weekend. Yes he is a wonderful man, this Ramblin’ Wreck . And a brave dad to take three girls to football game!

IMG_0784

The girls are ready for fall. Last weekend they started raking whatever leaves they could find in an attempt to make a leaf pile, and jump in it. We were talking about a beach trip this fall and my middle girl said, “I love fall. I love jumping in the leaves, and the pumpkin patch. I don’t need the beach!” Here, here my girl. I still love the beach. But this scene in my front yard is lovely too.

DSC_0140

Now I’m going to get outside for a walk in the fall breeze, then make some butternut squash soup to welcome my family back home. Together.

Filed Under: Family

posted on September 11, 2013 by Rebecca Simmons

Simple after school days and no homework

I’m so thankful my girls do not get homework. At least not often. At their school children choose to bring work home if they need to get caught up or want to get ahead. They have weekly work plans. The children know what is expected of them all week, and they learn to manage their time at school to get everything accomplished. So when all goes well, there is no homework.

Which means our afternoons can be pretty simple. The routine is come home, put bags away, put lunches in sink and play. Just play! Go outside, read a book, call a neighborhood friend over, play a game with your sister. Simple play. I love that. And I truly believe that’s what childhood is all about.

Here’s a few snapshots of a simple afternoon, when there is no after school activities and NO HOMEWORK for my first and third grader. I’m so thankful of that!

On this day we started with picking a watermelon from our little garden and ate snack outside.

Then my youngest girl came to me and said, “MOM, I have THE BEST idea ever! Lets MAKE orange juice!” As if it had never been done before.  My middle girl joined in, served us OJ and then they “mopped the floor.” It did help with the sticky mess. But as you can see by the last photo what I mean by “mop.”

DSC_0100 DSC_0109 DSC_0127 DSC_0129 DSC_0130 DSC_0137

Then came the matching game, followed by a few puzzles and Operation.

DSC_0138

My oldest girl really needs down time after school, to unwind from the day’s happenings. She is wonderful at entertaining herself, reading books, or playing in her room with Legos. And playing with the simplest of things (even if she doesn’t like having her picture taken theses days).

DSC_0111

I could rant on about why I don’t think kids need homework. But I’ll just sum it up with this…..

Recently this article  ran in our local paper about heavy backpacks causing injuries in young children. I found this news absolutely absurd. If schools can’t teach what they need to teach between 8:00 -3:00, there is a problem with the system.  Ironically right next to that story, was an education column titled School never actually stops, written by a parent whose children attend the same Montessori school as mine. Karyn Adam’s article does a fabulous job of explaining how life learning, beyond the hours of school and summer break, creates students who really love to learn.

The homework battle I hear about from so many parents is SO unnecessary. I think local writer Katie Allison Granju nailed that point over on Babble last month, in a piece called Homework: It’s What’s For Dinner.

Homework should not be for dinner. And the loom and doom of it should not dominate the precious after school time we have between 3:30 and bedtime. I’m a firm believer of that. Simple play is always the answer for a happy child. And sisters playing peaceful together while one girl reads a book day – always solidifies this belief for me.

I’m not saying all afternoons are perfect like this. Because they are not. And even on these peaceful days, there is a peppering of jabs, whines, and sister rivalry. But still, these simple after school days fill my heart with enough goodness to know we are doing the right thing. And in this tricky business of parenting, these moments are a beautiful thing.

Filed Under: Family, Montessori, Mothering

posted on August 29, 2013 by Rebecca Simmons

Back to the school routine

School has been back for nearly three weeks and I we have finally settled back into a routine. Where we come and go. And the cat waits for us to return.

All my appointments I put off doing this summer with kids – dentists, hair, vet check ups – are done. And we have already had one case of Strep Throat. So yes, it’s back to the school routine here.

It’s back to packing school lunches. Which I really despise. We try to do it the night before because it makes the mornings smoother when we do. But sometimes after the dinner cooking and cleaning, one more thing is just too much.

Sometimes the girls help. My youngest helps in a way that she says, “I’ll do it myself.” Because that is how she is. My oldest packs her lunch entirely on her own now. She’s shying from the camera these days. But my little one is always up for showing off her independence.

DSC_0051

The first day of school photos didn’t happen here. I took them. But then I learned I forgot to put the memory card back in the camera. I tried to recapture them after the first day of school. But I mostly got grumpy, fake smiles in winked dresses. Until I told them I had first day of school celebration cupcakes.  My oldest is in 3rd grade this year. The middle girl is in 1st grade and the little one is in 3 year-old pre-k.

Even after a first, long day back to school, they are still wonderfully mine in all their cuteness and grumpiness.

Fotor08299335

Part of getting back to the routine is getting back to dinners all together on a timely schedule. Some nights the girls choose to help. They prefer the prep work like breading eggplant and cutting vegetables.

IMG_1615

When they discover things are fun they are more willing to help. They really, thought doing the dishes one night was FUN. And I’m trying to build extra time into our routines for little hands to help. It’s always faster when I do it myself. But they are so proud when they do a good job at something. And I love that.

DSC_0015

She loved doing the dishes so much she wouldn’t stop to go potty. Incase you noticed.

In the mornings my oldest helps the youngest get dressed sometimes. They love doing things together. This morning my middle girl was home sick. These two went upstairs to get dressed together and came down like this.

DSC_0099

It’s not a back to school photo. But it’s pretty darn cute. And it won my oldest  girl’s approval to post here. As these girls grow, I really love the age gap between them. They have an amazing bond and relationship. They barely ever fight. My middle girl has her special place with them both too, but days like this really make me wish their was a fourth pair of feet around here.

When the youngest gets herself dressed it looks more liked this.

IMG_1619

She wore this “church dress” to church Sunday.  It had been in her closet all summer – a hand me down that was my oldest wore to my middle girl’s baptism. The youngest never wanted to wear it. Until she decided on Sunday that she LOVED it.

On Monday I told her we don’t wear “church dresses” to school. To get muddy, paint on it and and romp in the sand box. She said, “oh man!” Tuesday my husband had the same thing happen, talking her out of choosing it again. On Wednesday I told the girls to go get dressed, after breakfast. She RAN upstairs saying she was going “to do it all by myself today.” She got her biggest sister to button the back and help her with her ponytail. She came downstairs and declared, “I’m dressed!”

There was no way I was saying no to that. But you need bike shorts under it I said. For  when you hang upside down from the monkey bars. “Fiinnnne,” she said and hughed up stairs. She returned wearing a skirt (with build in bike shorts) under her dress then proceeded to put on tie-die socks and red shoes.

And off to school she went. Because that’s how we roll.

To see other how another one of my favorite blogger rolls – check out this back to school post from Memories on Clover Lane. It is one of my favorite posts ever – so honest, funny and real. 

Filed Under: Montessori, Mothering

posted on August 10, 2013 by Rebecca Simmons

Saying goodbye to summer

Some of our last days of summer were spent at the beach. I just could not let summer go by without some sand in my toes. In spite of my husband being too busy to take off for a traditional beach trip, I decided I wasn’t was too busy. And I booked a trip I thought I could handle solo with just the girls. In the end, it worked out where he joined us for half of our short four day trip.

It was fun. Too short. And the girls really missed the pristine beaches of the Florida gulf, where we usually go. But I proved that YES I could totally do a trip with just me and the girls. However, the girls really prefer having us all together – daddy included. Which I think is really sweet.

He is, BTW, the fun one who brings the surf board. 

DSC_0283 DSC_0196

I realized I’m the one perfectly happy sitting in the beach chair watching the little ones play with purple dump trucks in the sand. Loving their little bouncy ponytails and happy feet in the waves.

DSC_0224 DSC_0259DSC_0191

I love the next picture because it shows these sisters really DO love each other. Before summer the older two were acting very sassy towards each other. And it reminds me summer has magical powers of bonding families back together. I love that!

They are going to be in the same class next year. And I really hope them being together, will continue the bond they recreated this summer. At least until fall break. When I can force them to spend another week together.

DSC_0073

I love that summer gives a child full-on freedom to discover, explore and stretch their imaginary minds with no boundaries or strict schedules to follow. I will miss lazy mornings that are a result of later bedtimes.

While at the beach my pre-school girl became a super fish. It was after dark, during a night swim, when she really found her fins.

She’s loved the water all summer, and for all the winter months she was taking swim lessons. But during this trip she really got it. She went from fearlessly dog paddling around the pool looking like she might drown any second. To full on swimming under water from – I kid you not – one end of the pool to the other in 4 feet water.

There was one night where her and her big sister stayed in the pool till 9:30. Until the little one finally declared, “lets go to bed now.”DSC_0135

Goodbye summer. I will miss sharing my late nights and lazy coffee mornings with these bright eyed girls, giving me a million kisses a day. And an endless supply of laughs with all their silly ways.

DSC_0085

DSC_0047

I’ll try and remember these bright summer smiles come school mornings at 7:50 when I’m trying not to sound like a drill sergeant getting everyone out the door on time. Sigh. I will miss you summer.

Filed Under: Mothering, Summer, Travel

posted on August 2, 2013 by Rebecca Simmons

No back to school hoopla here. We’ll just jump in.

We don’t like that school starts in 10 days. Not one bit. We did the essential pencil box buying and eraser purchases today. With a much bigger shopping list on hand for the beach.  We’ll be making the most out of our last 10 days. And I’ll embark on my first ever solo trip to the beach with the girls. Husband has to work. But that’s not stopping us girls from enjoying every last minute of summer.

Usually by now I’m ready for school to start, to get back to a routine, and get the girls out of the house. But not this year. We’ve had great summer. At first I was worried, that with them getting older they would get bored. The oldest would want to do things the youngest can’t do…and so on. But they proved they love being home, playing with friends, with neighbors, with mom. With simple things like cardboard boxes and forts in the living room. Sleepovers included.

They went to zero camps because they I could not convince them to go – anywhere. Except the pool and out for lunch or to pick up a new game or outdoor toy.

But it’s coming. The end of summer. And there is hardly any back to school hoopla happening here. Backpacks are issued by the school. My youngest girl’s teachers are just asking for gift cards to get the things they need – LOVE THAT. Eassssssssssssssyyyyy. And the same lunch lunch systems will apply this year. Reusing all the same stuff.

Including the same Plastic free lunch packing containers and systems. And the same Ideas for avoiding plastic cups, from babies to adults. Both posts are receiving a record number of hits during these back to school days. YEAH. And incase you are new around here and looking for lunch ideas, there is more. Like Waste free lunches, made easy and fun from two years ago. And A week of simple, fresh food lunches for school from last year.

Then there was the post about getting the girls to pack their own lunches. So there is not much more more I can say about packing school lunches.

So we are off to the beach. I’m skipping parent meetings and info sessions. It’s our 7th year at that school. So I don’t feel like a bad parent one bit. We know the drill. And so do our kids.

I’m off to enjoy the last 10 days of summer…. And then, just as fast as summer passed. We’ll jump right back into school.

IMG_1373

Filed Under: Mothering

posted on August 2, 2013 by Rebecca Simmons

Banners

Banners brighten up everything. And there is no need to have a party to have one. Even though having a party last week  DID inspire me to stay up  until 3 am one night sewing/making three banners. I can not explain it. There was a part of me that needed to create. So I did.

Since the party they have found homes in my house. Hanging on doorways, indoor windows adding a boost of happiness in my laundry room.

Incase you didn’t catch them in the last few posts. Here’s a little more detail on them.

DSC_0392

The first was made with vintage burlap coffee sacks, cut in strips and hand sewn on a piece of twine using the end of an awl  – a sewing notion that is a metal stick with a round end for poking out the inside corners of things sewn inside out, and an end like a large needle for threading elastic through waists. I tried a large blunt needle that I use to teach my girls to sew but it didn’t work as smoothly as the awl.

After I sewed all the burlap pieces I laid it on a table and tied the other pieces of fabric around the twine. SO easy.

DSC_0339

I had been waiting for several weeks to share our new Mud Pie Sink, until I made the proper banner to finish off the fun.

To make this one I first cut the blue fabric in long enough strips to sew the tops over, to thread the twine through the tops. There is two layers, contrasting on the back and front, which are sewn together. I did not do the rest in the order that would have been suggested by the fabric crayon manufactures. Because next I used heat’n’bond to iron on the white fabric. Then sewed a zig-zag stitch around the white edges. The last thing I did was used fabric crayons to write out the letters. Risky I know – no margin for error at that point! But I had planned to use fabric paint and I didn’t have time for it to dry before I sewed it all together. Then I found the crayons in my stash and I liked them better. The green strips were leftover from another project. I hope that made sense. 

DSC_0369

This banner turned out to be my favorite. It is yarn, about 1/2 yard of fabric (two different types) cut into strips – long enough to tie and still be long on both sides – leftover lace given to us and ribbons from my scrap bin. It was all tied on. No sewing required.

Filed Under: Handmade Tagged With: banners, letter banners, no sew banners, scrap fabric banners, tie on banners

posted on August 1, 2013 by Rebecca Simmons

Mud pie sink and wash station

When we renovated our kitchen last year I had a vision for the old cast iron sink with the washboard. When the contractors asked where I wanted them to put it (meaning the trash or the curb) – I said “Put in the garage. I have a plan for it.”

I wasn’t sure how or when, or if, I would ever see it come to life again. But recently, with a little handy work from my dad and my sweet husband’s willing to help configure hoses and pieces and parts – they worked magic.

We now have a running water sink in our backyard that uses water from the spigot. I can’t tell you exactly how it happened. The splicing and splitting of water hoses and diverters is beyond me. And it will be different for everyone who tries this depending on your sink and your backyard spigot. But it was not expensive. It just took a little trial and error. And only two trips to Home Depot.

Our system is not perfect yet, and we do have some water causing pressure and spewing in places of hoses that is not ideal. But it can all be turned off when kids are not playing it. Which is the important part, to save water.

And either way they love it. It makes me smile as well. It is a great extension of our Mud Pie Cafe.

DSC_0339

Filed Under: Family Tagged With: backyard play sink, mud pie sink, turn an old sink into an outdoor sink

posted on August 1, 2013 by Rebecca Simmons

Picnic Table Art – such a fun kid art project!

During my savor-the-little-girl-times around here this summer, I was in search of a small picnic table for the yard. For the little people to sit at. Yes we have a big picnic table that works just fine, especially to hold the masses. But since the little people are dwindling (getting bigger)  around here, I really want to keep all the little people furniture around as long as possible.  Because YES, they grow too darn fast.

So I bought this cute table at a local ACE hardware store and stuck in the yard. It was not my idea to graffiti it, and paint it and leave such a cool mark on it. It was totally the kids idea! And once the first pictures were drawn, without my knowledge of it happening, I embrased the idea. It was their table. Let them make it their own.

The drawings continued, with other kids from other visiting families making their mark too.

Then one sunny afternoon, it seemed it had been too long since I let the girls paint all over something, and themselves! Using kid’s non-toxic paint, came the next step of the Picnic Art Table – paint.

We LOVE the book I Ain’t Gonna Paint No More! So I went in to that painting session knowing my pre-school girl would get naked and paint not only the table but her whole self too. And she did. Even down to the part of her body where in the book they run out of paint. Not here. Her butt was blue. And I was so glad I still have a little one willing to do such silly things with me. So this table will be forever special to me.

DSC_0318DSC_0320DSC_0308

This is what the painting process started out like. And the rest of my photos are censored for me only. With a naked little girl covered in paint from head to toe.

IMG_0880

But I will add, a baby pool full of soap outside is ONE fun way of getting clean. Even with a blue butt.

NOTE – To preserve the table and the artwork, I covered it with three coats of water based (non yellowing) polyurethane. And must to keep the art from washing away in the rain and sun.

Filed Under: Handmade, Summer Tagged With: kids picnic table, paint a picnic table with kids, Picnic table art

posted on July 30, 2013 by Rebecca Simmons

DIY comforter featuring Kaffe Fassett fabrics

Coming from a self-taught sewer who still relies on you-tube to sew a zipper – this comforter/slash sort of quilt is totally doable for beginning sewers. It takes some patience knowing you have to work in steps when time allows, determination to finish, attention to detail yet attitude that forgives imprefecions. And a good sewing machine, big enough to fit the whole quilt through it. But it can totally be a DIY project.

And the best part is the completely one-of-a-kind outcome.

I sewed two comforters for the girls shared room about three years ago, with 20 18″x18″ squares, which are now on the beds in the room my middle and youngest girls now share. To make those, I had an inspiration and a little advice and encouragement from a friend with a lot of sewing experience. It was enough of a success that this time, I was up to the challenge of putting together 80 9″x9″ inch squares.

My oldest daughter choose all the fabrics, from our locally owned fabric store. A year ago. That’s how long it’s been sitting my project bin. Quite a lesson on patience for her I must say, and resisting the urge to just go buy something new. But this special girl values something homemade by her mom. She knew it would be worth the wait. And when she finally started complaining about the given-to-us Laura Ashley fairy comforter on her bed that has been passed about the sisters the last seven years – I knew I couldn’t make her wait much longer.

That day at the fabric store her eye was driven to the Kaffe Fassett collection. And she chose 10 different fabrics, with no rhyme or reason. She just liked them. That’s the beauty of Kaffe Fassett. You can do that. And it works!

I have to say I had my doubts when I was laying it all out, with all those different colors going different ways. But I trusted her. She has a good eye for design. And I wanted her to love it. So it didn’t matter that questioned the colors and patterns. It’s what she wanted.

While she was away at her grandparent’s house last week I finally finished it for her.

DSC_0003

The pink and purple curtains are also Kaffe Fassett fabrics. The curtians finally replaced the tie-dye sheet hanging in the window. Which was also a surprise waiting for her when she came home. And now a year after the room was renovated with the upstairs of the house, her room is finally complete.

The throw pillow cover was made using the scraps cut from the 9″x9″ squares. DSC_0414

I made three smaller coordinating throw pillows for the sofa in her room. The backing fabric is the same as the purple curtains. The throw pillows all have zippers on the bottom to insert the pillow filling. I sewed the scrap strips together because I didn’t want them to go waste. It was a total DIY idea. I watched a zipper tutorial for throw pillows on YouTube and viola. Done. They are not perfect but they are already well loved.

DSC_0420DSC_0423

Here’s the back of one, showing the contrast. DSC_0421


Steps for sewing the 80 square comforter. 

1) Pick 10 fabrics, each 1/2 yard long. Do not pre-wash your fabric! So it will have more of puckered quilt look in the end. Use a cutting board with wheel blade to cut each piece into 8, 9″x9″ squares. I folded the fabric and cut all 8 squares from one fabric at one time.

DSC_0192 IMG_1244

2) Lay them all out in a random design then move the squares around to your liking. Take a photo incase they get unorganized, or in my case the dog gets let in and runs through the living room. I put the photo on my computer and it was very helpful to look at, especially if you don’t have time to sew them all together in one siting.

3) Sew each horizontal row together, one square at time. And then sew the rows together (which I did on a different day). Be very mindful when you do the rows, matching up the corners of each squares.  And then forgive yourself if it’s not absolutely perfect because in the end you won’t notice the tiny imperfections.

In a way, embracing those imperfections is a lesson of life. When I accidentally cut one set of squares to be 8″x9″ and had to sew the inch back on each square, my daughter was disappointed (so was I). But I said sometimes we make mistakes, we make the best of it and move on. So it’s not perfect. And neither are we. For my perfectionist daughter, that is a lesson we point out whenever we can.IMG_1302

4) Sew the quilt top to a twin size piece of natural fiber batting. Which comes 72″ by 90″ and can be purchased at JoAnn’s. I sewed mine inside out but you don’t have to. Cut the excess batting that is a result of the 1/4 inch seam allowances from the squares.

5) Sew the backing together for the quilt. I used 5 yards of fabric, cut into 2 halves at 7.5 feet each. Leave one strip whole. Cut one of the 7.5 feet strips in half width wise, and sew each half to the either side of the one whole strip – making the back wide enough for the quilt.

6)Lay out back on the a large open floor space with quilt top/batting on top. Cut the excess from edges and fold over to make edges of quilt. Pin them all around. Also put one pin in the center of every square to hold it all in place.
DSC_0249

DSC_0250


7) Sew all the edges with a straight stitch, all the way around.

IMG_1383

8) Run the whole quilt through the sewing machine at every diagonal angle, so that every square has four triangles of stitching, totally 32 seams throughout the entire comforter. This give the comforter the pucker quilt look when it is finished, and hold it all in place.

IMG_1384

9) Wash and dry on regular settings, in cold water and low heat to achieve the final pucker quilt look. And surprise your child by what you can do!

Filed Under: Handmade Tagged With: easy to sew comforter, easy to sew quilt, homemade quilt for girls room, kaffe fassett quilt, sew a girls comforter

  • « Previous Page
  • 1
  • …
  • 12
  • 13
  • 14
  • 15
  • 16
  • …
  • 47
  • Next Page »

Subscribe


Archives

Copyright © 2025 | Fabricated theme by The Pixelista | Built on the Genesis Framework
[footer_backtotop]